Cozy Knitted Mittens
Posted: November 22, 2024 Filed under: cricut, Echidna Studios, mittens, my designs | Tags: cricut, Echidna Studios, Penny Black stamps 1 Comment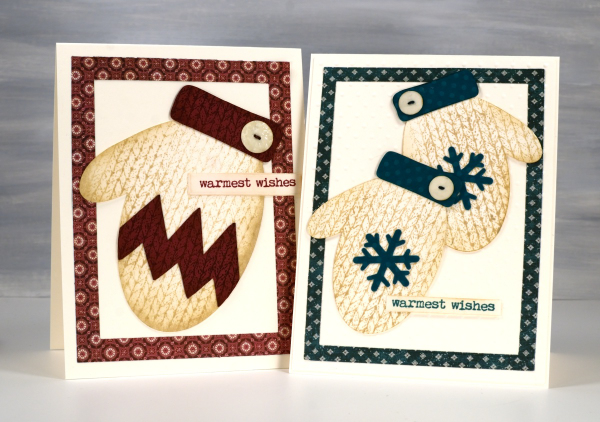
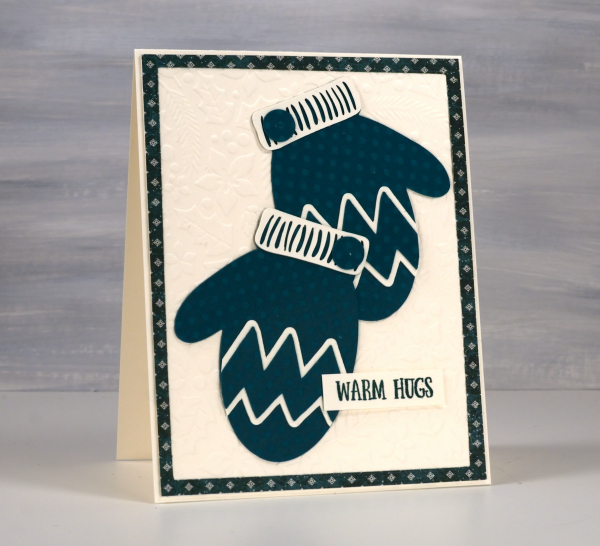
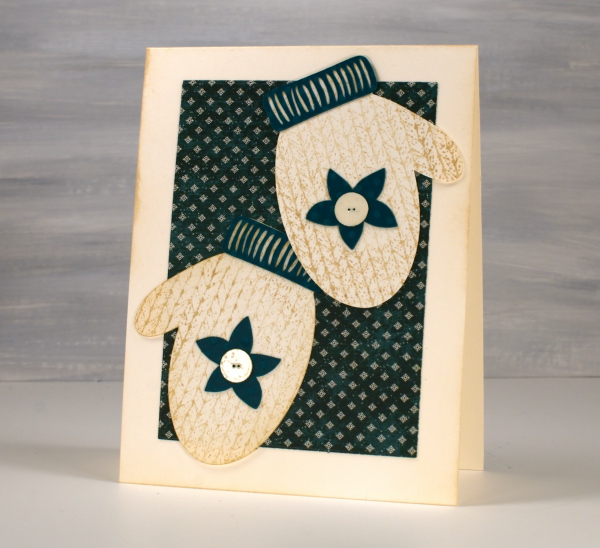
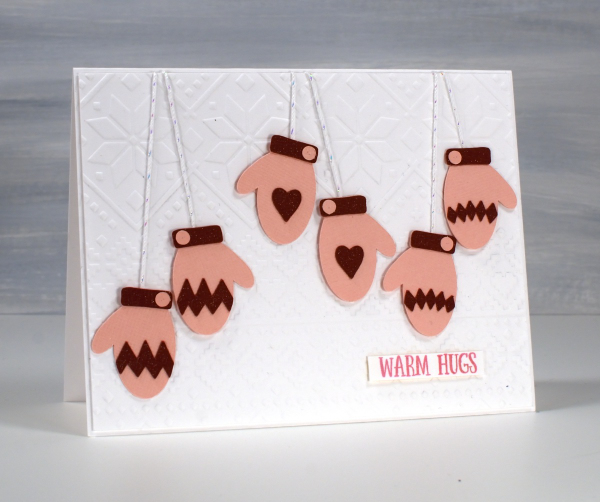
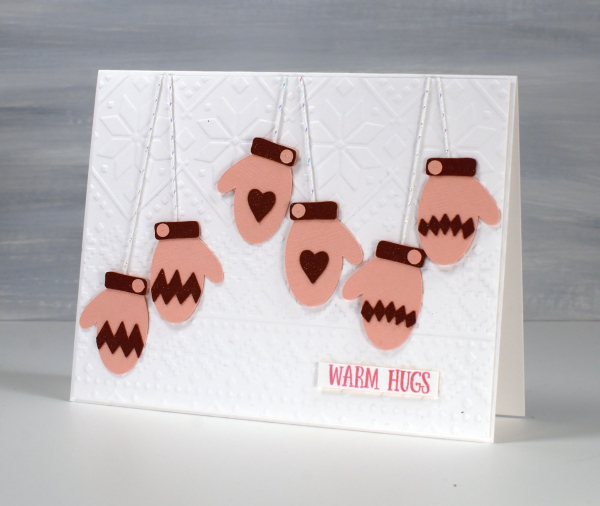
More mittens! To see mini mittens click over to yesterday’s post. I cut the mittens for today’s cards using the ‘Mittens’ digital stamp & cut-file set I designed for Echidna Studios etsy store. It’s the same set I featured yesterday but with a digital file I can cut whatever size I like. The large mitt is 4″ long and the two green mitts are 3″ long.
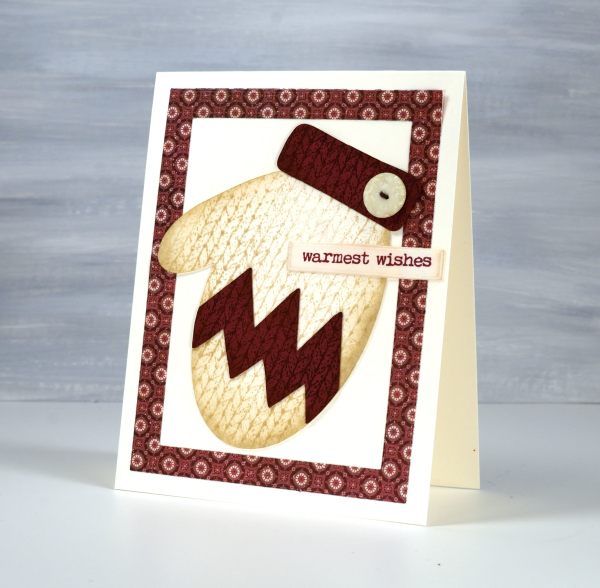
I cut them all from Neenah natural white cardstock along with some buttons. I cut the cuff and Charlie Brown style zig-zag from burgandy cardstock.
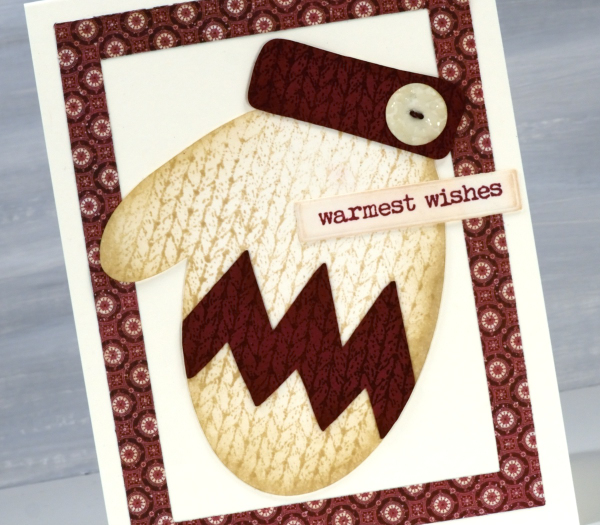
To get the knitted look I stamped the mitts in antique linen distress ink using the Darkroom Door ‘knitting’ background stamp and the cuff and zig-zag in aged mahogany ink. For some depth I blended ink around the edges.
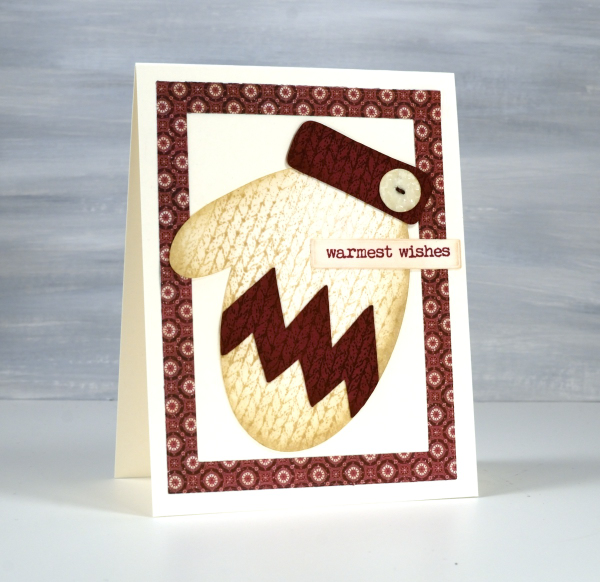
The little buttons continue to delight me so I embossed them with clear embossing powder then coloured some thread with distress markers and threaded it through the little holes.
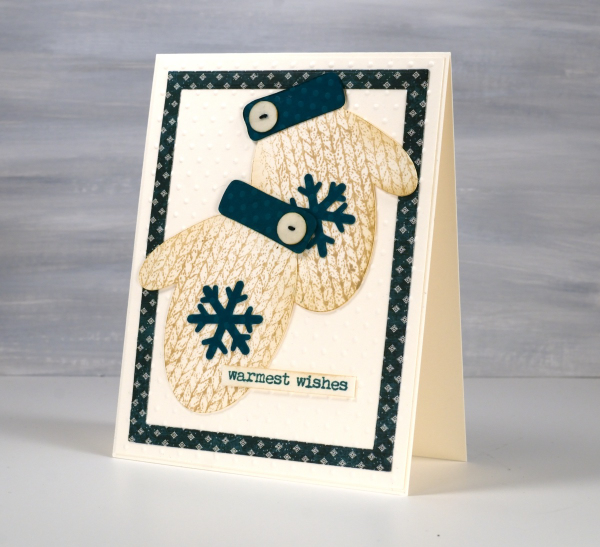
I found Christmas patterned paper from a Graphic45 pad and cut frames using the Waffle flower A2 layer dies. For the green cuffs and snowflakes on the pair of mitts below I used some textured polka dotted cardstock along with an embossed dotted background.
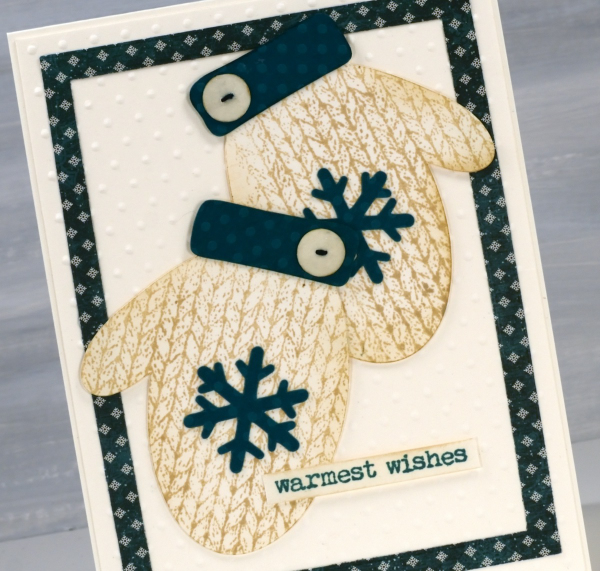
Once again the ‘warmest wishes’ sentiment from ‘Merry Up‘ seemed the best choice and could work any season mitts are worn!
As you can see I am struggling to move on from making mitten cards. Thanks for dropping by.
Mini Mittens
Posted: November 21, 2024 Filed under: cricut, Echidna Studios, mittens, my designs, ski lodge embossing folder, Spellbinders | Tags: cricut, Echidna Studios, Penny Black stamps, Spellbinders 9 Comments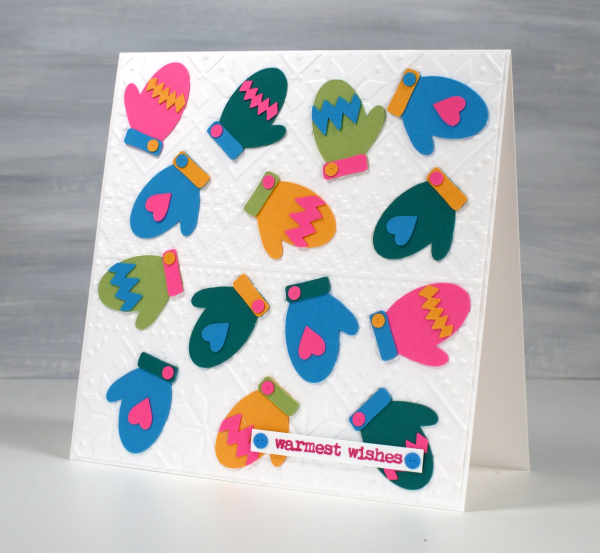
I do like an alliterative title but I restrained myself from calling this post Many Mini Mittens! I designed these mittens and accessories as cutting files for the cricut and I’m having so much fun with them. The Mittens digital stamp & cut-file set is available in the Echidna Studios etsy store. When I taught my bookish Christmas card class recently I had a cool stocking to cut from vintage papers but no mittens. To begin with I just designed the mitt and the cuff but I couldn’t stop so now the digital set has a heart, a poinsettia, diamond pattern, a zig-zag pattern, a snowflake, two cuffs and a little button. The buttons are too sweet.
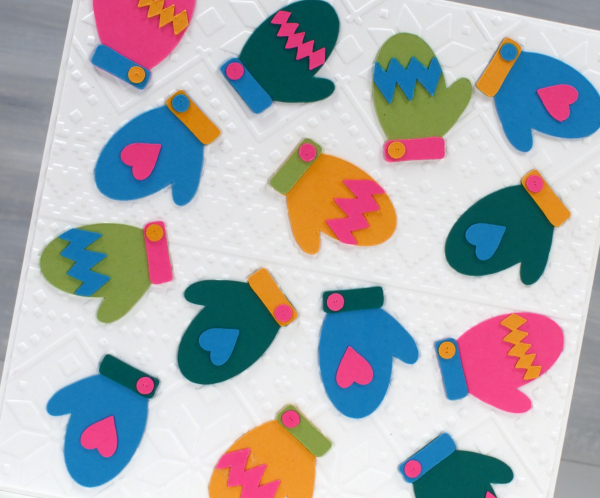
This colourful card started as an experiment to see how small the cricut would cut the mitts without tearing them. These little mitts are 1¼” in length; everything else is obviously smaller and cut just fine.
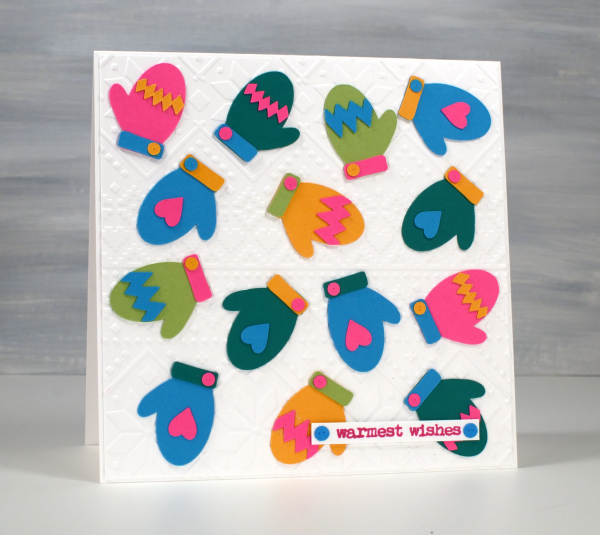
I had fun arranging the elements on the mittens so there wasn’t too much of one colour or repetition of the same coloured patterns. I did create them in pairs because who wants a whole bunch of unmatched mitts? I’ve experienced that in our own mitt basket – why so many right mitts and no left mitts?!
And because I couldn’t stop I cut some matching pairs the same size but using linen textured pink and burgandy cardstocks. I used a clear wink of stella brush pen to make all the burgandy bits sparkle but as I write this I see it didn’t show in the photo. Trust me it adds to the cuteness. ( I had forgotten about my wink of stella pens)

For both cards I used Spellbinders ‘ski lodge’ embossing folder to make a background because ❄! I found suitable Penny Black sentiments from the ‘Merry Up‘ set. Come back tomorrow and I will share the larger, knitted mitten cards I also made with this digital set.
New YouTube channel – New Video
Posted: February 11, 2023 Filed under: Alcohol Ink, baby blue leaf embossing folder, Branch 9 die, cricut, Dies, grafix, Moda Scrap, my designs, ornate tile embossing folder, Paper Rose, Penny Black, Pink & Main, scripty, silhouette birds, so extra supporting sentiments, Stampin Up, thank you squares, Tim Holtz, Tutorial | Tags: cricut, grafix, grafix craft plastic, Penny Black creative dies, Penny Black stamps, Ranger Alcohol Ink, Stampin Up, Tim Holtz 6 Comments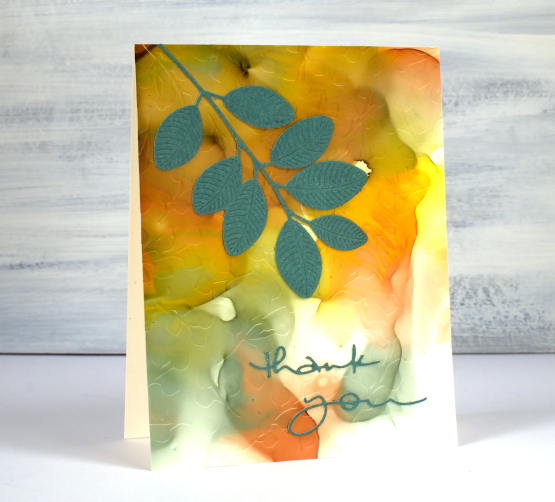
If you have been visiting this blog for a while you will know I had a youtube channel for many years. In 2022 after ten years of adding videos and gathering a community of 7000 subscribers my channel was deleted. In recent weeks I have started again with a new channel and some videos ‘from the archive’. My new channel is called Heather Telford Art and I would be very happy if you decided to like, subscribe and tell your friends! There is content on there that you may remember from the last few years and starting today there is new content also! The new ‘2 for 1 Alcohol Ink Panels’ is freshly filmed for my new channel and I hope it will be the first of many!
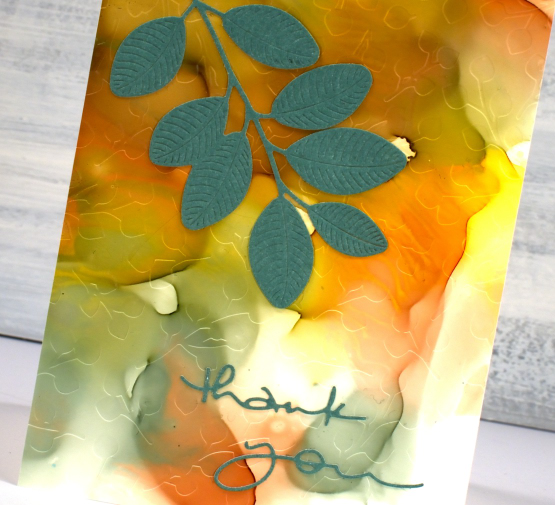
There are quite a few photos in this post because, well, this is a 2 for 1 technique and I created three panels which of course became six panels and one was cut in half so there are seven cards to show you in this blog post! Grab a cup of tea. I have added a linked supply list at the very bottom of this long post.
As well as a new youtube channel I am also a new Cricut owner. The stencil used on the card below was designed by me and cut on my Cricut. It is available as a cutting file from Echidna Studios etsy store.
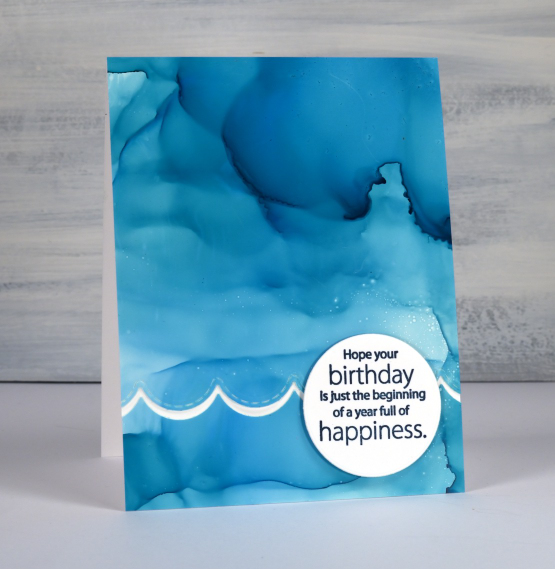
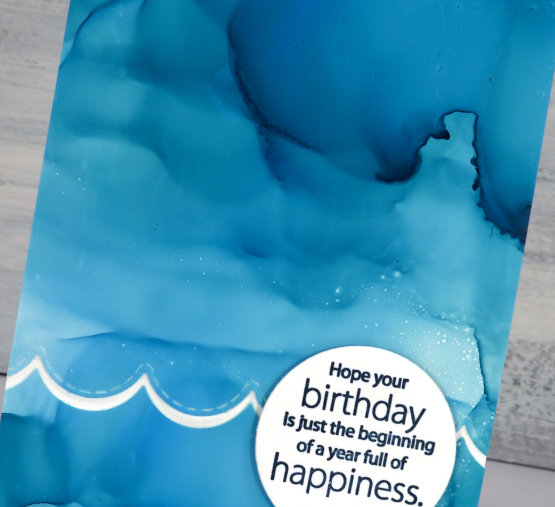
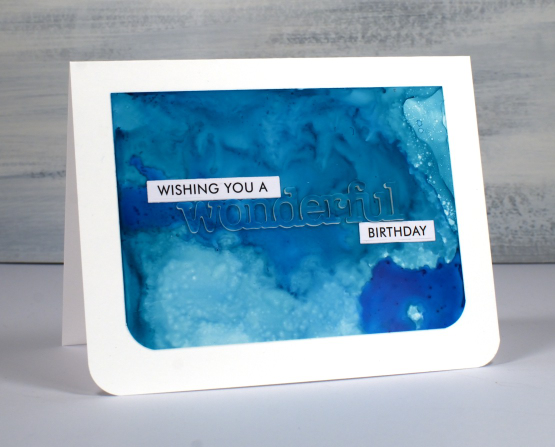
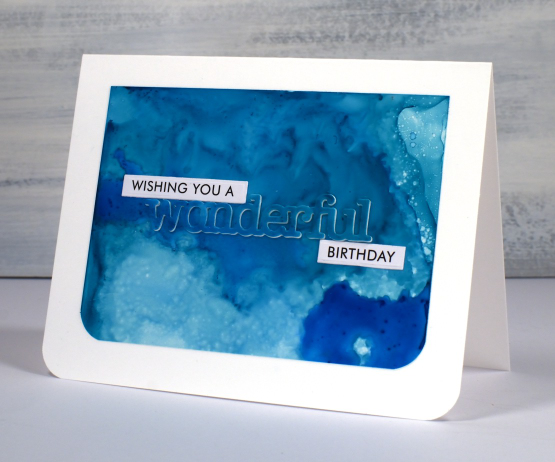
Most of the 2 for 1 smooshed panels I left as a full card fronts adding only a sentiment or some die-cutting. As the panel below reminded me of the ocean, the PB wavy scallop border seemed a nice touch.
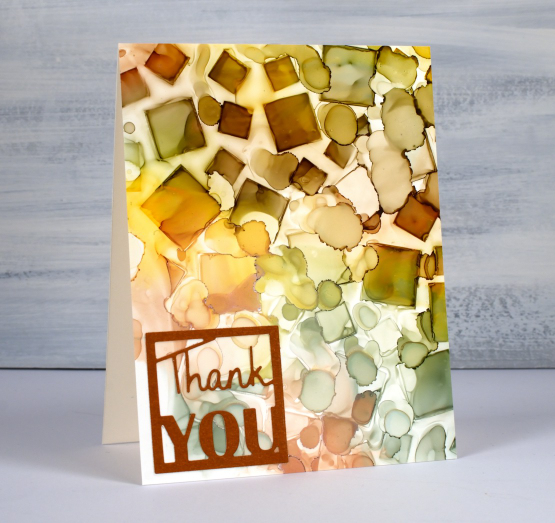
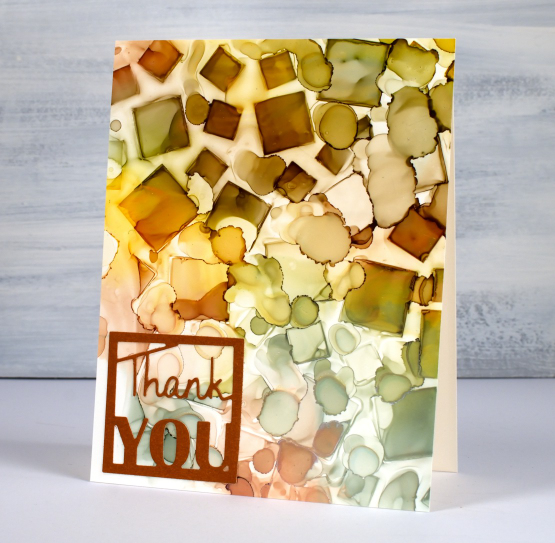
The panel below is a half panel from the first one I showed on the video. I love the patterns from the isopropyl alcohol ink spray even though they don’t stay distinct. Even when die-cutting the word from the panel I couldn’t leave it off so I popped it up. Not so funny story: I guess I haven’t popped up a die cut word in a while because I flicked those little shapes inside the letters into the garbage when I poked the word from the die. So yes, I had to hunt through my garbage to complete the card.
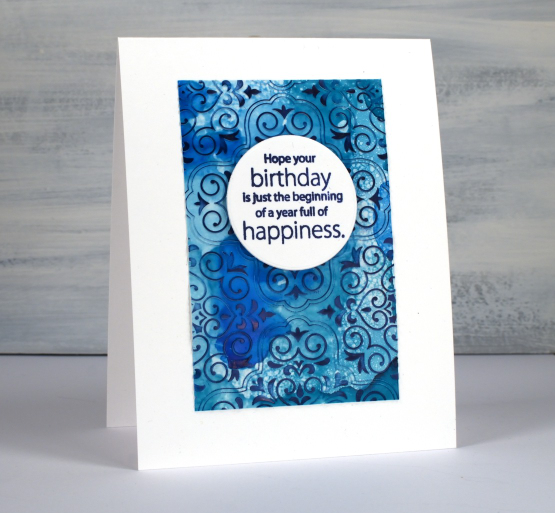
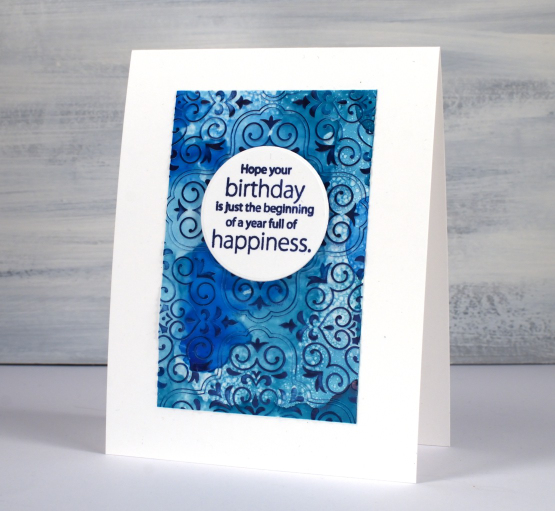
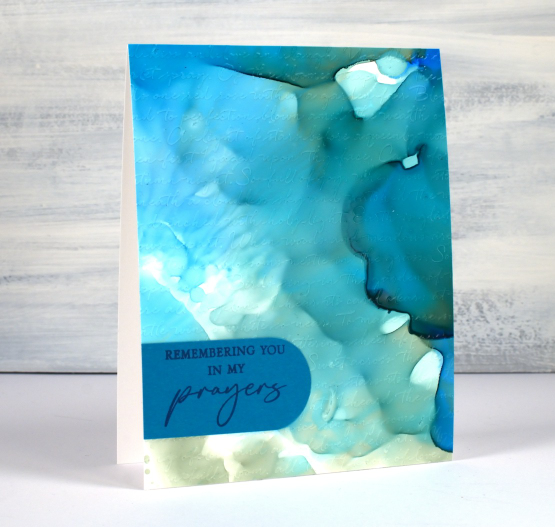
I don’t know why I hadn’t tried it before but seeing how well Grafix craft plastic responds when put in an embossing folder has been a revelation! I thought it might crack but it doesn’t so you can have the subtle impression of your embossing folder on a panel or the bold inked pattern as I’ve done on the card below. Sentiments in circles might be a little fad I go with for a while too; they look cute!
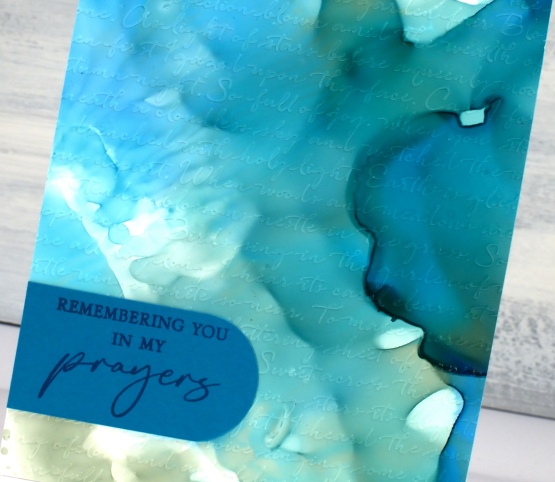
You can see the soft look of embossed script on the panel below, especially in the close up. This detailed embossing folder is from Stampin’ Up and is called ‘scripty’. I don’t think it is available anymore but you might something similar.
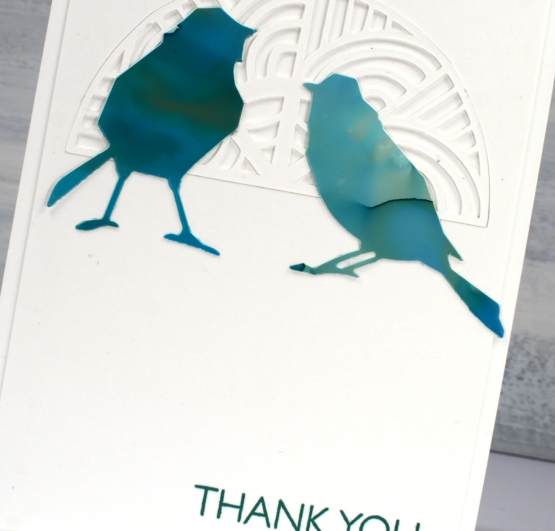
For this final card I cut six little birds from the panel and played with layouts for quite a while. I ended up just using two which means I have four birds in hand for another project. (pun definitely intended)
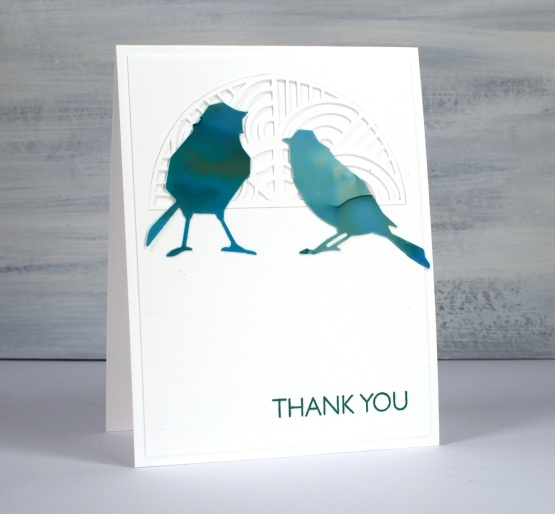
The intricate half circle cut out behind the birds is also one of my new cricut cutting files but more about that in another post. If you got this far, you’re a champion. Thank you for supporting me here on my blog and I would love to see you over on youtube as well.
(Compensated affiliate links from Foiled Fox, Scrap n Stamp)