
Winter Cheer
Posted: December 23, 2016 Filed under: Nature's Silhouettes, Stamped Landscapes | Tags: Kuretake Zig clean color real brush markers, Penny Black stamps, Tsukineko Versafine inks, WOW embossing powders 4 Comments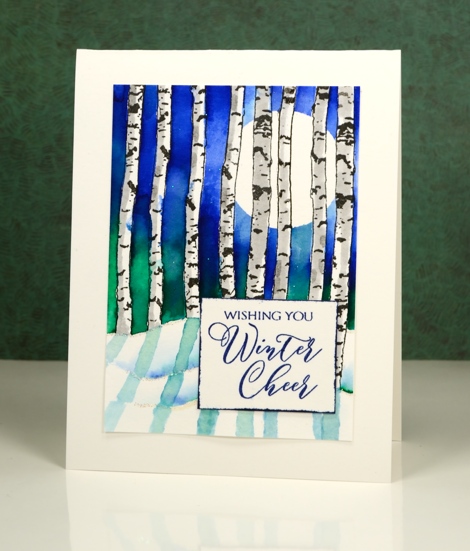
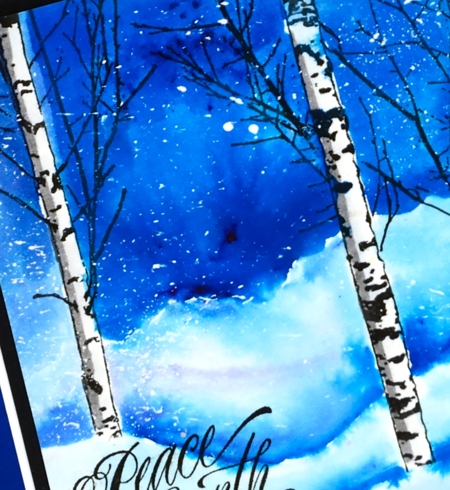
I used the versatile birch trunk stamps from the ‘Nature’s Silhouettes’ set for this card stamping them over a hill shaped mask at the bottom and bending them this way and that so no two trees looked the same. After stamping them I positioned a circle mask for the moon and painted masking fluid over all the tree trunks. I used zig clean colour real brush markers for the blue sky and green foliage in the background; I rarely use the zig markers but whenever I do I resolve to get them out more often. The colours are so vibrant and the blending so easy. Once the sky was completed I removed all the masks and added grey to the trunks.
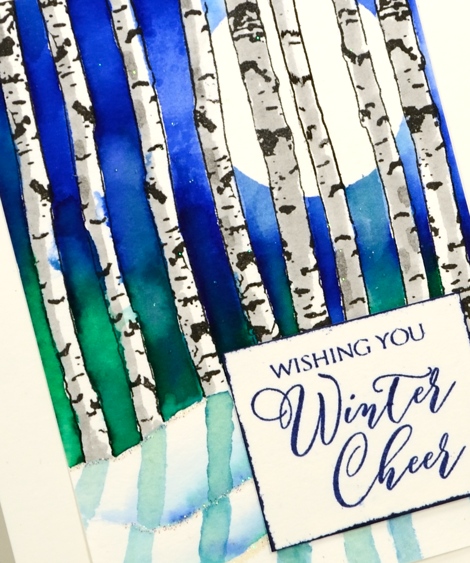
I wanted shadows in the snow but with paler tones than the background so scribbled some colour on a palette and diluted it to paint a shadow for each tree. There is a little line of sparkly embossing along the snow banks to make them glisten. The sentiment may or may not be positioned where it is to hide something; I’ll let you draw your own conclusions!
Enjoy Christmas Eve.
Supplies:
Stamps: Nature’s Silhouettes, Yuletide wishes (PB)
Markers: Zig clean color real brush markers green, blue, light gray (Kuretake), Versamarker
Inks: Versafine onyx black ink, Majestic blue(Tsukineko)
Cardstock: hot pressed watercolour paper
Also: clear sparkle embossing powder
You warm my heart
Posted: December 22, 2016 Filed under: CAS, crystal trio, What's in your cup | Tags: Brusho, Penny Black creative dies, Penny Black stamps 4 Comments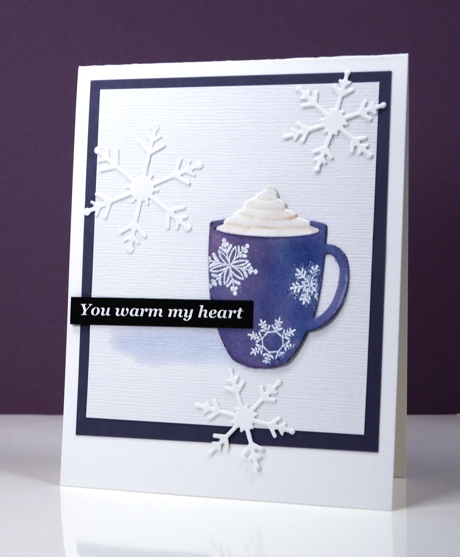
This message is definitely for you my blog readers; you really do warm my heart with all the kind encouragement you leave in the comments. I have been working on a Valentine themed class for January 2017 and the cute little die-cut cup is one of the stars of the new class. I settled on classic red & white for the Valentine class but not before painting quite a few cups in other colours. This little blue cup with its snowflakes is just right for a day which started with snowfall and ended with a blue sky.
I die cut the cup out of watercolour paper then painted it with blue brusho watercolour paint. To give the cup some shape I painted some purple over the blue on the left hand side. Once it was dry I embossed the snowflakes over the top and added the whipped cream die cut piece. I attached the cup to a textured white panel and painted a pale shadow beside the cup then added snowflakes, a sentiment and a purple mat to frame it.
I’ve been making gingerbread today following my usual pattern of burning the first tray and half the second before settling on a shorter cooking time.
Supplies
Stamps: season’s gifts (PB) note: I printed the sentiment on my computer; it’s not a stamp
Dies: crystal trio, what’s in your cup (PB)
Inks: versamark (Tsukineko)
Paper: hot pressed watercolour papers (Fabriano),white linen textured cardstock, purple cardstock, black cardstock
Also: brusho watercolour crystals (Colourcraft), white embossing powder
Misty Mountains
Posted: December 20, 2016 Filed under: Prancers, Stamped Landscapes | Tags: Brusho, Penny Black stamps 6 Comments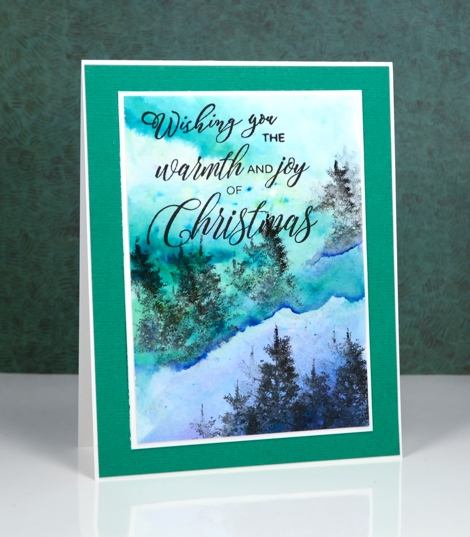
I was happy to read in the comments that I am not the only one who hasn’t sent all their Christmas cards yet. I am making progress; I’ve written 67, sent 60 and have 12 left to write. The card I’m sharing today shows a little sentiment splicing; I’ve taken the ‘wishing you’ from the festive snippets set and added it to half of a stamp from the festive cheer set. The lettering in the two sets combine nicely along with the small capitals on the little words. You can get more from your stamps if you take a look at which sentiments might mix and match with each other. A stamp positioning tool makes this kind of thing easier but partial inking and masking works if you don’t have a handy dandy tool.
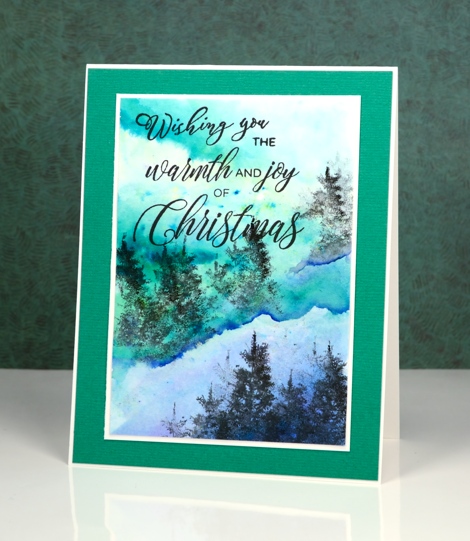
The landscape for this card was definitely a brusho experiment. I sprinkled blue and green brusho on my watercolour panel then moved water around with a paintbrush to create some hard edges and feather out other areas. After I’d created my misty mountains I did partial inking on the little tree stamp from the prancers set to fill in some forest on the mountain sides.
Supplies
Stamps: prancers, festive snippets, festive cheer
Inks: versafine onyx black (Tsukineko)
Paper: hot pressed watercolour papers (Fabriano),green linen textured cardstock
Also: brusho watercolour crystals (Colourcraft)
Lake Reflections
Posted: December 18, 2016 Filed under: On the lake | Tags: Kuretake Gansai Tambi watercolour paints, Penny Black stamps, Tsukineko Versafine inks 7 Comments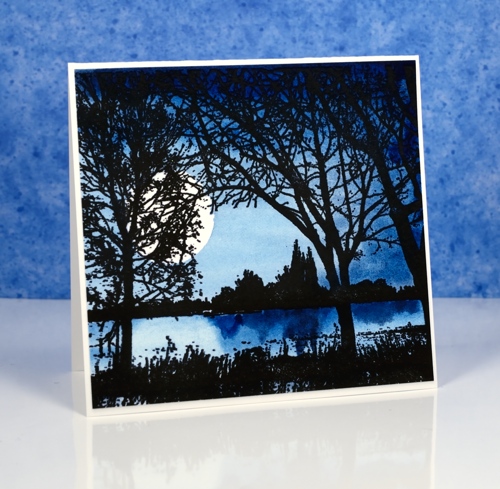
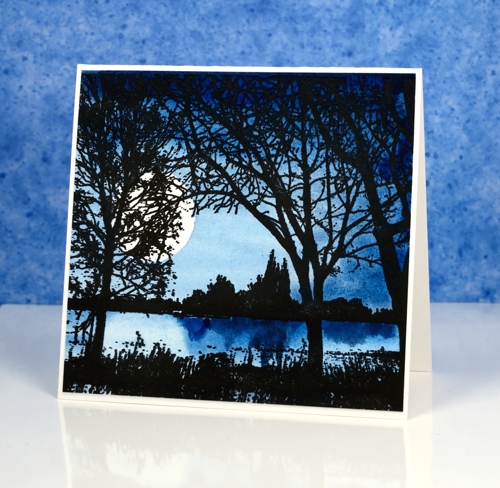
The stamp ‘On the Lake’ is a such a lovely stamp, a whole scene in itself. I featured it with a sunset behind it here keeping the stamped image all black. Once again I stamped in black on today’s card but used a limited blue palette to create a moonlit sky with reflections in the lake.
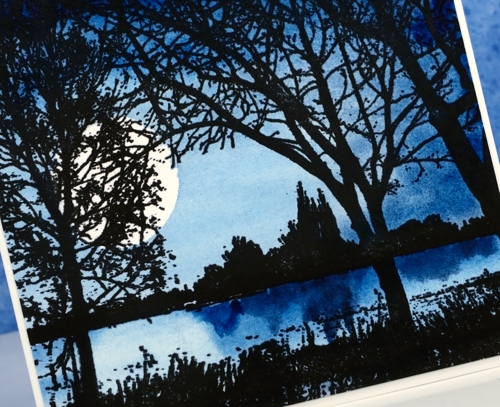
I began by using the MISTI to stamp the ‘on the lake’ image in versafine black on hot pressed watercolour paper. I used the MISTI so I could restamp a couple of times to make sure the image was solid; watercolour paper has some texture, even the hot pressed, so the first stamped image is not always complete. Once the the ink was dry I positioned a frisket film circle mask on the left hand side and painted the sky, lake and reflections in blue watercolour paint. I kept the colour diluted around the moon and in the lake under the moon.
Another way to use this stamp is by inking sections in different colours. To see this technique check out Jill Foster’s beautiful card and video here.
Supplies
Stamps: On the lake (PB)
Ink: Versafine onyx black ink (Tsukineko)
Paper: Fabriano hot pressed watercolour paper , Neenah epic black cardstock, solar white cardstock
Also: gansai tambi water colour paint, grafix frisket film, MISTI
Three northern scenes
Posted: December 13, 2016 Filed under: Classes, Stamped Landscapes, Woodland Beauty | Tags: Classes, Penny Black stamps 15 Comments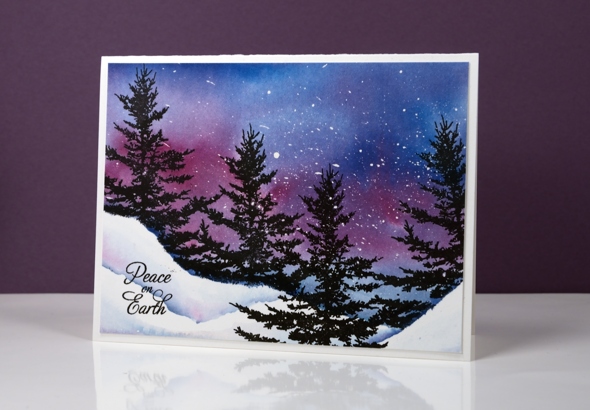
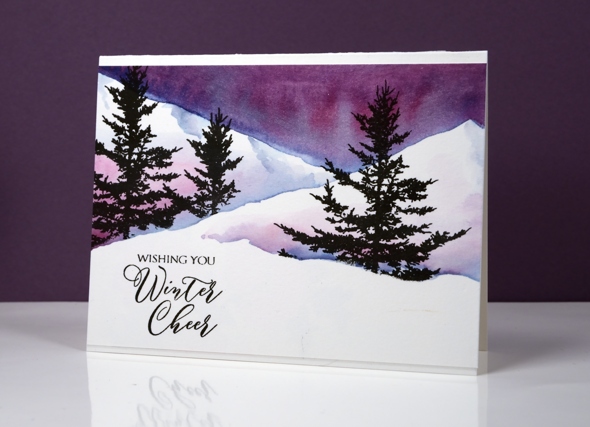
I recently taught a card class where we created Christmas cards featuring the northern lights over snowy landscapes. Everyone’s scenes looked different as there was a variety of inks to choose from. Back in the planning stage for the class I created a few different scenes as I worked out what would work in a class setting. (I have to make sure I can reproduce my own techniques if I am going to have any chance of teaching them to others.)
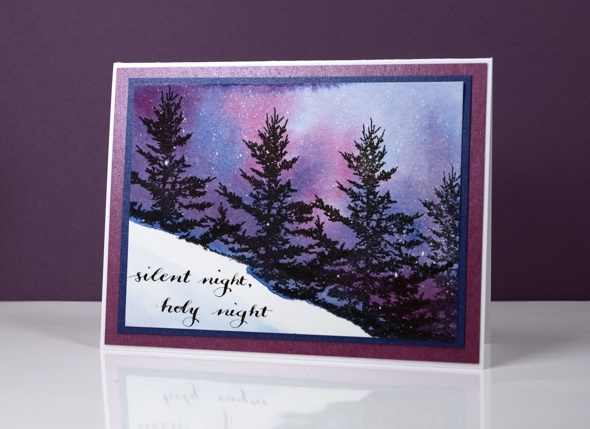
The top card and the bottom card were experiments that didn’t become class samples and the middle one was a variation I did during class. They all happen to use the blue and plum colour scheme. The two above have masking fluid snow flakes and the one below a bit more definition in the mountains. Sometimes my experiments end up as class projects, sometimes they become recycling and, sometimes as the case was with these three they join my stash of cards to use as needed. These ones really should have been sent already to arrive at their destination by Christmas.
Have you sent all your cards yet? I’m not even half way there.
Supplies
Stamps: woodland beauty, yuletide wishes, joy filled
Inks: versafine onyx black (Tsukineko), chipped sapphire and seedless preserves distress stain (Ranger)
Paper: hot pressed watercolour papers (Fabriano), blue and plum shimmer cardstock
Also: masking fluid
Birch in snow
Posted: December 6, 2016 Filed under: Nature's Silhouettes, Stamped Landscapes | Tags: Brusho, Penny Black stamps 13 Comments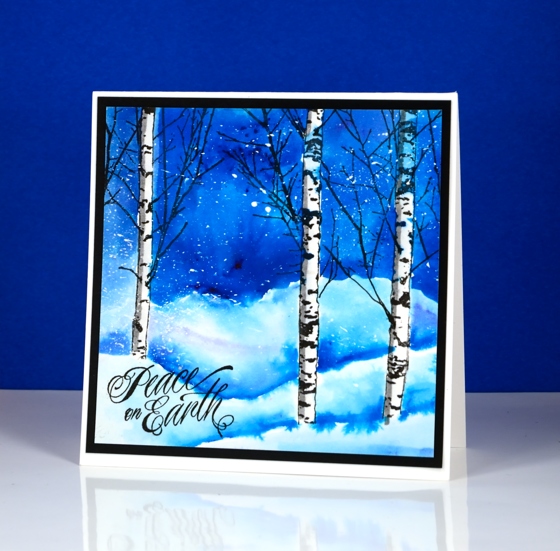
I wish I could tell you the beauty of yesterday’s snowfall inspired this little snowscape but the reality is having this photo edited and ready inspired this little post! I made this card months back but misplaced it somewhere in my spotless workroom!
The ‘nature’s silhouettes’ transparent set includes two long birch trunk stamps. One is a little slimmer than the other so when stamping them you can shape them, turn them upside down, ink them partially and add branches to get a range of different ‘birchy’ looks. I also discovered a little trick you might like. The wider of the two trees just happens to be the same width as narrow painter’s tape which makes masking a snap.
I inked the birch trunks in versafine onyx black for this panel as I didn’t want the watercolour painting to blur the trees at all. Before stamping I splattered some masking fluid and positioned some hill shaped post-it masks at the base of the panel. I stamped the trunks so the base overlapped the post-its. I used the narrow masking tape to mask two of the trunks and cut a narrower mask for the other trunk. I removed the masks from the base of the trees but kept the trunks masked while I painted snow banks and sky with a couple of blue brusho paints. To get the shadow of the snow banks I paint a curved line then soften it with water above but keep it fairly sharp and unblended below. Once the paint was complete I removed the masks from the trunks and add a line of grey down one side of the trunks with a marker.
Even though this particular card wasn’t inspired by my backyard, the beauty of a fresh snowfall is what keeps me creating these snowy scenes.
Supplies:
Stamps: Nature’s Silhouettes, Hello Winter, Into the sky (PB)
Paints: Brusho powders (Colourcraft)
Inks: Versafine onyx black ink, London fog memento marker (Tsukineko)
Cardstock: hot pressed watercolour paper
Also: masking fluid
Poinsettia gift set
Posted: December 2, 2016 Filed under: Winter Joy | Tags: Artline Stix brush markers, Faber-Castell Albrecht Durer Watercolour pencils, Fabriano Watercolour Paper, Peerless Transparent Watercolors, Penny Black stamps, Tombow fudenosuke brush pen 20 Comments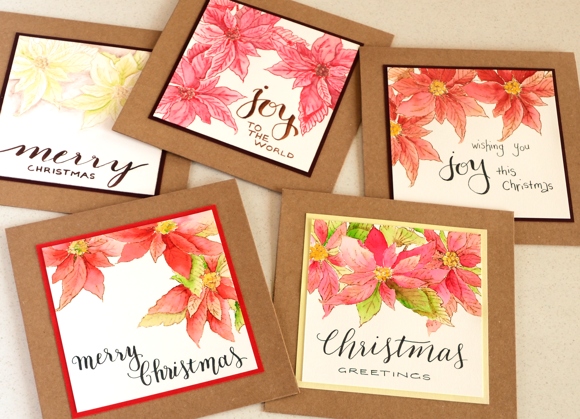
Although I had posts popping up on the blog while I was away for a month all the projects had been created and photographed before I left for Australia. I did take some art materials with me and spent a little bit of time creating this gift set for my sister-in-law. I was able to catch up with her a couple of times, once for dinner and a concert where she lives and again for my last day in Australia, a girls day out in Sydney. We had a great time together and I was happy to have finished this little set as a thank you gift.
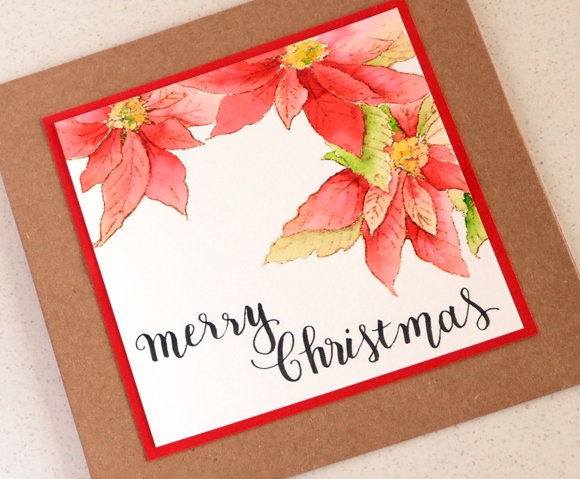
I only took two stamp sets with me, one stayed uninked but the poinsettia from ‘winter joy’ was perfect for this set of cards. I stamped it on some label paper and cut it out so I would have a mask to enable me to layer the images and stamped all but one design in vintage photo ink. The one pale card was stamped in antique linen so I could create ‘white’ poinsettias.
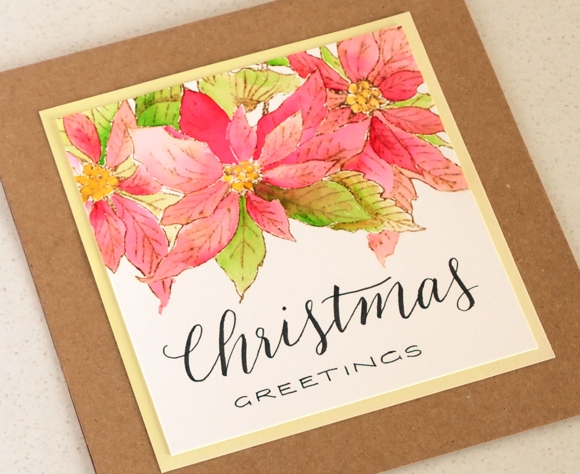
I did my colouring with a mix of watercolour pencils and peerless watercolours on hot pressed watercolour paper. Because I hadn’t taken any sentiment sets with me I hand lettered all the sentiments, some more neatly than others! I picked up some kraft coloured square cards and envelopes from Eckersleys art store and raided my parents’ stash of coloured cardstock to create some mats. Even though I was working with minimal supplies I still managed to spread myself over half the dining room table at mum and dad’s house!
Supplies
Stamps: winter joy (PB)
Inks: vintage photo, antique linen distress ink (Ranger)
Paints: Peerless watercolours, Faber Castell Albrecht Durer watercolour pencils
Markers: Tombow fudenosuke brush pen, Artline Stix brush pens
Cardstock: fabriano hot pressed watercolour paper, Kaisercraft card & envelope pack
Pink & Green Poinsettia
Posted: November 29, 2016 Filed under: Scarlet Majesty | Tags: Penny Black stamps 21 Comments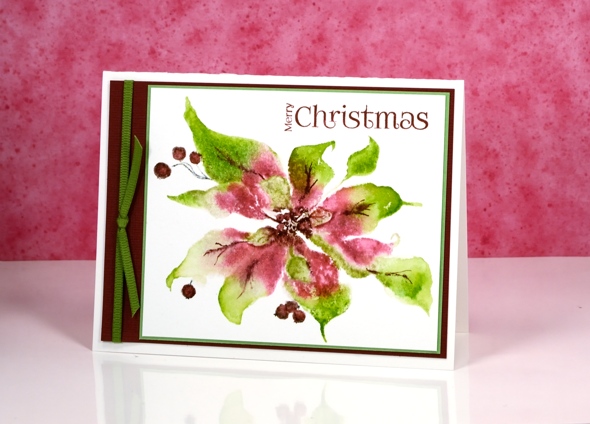
I’m not sure that poinsettias ever appear to be quite this pink but I have artist’s licence so here is a bright pink and green poinsettia. I stamped and painted this one way back in September and was pretty careful to note down colours and products with all the projects I was working on before I went to Australia. Somehow though, I can’t find my list for this one.

I used the MISTI so I could ink with pink first (maybe Victorian velvet or worn lipstick dsitress stain) then ink with green (mowed lawn distress stain??) and finally with aged mahogany distress stain. Once the petals were dry I added details with an aged mahogany distress marker.
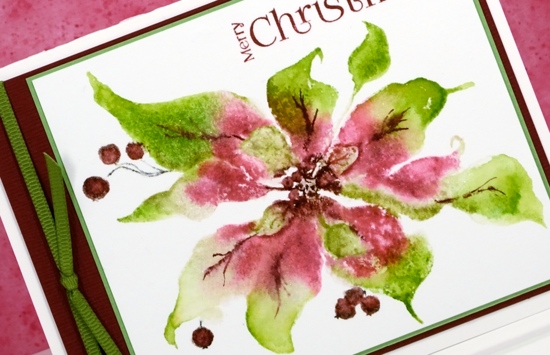
It is entirely possible that I did not do this with distress stains at all; sorry, I’m just not sure. I did mat the panel with green then with burgandy making it a four-layer card which, for me, is a little unusual just like the colour scheme.
Supplies:
Stamps: Scarlet Majesty, Joy filled(PB)
Inks: not sure but my guesses are listed in the description above.
Cardstock: Fabriano 100% cotton hot pressed watercolour paper, green cardstock, burgandy cardstock
Winter celebration
Posted: November 22, 2016 Filed under: Stamped Landscapes, Woodland Beauty | Tags: Fabriano Watercolour Paper, Penny Black stamps, Ranger Distress inks, Tsukineko Versafine inks 10 Comments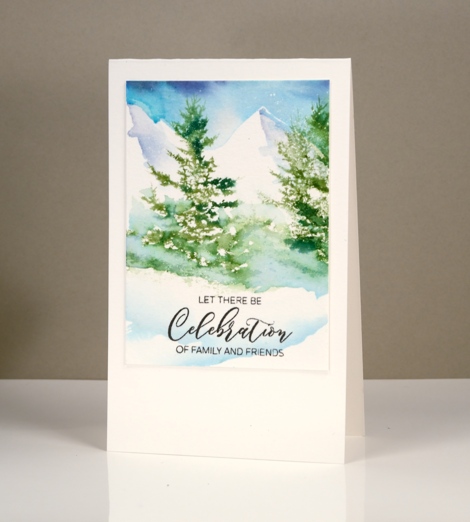
The tree from the ‘woodland beauty’ set has definitely become a favourite of mine. (It features in my next Christmas card class this weekend and one spot just opened up) I started by painting a blue and purple sky over some masking fluid specks. I used the same blues to paint shadows over the mountains.
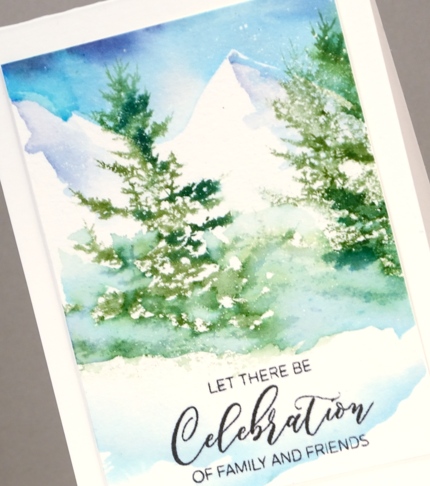
To create this little winter scene I stamped the tree in a mix of two greens and added water to blend the greens and add the shadow to the snow. To make the snowbank below the trees I partially inked the trees so the trunks weren’t stamped then painted some blue ink around the branches and as a sharp edge below the branches.
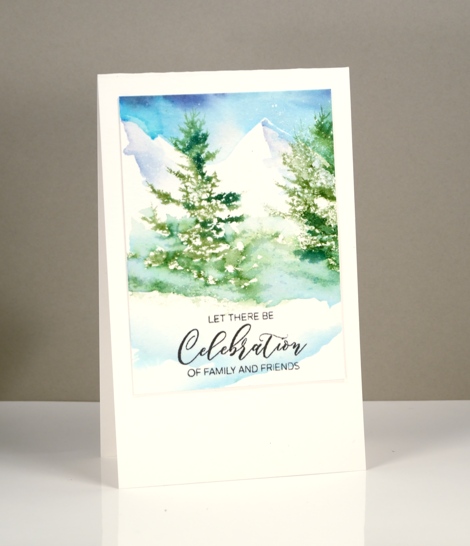
I painted some more pale blue snow banks then used part of a sentiment stamp to finish the panel. I’ve been back in Canada for over a week now and the snow has indeed come to Ottawa!
Supplies
Stamps: woodland beauty, festive cheer
Inks: versafine onyx black (Tsukineko), forest moss, pine needles distress markers (Ranger)
Paper: hot pressed watercolour papers (Fabriano), green cardstock
Paint: brusho watercolour crystal paint
Also: masking fluid
Gods blessings
Posted: November 16, 2016 Filed under: Skyline, Woodland Beauty | Tags: Brusho, Penny Black stamps, Ranger Distress inks 5 Comments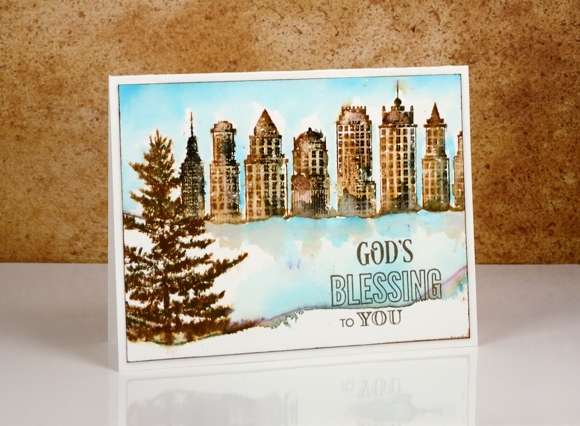
It’s time for a card with a vintage feel; you know they pop up here from time to time. I began with a watercolour panel splattered in a fine spray of masking fluid which results in tiny dots of white to represent snow. As with past cards in this style I used vintage photo distress ink which blends very nicely with water. The smoky black areas were added with black soot distress ink as well as an elegant writer pen. I can’t remember whether I stamped the buildings over a mask or just partially inked the stamp, either way the result made the skyscrapers appear to behind a snowbank. I blended the ink with a paintbrush above the snowbank and later, once the buildings were dry, painted the ice and sky with turquoise brusho.
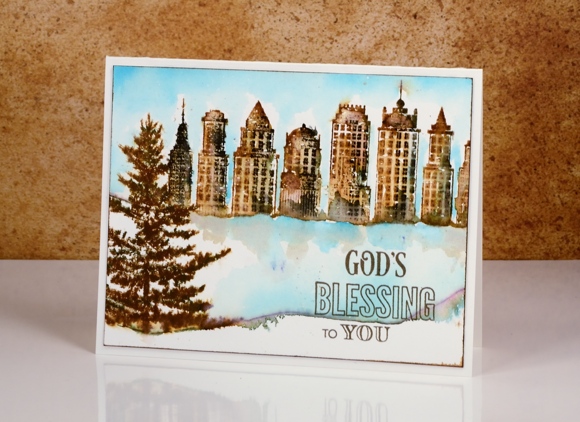
To frame the scene I ran the vintage photo ink pad around the edges of the panel then attached it to a cream card base.
Supplies:
Stamps: Skyline, Woodland Beauty, Holy Night(PB)
Inks: Versafine vintage sepia ink (Tsukineko) vintage photo, black soot distress inks (Ranger) Elegant Writer (Speedball)
Paint: Turquoise brusho
Cardstock: Fabriano cotton hot pressed watercolour paper


