
Golden Harvest
Posted: September 12, 2014 Filed under: CAS, Golden Harvest, Words of Gratitude | Tags: Penny Black creative dies, Penny Black stamps, Ranger Distress stains 5 Comments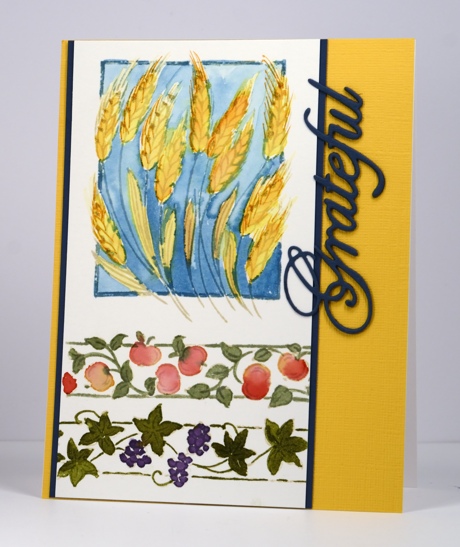
All the new Penny Black Fall 2014 products have been revealed on the PB blog this week and are now available in the online store. I have another fall card today and the temperature outside has dropped dramatically enough to make me realize summer might just be almost over. (you can tell I am clinging to it can’t you?)
I used the set Golden Harvest to create the card above and arranged the three stamps a bit like a sampler of autumn produce. I stamped all three images in antique linen distress ink to give me an outline then with painted distress stains to add colour. I matted it with blue cardstock and cut three “gratefuls’ out of the same cardstock. I stuck two together then trimmed the top off the tall letters and added another full die cut of the word on top. This made it possible to glue the word down evenly over the edge of the matted panel. I know this one isn’t quite as CAS as I often do, but I think it might qualify for the “Three” challenge at CASology this week.
Supplies
Stamps: Golden Harvest (PB)
Creative Die: Words of Gratitude (PB)
Inks: Mustard Seed, Barn Door, Spiced Marmalade, Peeled paint, Bundled Sage, Broken China, Dusty Concord distress stains & Antique Linen distress ink (Ranger)
Cardstock: Neenah Natural White 110lb, Fabriano 100% cotton hot pressed watercolour paper, yellow & blue textured cardstock
Autumn Dance
Posted: September 10, 2014 Filed under: Uncategorized | Tags: Fabriano Watercolour Paper, Penny Black stamps, Ranger Distress inks, Ranger Distress stains 7 Comments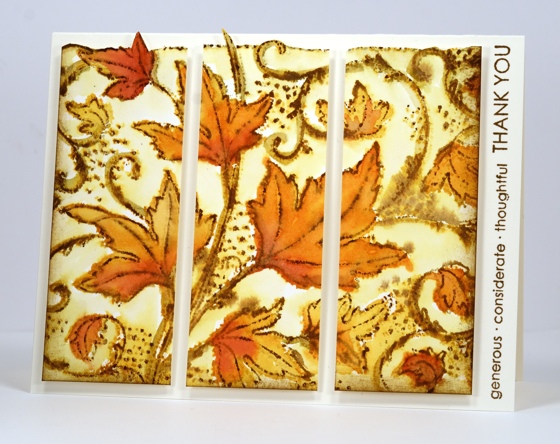
The Fall 2014 reveal and giveaway continues on the Penny Black blog this week. The image above was created using one of the new Autumn stamps, a large whimsical array of leaves. I used watercolour paper and stamped the image twice, once in wild honey and again in frayed burlap distress inks . I then used wild honey, spiced marmalade, barn door, frayed burlap and dried marigold to paint inside the leaves and over the outlines. Using a waterbrush I blended the colour from the dots and lines into the background filling the spaces with pale yellow and olive tones. After finishing my colouring I restamped the outline image in vintage photo distress ink. Finally I added some gold pearl ex mixed with water over the top of a few leaves. You can’t see it in the photo above but on the actual card it adds a gold shimmer.
The whole image has a wavy border with leaves and swirls cutting through it here and there but I just kept the border at the top of my panel and trimmed the other three sides. I sliced the panel into three even sections and popped them up on dimensional squares. I knew I had a nice long sentiment for the narrow space but I had to hunt it out. It’s from the “…wishing you” set.
Supplies
Stamps: Autumn Dance, …wishing you (PB)
Inks: Mustard Seed, Barn Door, Spiced Marmalade, Vintage Photo distress stains & Wild Honey, Antique Linen(Ranger)
Cardstock: Neenah Natural White 110lb, Fabriano 100% cotton hot pressed watercolour paper
Also: 3D Foam squares (Scrapbook Adhesives)
Simply Leaves
Posted: September 8, 2014 Filed under: CAS, Lush & Lavish, Watercolour | Tags: Fabriano Watercolour Paper, Penny Black stamps, Ranger Distress stains 4 Comments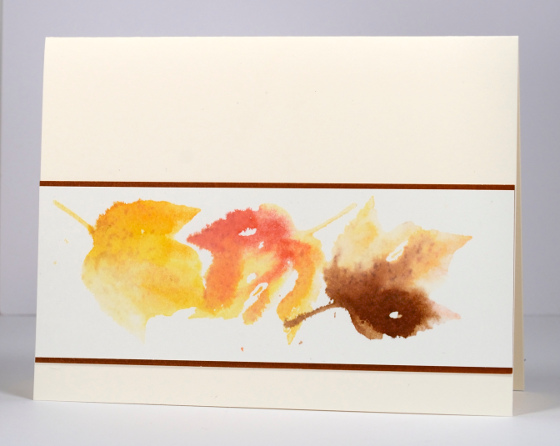
I was working with new leaf stamps from Penny Black today; they are from the Fall 2014 release being featured on the PB blog all week. The panel I was making was more vibrant and bold than the one above (you will see it on the blog next week) but the images on the scrap paper beside me were muted and watery like these. I was using distress stain and stamping several impressions without reinking because the pigment is strong and a little spritz of water makes it go further. Before changing colour I stamped off on the scrap paper to clean the stamp. I decided to recreate the pretty pale leaf images on a card instead of a scrap.
For each leaf I applied a little distress stain to one side of the leaf image, spritzed with water and stamped on watercolour paper. The stain and water blended but not evenly. I didn’t clean the stamp between colours; that’s why there is a bit of yellow in each leaf. The little specks of colour you see on the panel were splats made as I lifted the wet stamp from the paper. Basically this prettiness just happened; I had very little to do with it. I was so happy with the simplicity of the three leaves I didn’t even add a sentiment. If I want one I can add it inside.
Supplies
Stamps: Lush & Lavish (PB)
Inks: Mustard Seed, Barn Door, Spiced Marmalade, Vintage Photo distress stains & Wild Honey(Ranger)
Cardstock: Neenah Natural White 110lb, Fabriano 100% cotton hot pressed watercolour paper, Fall Festival mix & match papers (PB)
Leaves and canvas
Posted: September 5, 2014 Filed under: Foliage Fancy, Textures | Tags: Fabriano Watercolour Paper, Penny Black stamps, Ranger Distress stains, Tsukineko Memento inks 7 Comments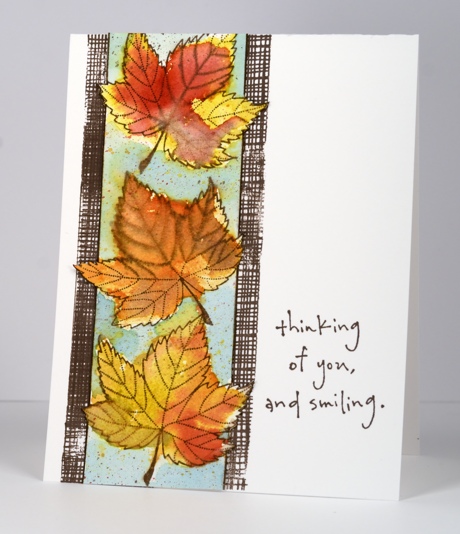
I am not anxious for summer to end but I am enjoying playing with autumn stamps and colours. The Foliage Fancy set I used for this card has solid leaf stamps and outline/vein leaf stamps. I started by applying two colours of distress stain directly to the solid leaf, spritzing it and stamping on watercolour paper. I changed the colour mix slightly for each leaf. While the stain was still a bit damp I inked the outline stamp with rich cocoa memento ink and stamped over the solid leaves. I painted tumbled glass distress stain around the leaves and when that was dry splattered a little of each leaf colour over the top.
Before cutting out the watercolour panel I ruled lines down either side of the panel letting the leaves cross the lines for added interest. I stamped the canvas background directly on the cardbase in rich cocoa ink then added a sentiment.
I must admit I am looking forward to autumn a little because I went thrift shopping this week and came home with a 100% cashmere sweater in great condition for $7.99! It will be cosy when the weather turns cold.
Supplies:
Stamps: Foliage Fancy, …smiling, Textures (PB)
Inks: Mustard Seed, Barn Door, Spiced Marmalade, Vintage Photo, Tumbled Glass distress stains (Ranger) Rich Cocoa Memento ink (Imagine Craft/Tsukineko)
Pencils: Faber Castell Albrecht Durer watercolour pencils
Cardstock: Neenah Avon Brilliant White 110lb, Fabriano 100% cotton hot pressed watercolour paper
OLS#9 Hip to be square
Posted: September 4, 2014 Filed under: CAS, One-Layer Simplicity challenge, Tree-mendous | Tags: Penny Black stamps, Tsukineko Memento inks 7 Comments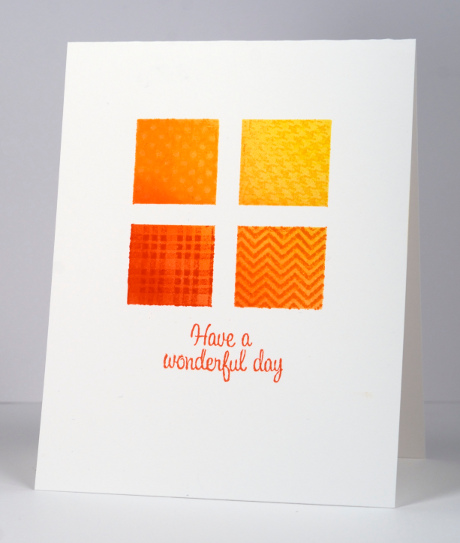
Ardyth has a wonderful challenge happening on the One Layer Simplicity challenge blog this month. We have to use squares on our one layer cards. It can be one square or many squares; there are so many possibilities. I decided to mask and sponge my squares with a bit of a diagonal ombre thing happening. I taped around the edges of the large square with painters tape then cut two narrow strips and criss-crossed them in the middle. My sponging blends from yellow through orange to a burnt orange colour (listed below) and then I added a little pattern to each square by masking the other three squares and stamping. The patterns are from the transparent set, ‘Treemendous’ and they were perfect for this technique. I also used a sentiment from the same set which makes this a one layer, one stamp set and one colour scheme card, but that is not required for the challenge!
The challenge is to have fun with squares on a one layer card. Hope you’re inspired.
Supplies:
Stamps: Treemendous (PB)
Inks: Memento Dandelion, Tangelo, Cantaloupe, Morocco ink (Tsukineko)
Cardstock: Neenah Avon Brilliant White 110lb cardstock
Christmas Traditions
Posted: September 3, 2014 Filed under: Caroling Tree | Tags: Penny Black stamps, Tsukineko Memento inks 9 Comments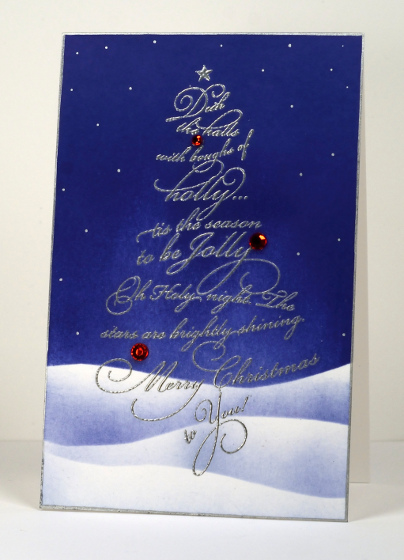
This week on the Penny Black blog the designers are sharing more Christmas inspiration and some of their own holiday traditions. At our house I pick a different colour scheme for decorating the tree each year. The children do give me input and we come to a decision together. Every colour scheme includes gold or silver as we don’t have an endless supply of decorations. Last year it was silver and white with a touch of red.
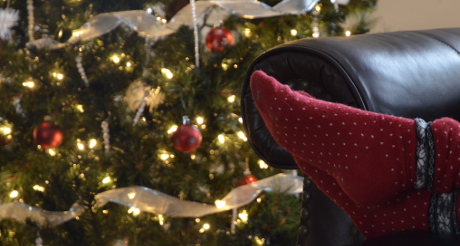
Another year it was silver and blue like the card above. One year my daughter who loves green and yellow asked for lime green! I was a bit dubious but we teamed it up with gold, found a set of lime green baubles, a garland of lime green berries and it worked. I’m not sure what it will be this year. When the children were younger we made a new set of decorations to add to the collection each year. One year we made peg angels and another year felt mittens. We painted balls with glitter glue a few times and threaded clear beads on florist wire to make icicles; you can see the icicles in the photo above.
To create the blue and silver card above I began by embossing the “Caroling Tree” in silver embossing powder, next I positioned a mask cut from a post-it note to cover the bottom of the panel. I brayered Memento Paris Dusk ink over the exposed part of the panel then evened out the colour with a sponge. I removed the first mask and cut another to place a little lower then sponged above it to create a snow bank and then another below that. To complete the panel I drew a border of silver with a sharpie and added a few silver stars also. The final touch was a few red rhinestones. I trimmed the card base to fit the panel so it is 5.5″ x 3.5″.
Thank you for all the feedback on my “No Card Left Behind” post; it was very interesting and helpful to read how other card makers deal with unexpected mishaps.
Feel free to share some of your Christmas traditions in the comments below; I would love to read about them.
Supplies:Stamps: Caroling Tree (PB)
Inks: Versamark, Memento Paris Dusk ink (Imagine Craft/Tsukineko)
Cardstock: Neenah Solar white 110lb cardstock
Also: Silver Embossing Powder, Silver Sharpie, Red Rhinestones
Runway Inspired #67
Posted: September 2, 2014 Filed under: Floral Applique | Tags: Penny Black stamps, Ranger Distress stains 4 Comments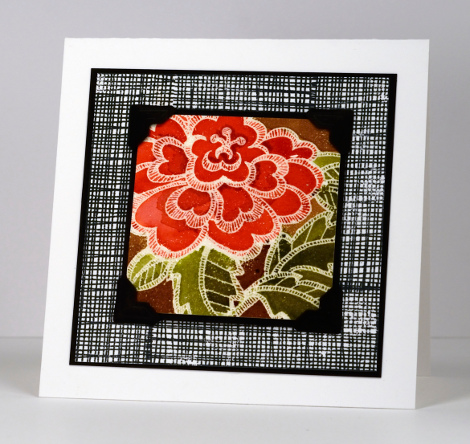
I have been wanting to play along with the Runway Inspired Challenge for a while so today I took a look at their new inspiration and came up with this little square card. The floral panel is clear heat embossing watercoloured with distress stains and the checked black and white mat I made with a few repetitions of the canvas stamp from the ‘Textures’ set. I matted the floral panel in black and was not planning to mat the canvas panel but the seamstress in me won over the CAS stamper. I was taught by my mother, my aunt, my great aunt and my fashion & design teacher in highschool to finish borders and seams properly. The canvas panel looked more “finished” with its own black mat. If you count the photo corners as a layer, this card has six layers – something you rarely see from me! (it might just be a record, Lindsey!)
Layers or not the design teams samples on the Runway Inspired Challenge blog are diverse and beautiful. Go and take a look.
Supplies:
Stamps: Textures, Floral Applique (PB)
Inks: Barn Door, Peeled Paint, Vintage Photo distress stains (Ranger) Tuxedo Black Memento ink, Versamark (Imagine Craft/Tsukineko)
Cardstock: Neenah Natural White 110lb, Black cardstock, Fabriano 100% cotton hot pressed watercolour paper
Also: Clear Embossing Powder (Stampendous), Creative Photo Corners (Scrapbook Adhesives)
No card left behind
Posted: August 29, 2014 Filed under: CAS, No Card Left Behind, Oh Christmas Tree | Tags: CAS, Faber-Castell Albrecht Durer Watercolour pencils, Penny Black stamps, Ranger Distress stains 15 Comments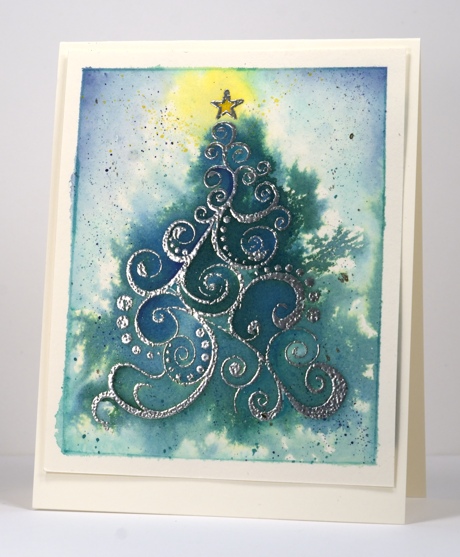
I recently started using the phrase ‘no card left behind’ at my classes. I know sometimes a card needs to left behind; sometimes a fresh start is best. I’m not talking about those instances; I’m talking about the times when the card is basically working. The colours are pretty, the layout is balanced, the stamping is solid but then something goes wrong. It could be a crooked sentiment or maybe a smudge of ink, perhaps an incomplete imprint from the stamp. In these situations I have adopted the policy of “No Card Left Behind” and I like to make sure it happens in my classes. I like the participants to go home happy with the their cards. I know they might try it again and tweak things or they might decide the design is not for them and never try it again. Either way I like them to go home with the promised cards.
To this end I have a few emergency solutions up my sleeve. I’m sure you have them too. Some of my class participants joke about the butterfly fix: “I can always stamp a butterfly over that” It can work in some situations but not really on a snow scene! I have shared some of my fixes before and have decided to continue in the spirit of “No Card Left Behind” and share some more from time to time. I will try and remember to photograph the problem before I come up with the fix but sometimes I just forge ahead and its too late for ‘before and after photo shoots’.
I have two cards to share today; the second one is the NCLB. I started both with the tree image embossed on watercolour paper with silver powder. I added distress stains to the paper and blended them immediately with water and a paintbrush. For the card above I kept the colour contained in the tree area just letting it bleed out a little by spreading the stain and water with a brush. On the other panel I blended the colour all over the panel so the whole rectangular area was covered in shades of green. I then sprinkled salt on the wet paper and let it dry. The result was a pretty textured background but overall the design was lacking something. I set it aside and finished the above panel with some silver, blue, green and yellow splatter. I added a bit of definition around some of the swirls and the border with watercolour pencils.
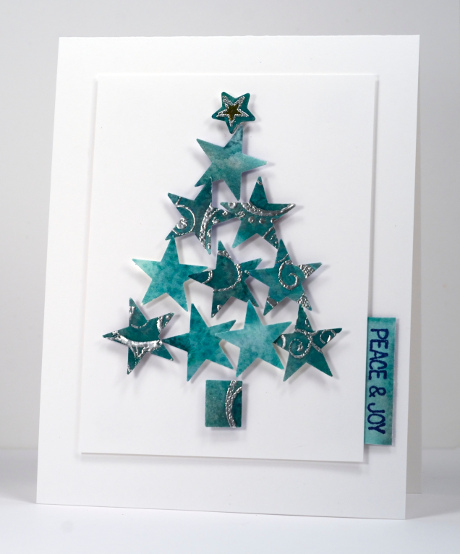
Now how about the NCLB card? You can see I ended up punching out stars and arranging them as a tree but it took a bit of fiddling around before I settled on that design. I first punched squares from the watercoloured panel to see if I could come up with a three or four square CAS layout but that wasn’t coming together so I punched as many stars as possible out of the squares and remaining scraps and arranged them in a tree shape. I had a little star punch that framed the star at the top of the tree and cut a little trunk from a scrap. All the shapes are popped up with 3D foam squares from Scrapbook Adhesives on a white panel which is popped up with the thin 3D foam squares. I had a few narrow scraps left so I stamped a simple sentiment and attached it as a tab to the panel. Punches are a good option for saving a card that will no longer work as a whole panel. I often punch squares from a stamped design but circles or fancier shapes like flowers and stars are great to arrange into a new design.
Thanks for wading through this rather long description; have I inspired you to give the occasional mess up a second chance? Do you have strategies for saving your hard work after an annoying slip or smudge?
Supplies:
Stamps: Oh Christmas Tree , Winter Magic (PB)
Punches: large and small star
Inks: Versamark, Versafine Majestic Blue (Imagine Craft/Tsukineko), Distress stains Pine Needles, Evergreen Bough (Ranger)
Pencils: Albrecht Durer watercolour pencils Indianthrene Blue 247, Viridian 161, Lemon 107 (Faber Castell)
Cardstock: Fabriano 100% cotton hot pressed watercolour paper, Neenah Natural white 110lb cardstock, Neenah Solar white 110lb cardstock
Also: Silver Embossing Powder, Silver Wink of Stella Pen, Salt, 3D foam squares, thin 3D foam squares (Scrapbook Adhesives)
Christmas Balls
Posted: August 28, 2014 Filed under: Joyous Wishes, Most Wonderful | Tags: Penny Black creative dies, Penny Black stamps, Ranger Distress stains 8 Comments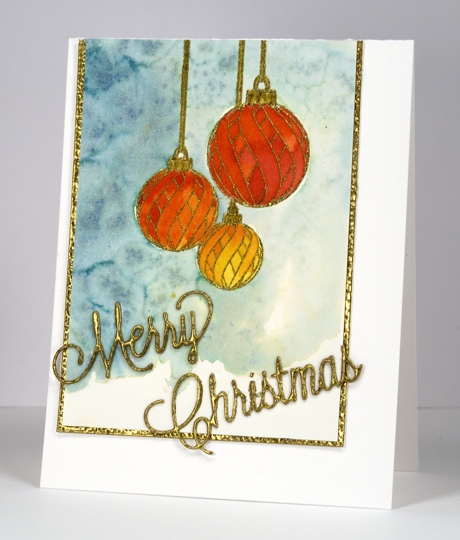
On the Penny Black blog this week the designers have been showcasing sentiments from the new “Season’s Greetings” release. I used this “Merry Christmas” die cut last week but it looked very different coloured with a silver sharpie. I coloured it for today’s card with gold embossing powder and used the same powder to emboss the Christmas balls and the edge of the mat framing the panel. You can see some of the shine on the border but in real life the words and balls glisten in the same way. I embossed the balls first then painted them with distress stains. I painted the background in blue and green diluted and blended with plenty of water then sprinkled salt over it to create some speckly texture.
Thanks for your comments and encouragement which I love to read. I have had a few questions lately which I hope to respond to in the next few days.
Supplies:
Stamps: Most Wonderful (PB)
Creative Dies: Joyous Wishes (PB)
Inks: Versamark (Imagine Craft/Tsukineko), Distress stains Barn Door, Mustard Seed, Spiced Marmalade, Evergreen Bough, Broken China (Ranger)
Cardstock: Fabriano 100% cotton hot pressed watercolour paper, Avon Brilliant white 110lb cardstock
Also: Gold Embossing Powder, Gold Wink of Stella Pen, Salt
Double Holly
Posted: August 25, 2014 Filed under: CAS, Happy Holly, Holly Berries | Tags: CAS, Fabriano Watercolour Paper, Penny Black creative dies, Penny Black stamps, Tsukineko Memento inks 9 Comments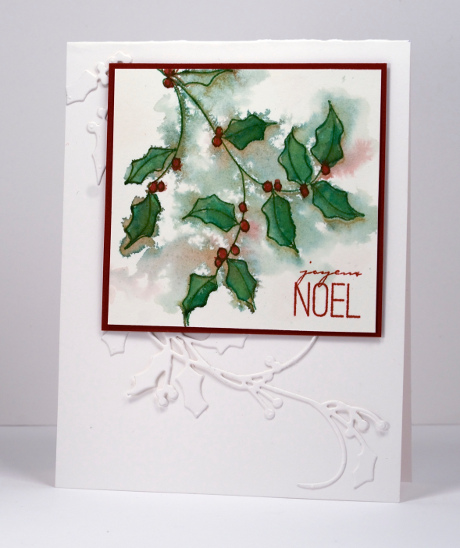
For the next little while at least I will be jumping between Christmas designs, autumn designs and last days of summer designs. I think some of you found the autumn theme of my last card a little much while it is still officially summer. I totally agree; I always hold onto summer as long as I can. I’m happy if I can wear shorts and summer dresses right through September!
Having said that here is another Christmas card. I created a little holly panel by stamping the “Happy Holly” stamp on damp watercolour paper. I inked the stamp with Memento markers then spritzed it and the paper before stamping. The ink bled into the paper straight away and I spread it even further with a water brush. When it was dry I restamped the holly image and painted the leaves and berries with ink from Memento ink pads. To finish I matted the panel in red, added a sentiment and popped it up over some holly die cuts. An adhesive sheet from Scrapbook Adhesives made it much easier to attach the die cut.
Supplies:
Stamps: Happy Holly, Joy Filled (PB)
Creative Dies: Holly Berries
Inks: Memento Rhubarb Stalk, Cottage Ivy inks & markers ( Imagine Craft/Tsukineko)
Also: 4×6 Adhesive Sheets (Scrapbook Adhesives)
Cardstock: Neenah Classic Crest Avon Brilliant White 110lb smooth , Fabriano 100% cotton hot pressed watercolour paper












