
Winter Wedding cards
Posted: January 6, 2025 Filed under: cricut, Gilding Flakes, Penny Black, Skyward | Tags: cricut, Gilding, Penny Black stamps 6 Comments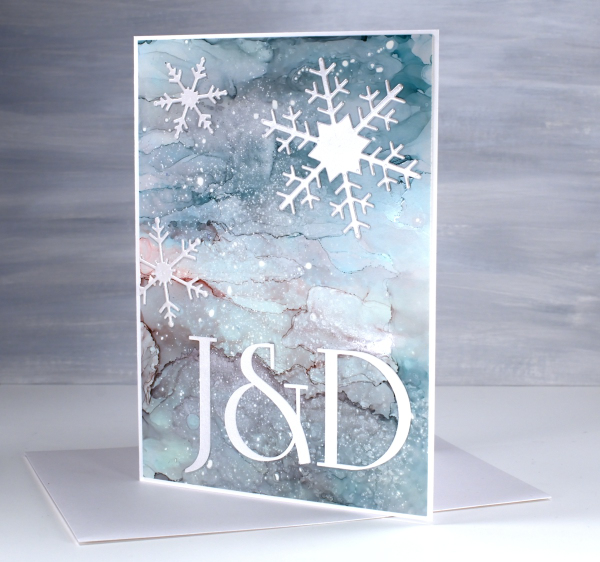
We attended a New Year’s Eve wedding last week and a couple of days before I realised I had no wedding cards on hand. I went to the ‘pile of possibility’ which is a shoebox full of panels yet to be made into cards. There are watercolour, alcohol ink, collage and stamped panels in the box.
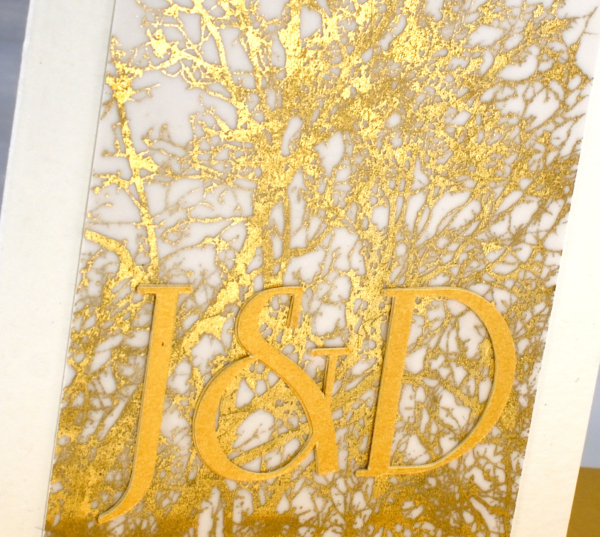
The galaxy style alcohol ink panel above caught my eye along with what I think is a stamped and gilded panel which you’ll see below. Both seemed fancy enough for wedding cards…but how to use them?
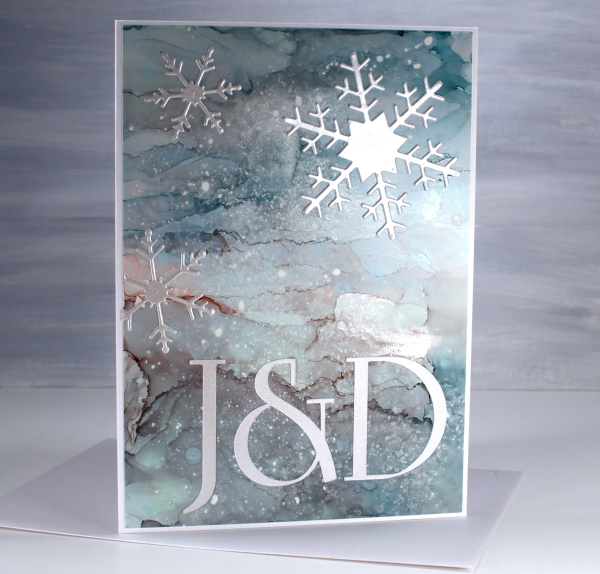
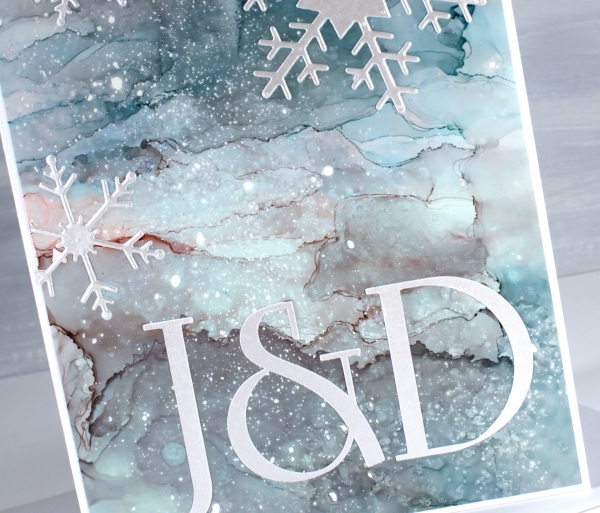
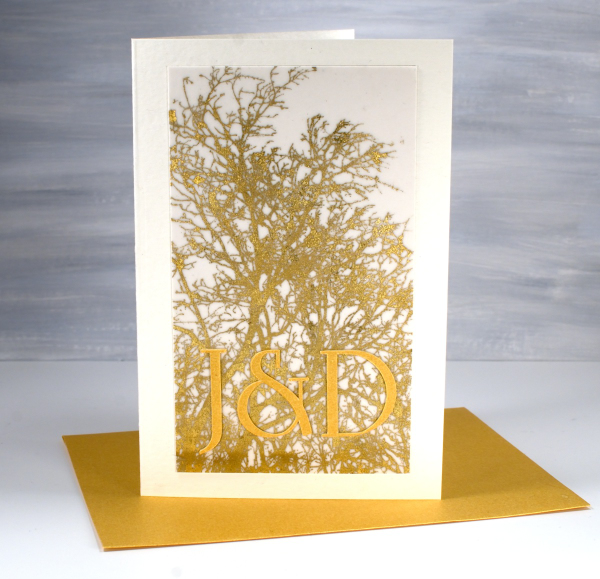
The gilded panel below was very pretty alone so I didn’t want to add much to it. The alcohol ink panel was also pretty but worked well with die-cut silver snowflakes.
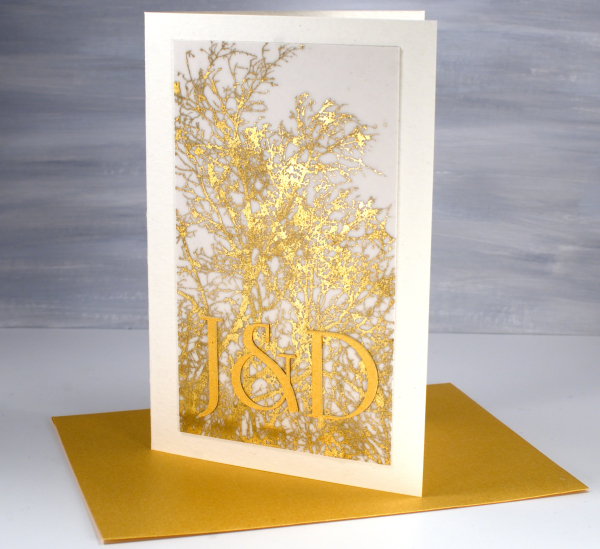
The panel on the card above features the Penny Black stamp ‘skyward‘ stamped on vellum with sticky glue ink and gilded either with foil or gilding flakes( sorry I can’t remember which.) It looked quite magical so I might just have to try and gild a stamped image again to see what happens. I hunted for a font that was similar to the one featured on the wedding stationery then cut initials using the cricut. The font I chose (which is not an exact match) is Linotype Rowena Pro Medium. I had a gold envelope which matched and a pearly silver one for the other card.
The wedding was lovely, ceremony at the church in the morning, party to ring in the new year at night!
Although it would have been good to have wedding cards on hand already I enjoyed customising these two for the bride and groom. And speaking of weddings, it is my wedding anniversary today. My husband and I were married on a summer’s day 35 years ago in Canberra. We looked a bit older and colder at last week’s wedding!

This post includes affiliate links from Foiled Fox. If you buy through these links I receive a small commission at no extra cost to you.
Gingerbread Set
Posted: December 10, 2024 Filed under: cricut, Echidna Studios, gingerbread set | Tags: cricut, Echidna Studios, Ranger Distress inks 3 Comments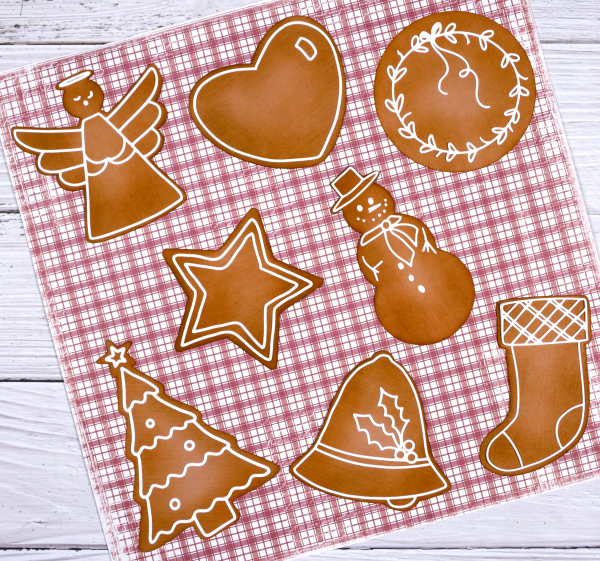
So far I have baked two batches of gingerbread for eating and cut one cardstock batch for card-making! The gingerbread set is a digital stamp and cut-file set from Echidna Studios and I have had a delightful time baking/making these samples.
I used the cricut to cut all the gingerbread shapes from a light brown cardstock which wasn’t gingerbread coloured. It was just for a test run. As it turned out when I blended rusty hinge distress ink over most of the cookies and vintage photo over just the edges the colour was very much like my real gingerbread!
I cut all the ‘icing bits’ on the cricut from white cardstock. I added double sided adhesive to the back before cutting so I wouldn’t have to use liquid glue for all that icing!
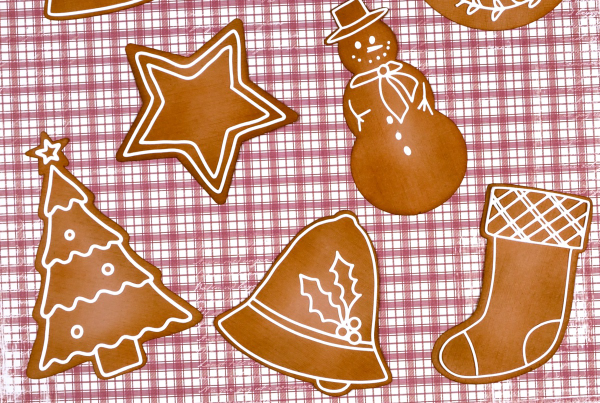
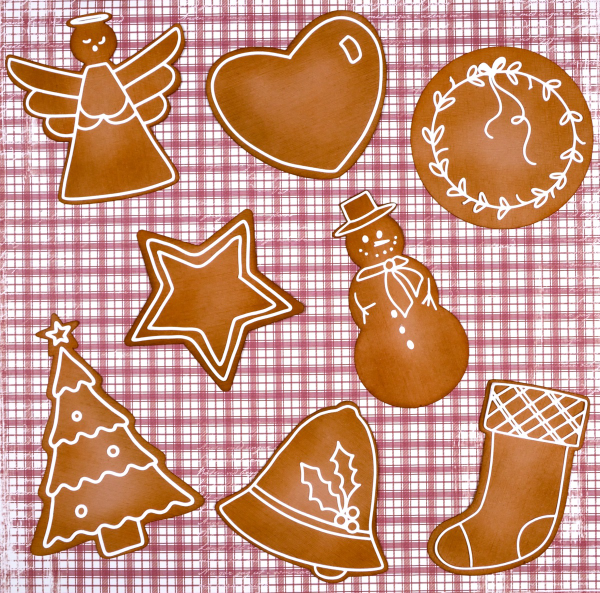
I don’t need nine gingerbread themed cards right now so I arranged eight of the cookies on cute check patterned paper for a photo and made the gingerbread man into a card.
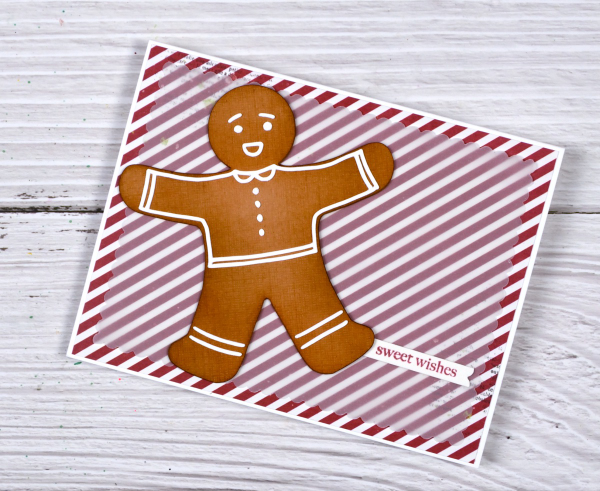
I glued two more gingerbread men to the back of the decorated one for more dimension and added him to my card. The festive striped paper is from Simple Stories ‘Simple Vintage Yuletide’ paper pad. To tone down the vibrancy a bit I layered a piece of vellum on top cut with scallop scissors which I still have from long ago. The sentiment is from the PB ‘holiday snippets’ set.

I might make a few more cards or perhaps use some of the ‘cookies’ as gift tags. For now I just think they look very cute on that check paper.
Vintage Stockings
Posted: November 26, 2024 Filed under: Christmas stockings digital stamp set, cricut, Echidna Studios, Gina K, holiday flora embossing folder, mittens | Tags: christmas, crafting, crafts, cricut, diy, Echidna Studios, Penny Black creative dies 4 Comments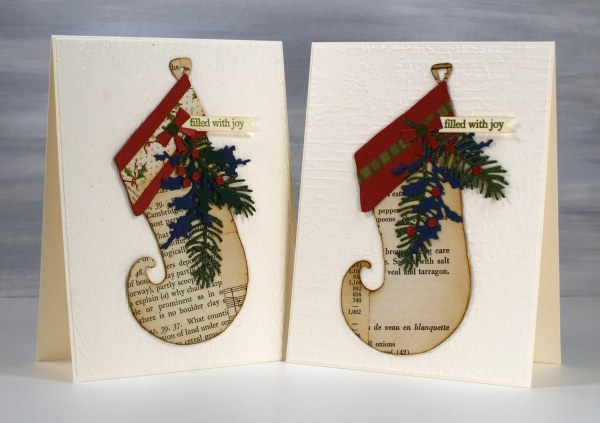
I have more vintage papers on display in today’s cards. These stockings are examples from my recent Bookish Christmas card class where we used book pages from carol books, dictionaries, recipe books and more to add a vintage charm to our cards.
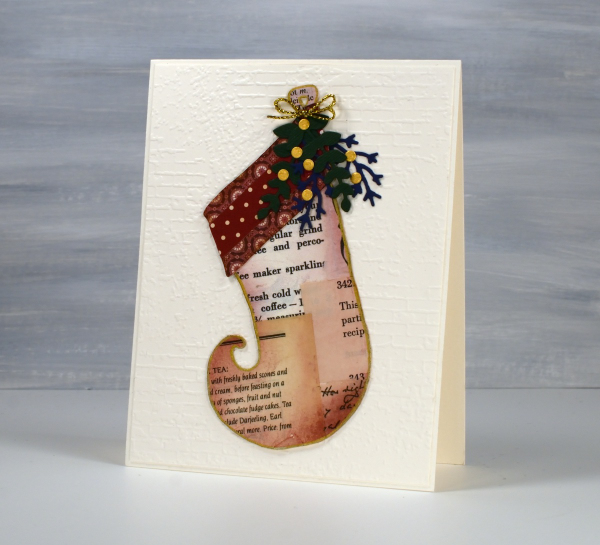
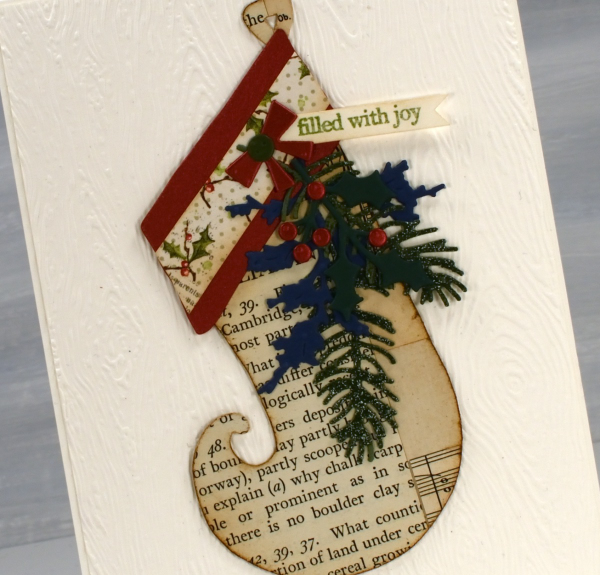
I collaged the vintage papers together then cut stockings from the collaged panels using my Cricut and the Christmas Stocking digital cutting file from Echidna Studios. I love the shape of this stocking my daughter designed; I think I mentioned last year, it makes me think of Narnia with that curly toe!
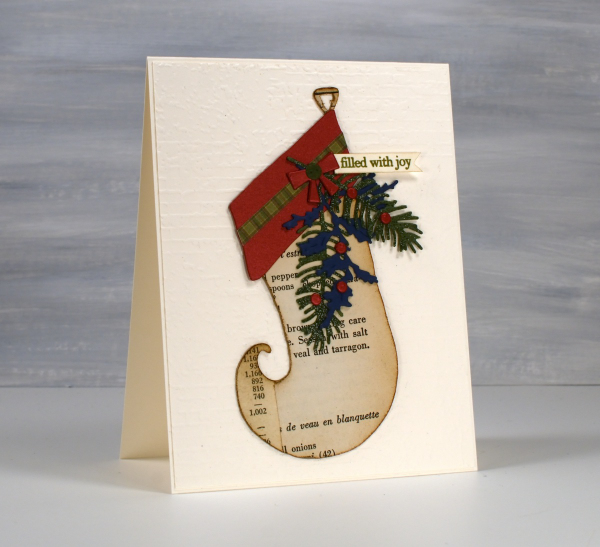
The cutting file includes a cuff for the stocking so I cut them from shimmer cardstock then added all sorts of foliage cut with Penny Black dies.
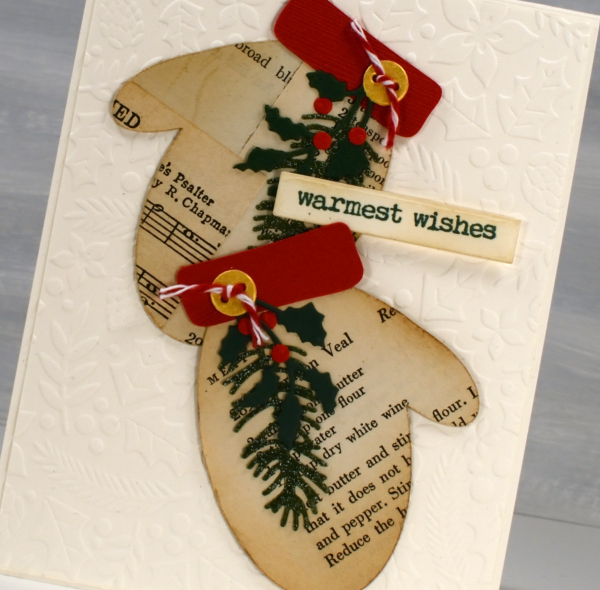
I hope you’re not tired of the mittens that I bombarded you with last week but as you see I also cut some from the collaged vintage papers and added some foliage, gold buttons and bakers twine.

I’ve been using a lot of embossed backgrounds in my Christmas cards this year. There are so many pretty ones including the Gina K ‘holiday flora’ one shown below and the Stampin up ‘exposed brick’ and ‘timber’ shown behind the stockings at the beginning of this post.
Today’s post features affiliate links to The Foiled Fox. If you buy through these links I receive a small commission at no extra cost to you.
Cozy Knitted Mittens
Posted: November 22, 2024 Filed under: cricut, Echidna Studios, mittens, my designs | Tags: cricut, Echidna Studios, Penny Black stamps 1 Comment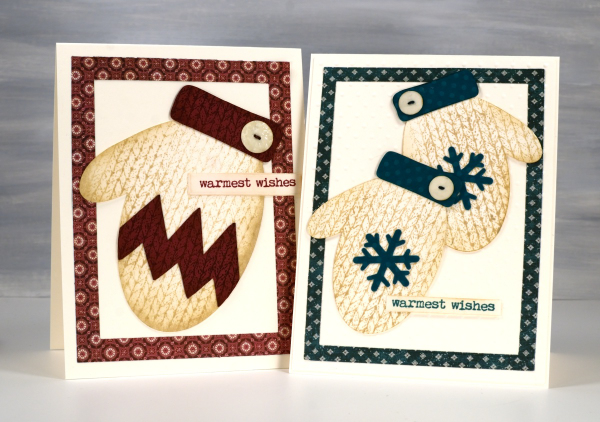
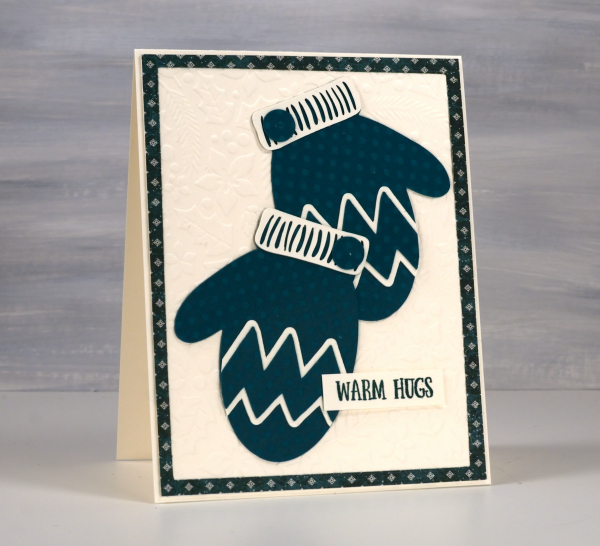
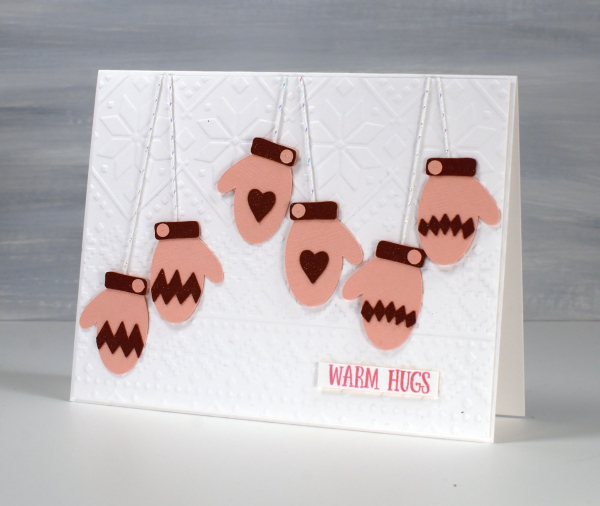
More mittens! To see mini mittens click over to yesterday’s post. I cut the mittens for today’s cards using the ‘Mittens’ digital stamp & cut-file set I designed for Echidna Studios etsy store. It’s the same set I featured yesterday but with a digital file I can cut whatever size I like. The large mitt is 4″ long and the two green mitts are 3″ long.
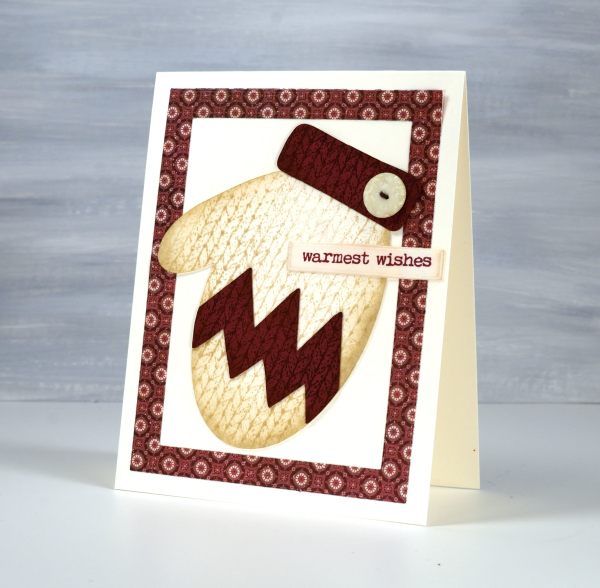
I cut them all from Neenah natural white cardstock along with some buttons. I cut the cuff and Charlie Brown style zig-zag from burgandy cardstock.
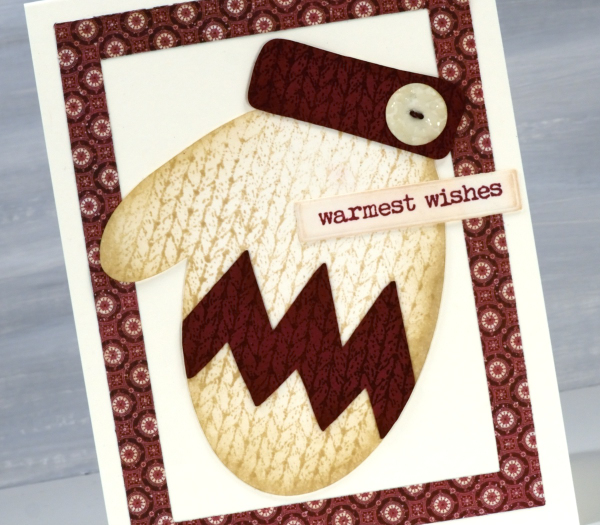
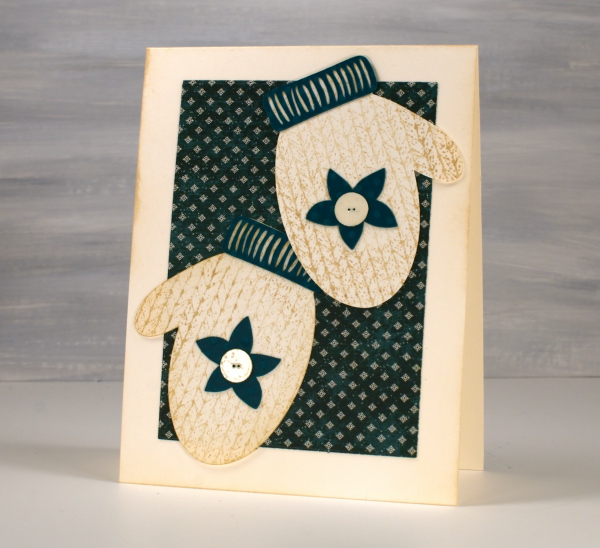
To get the knitted look I stamped the mitts in antique linen distress ink using the Darkroom Door ‘knitting’ background stamp and the cuff and zig-zag in aged mahogany ink. For some depth I blended ink around the edges.
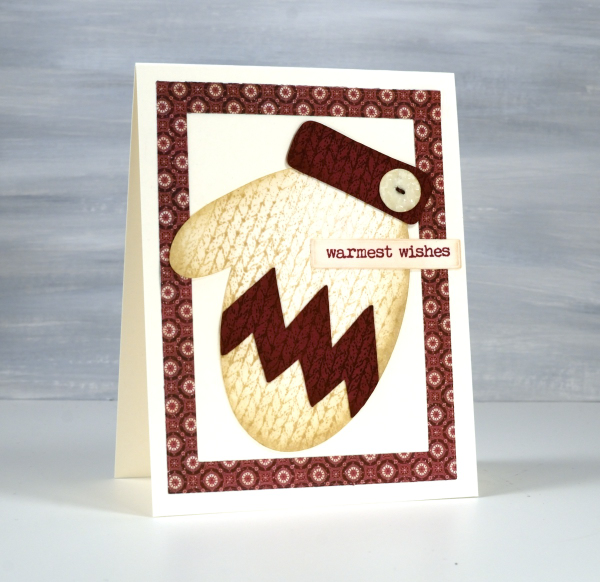
The little buttons continue to delight me so I embossed them with clear embossing powder then coloured some thread with distress markers and threaded it through the little holes.
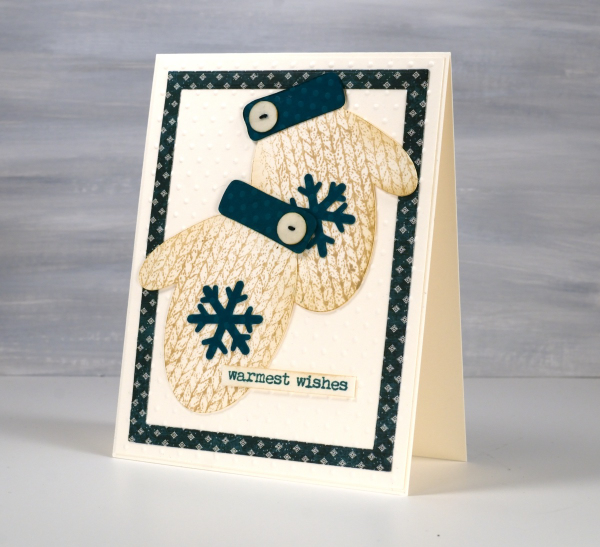
I found Christmas patterned paper from a Graphic45 pad and cut frames using the Waffle flower A2 layer dies. For the green cuffs and snowflakes on the pair of mitts below I used some textured polka dotted cardstock along with an embossed dotted background.
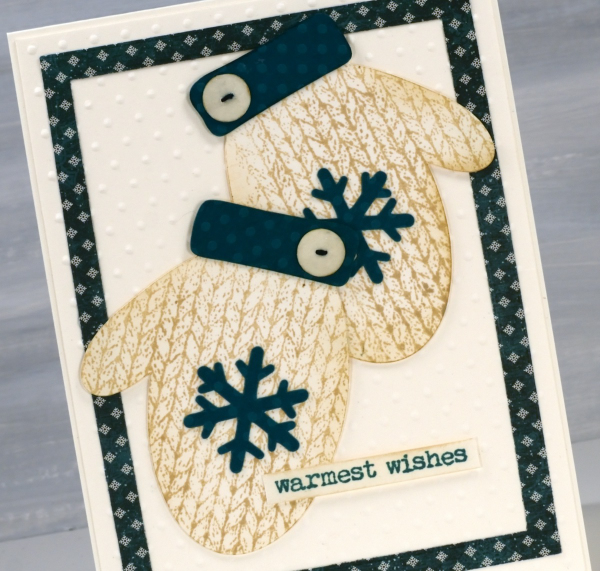
Once again the ‘warmest wishes’ sentiment from ‘Merry Up‘ seemed the best choice and could work any season mitts are worn!
As you can see I am struggling to move on from making mitten cards. Thanks for dropping by.
Mini Mittens
Posted: November 21, 2024 Filed under: cricut, Echidna Studios, mittens, my designs, ski lodge embossing folder, Spellbinders | Tags: cricut, Echidna Studios, Penny Black stamps, Spellbinders 9 Comments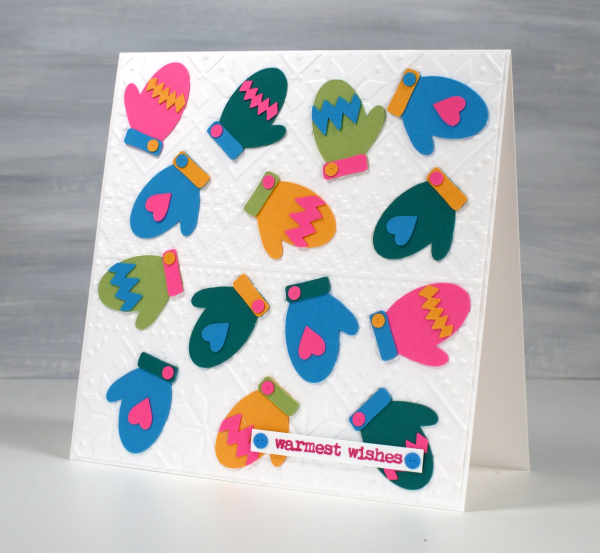
I do like an alliterative title but I restrained myself from calling this post Many Mini Mittens! I designed these mittens and accessories as cutting files for the cricut and I’m having so much fun with them. The Mittens digital stamp & cut-file set is available in the Echidna Studios etsy store. When I taught my bookish Christmas card class recently I had a cool stocking to cut from vintage papers but no mittens. To begin with I just designed the mitt and the cuff but I couldn’t stop so now the digital set has a heart, a poinsettia, diamond pattern, a zig-zag pattern, a snowflake, two cuffs and a little button. The buttons are too sweet.
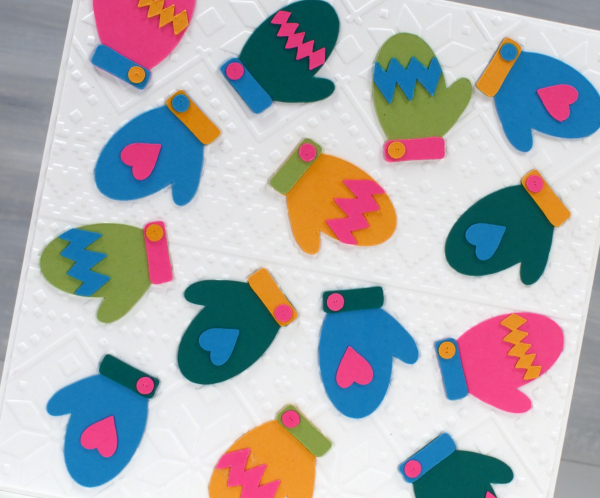
This colourful card started as an experiment to see how small the cricut would cut the mitts without tearing them. These little mitts are 1¼” in length; everything else is obviously smaller and cut just fine.
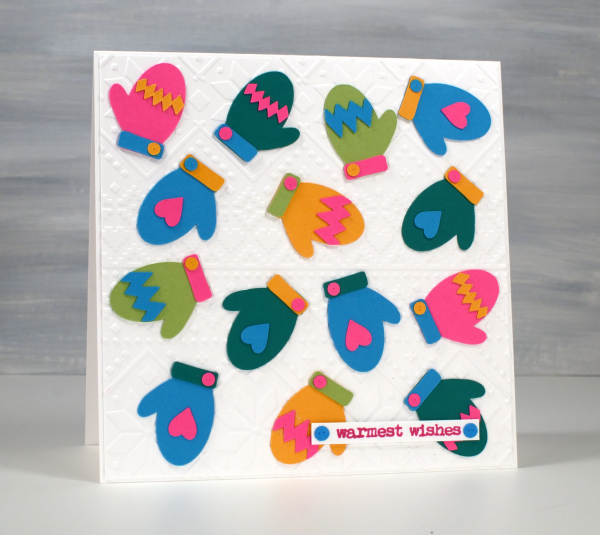
I had fun arranging the elements on the mittens so there wasn’t too much of one colour or repetition of the same coloured patterns. I did create them in pairs because who wants a whole bunch of unmatched mitts? I’ve experienced that in our own mitt basket – why so many right mitts and no left mitts?!
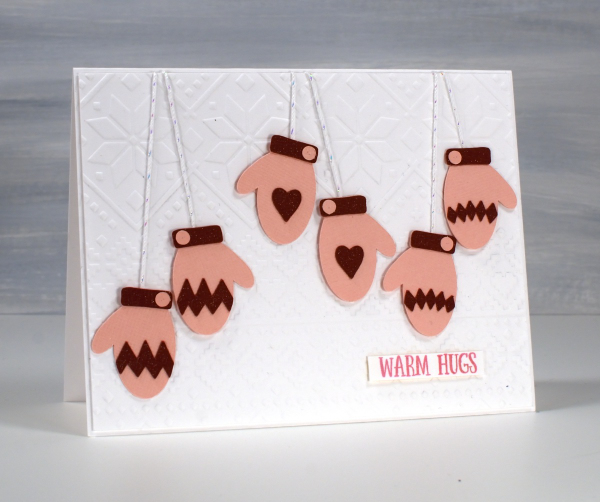
And because I couldn’t stop I cut some matching pairs the same size but using linen textured pink and burgandy cardstocks. I used a clear wink of stella brush pen to make all the burgandy bits sparkle but as I write this I see it didn’t show in the photo. Trust me it adds to the cuteness. ( I had forgotten about my wink of stella pens)

For both cards I used Spellbinders ‘ski lodge’ embossing folder to make a background because ❄! I found suitable Penny Black sentiments from the ‘Merry Up‘ set. Come back tomorrow and I will share the larger, knitted mitten cards I also made with this digital set.
Stencils + Alcohol Inks
Posted: July 5, 2024 Filed under: Alcohol Ink, brush lowercase alphabet, coloring book stencil, cricut, grafix, Picket Fence, Spellbinders | Tags: Alcohol Ink, cricut, grafix craft plastic, picket fence, Spellbinders 6 Comments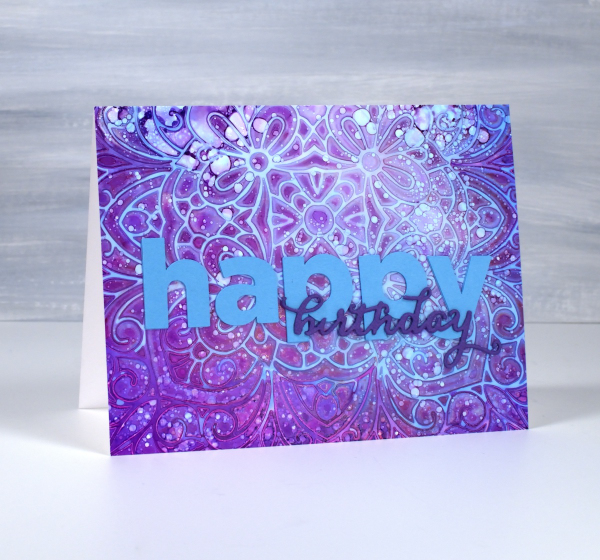
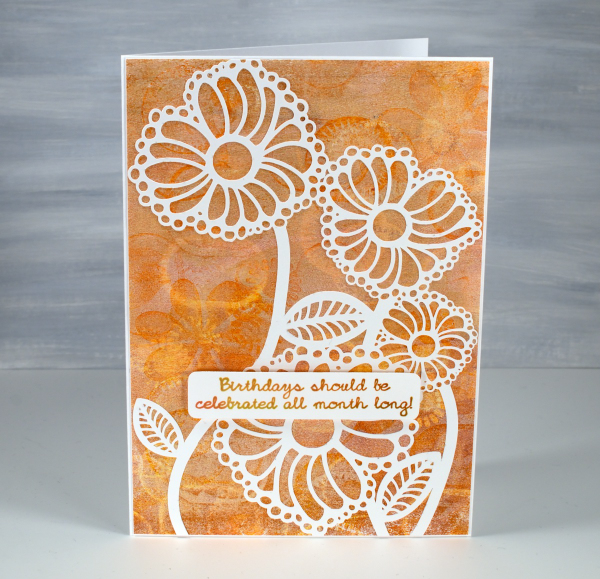
An amazing thing happened with this card. It arrived on the birthday, after being sent from Canada to Australia by an unreliable sender(me)! So now the recipient has it I am posting it here on the blog.
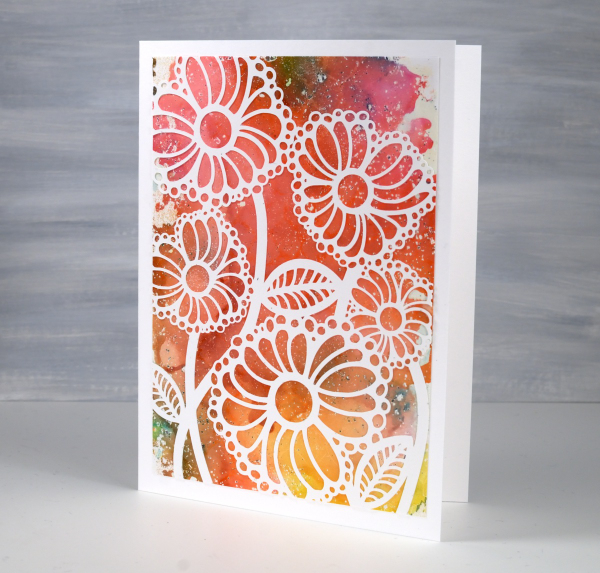
I have shared cards made with this technique before; it’s a fun one. I used alcohol inks on Grafix white craft plastic and for both cards I only used two inks along with isopropyl alcohol.

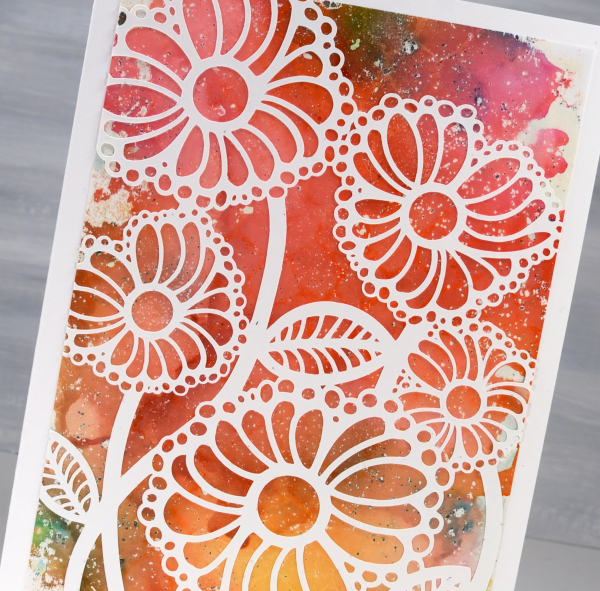
I start with a layer of isopropyl alcohol on the panel, then add a couple of alcohol inks and tilt the panel to move the inks and cover the whole panel. Next I drop a stencil on top, for both these cards I used the Picket Fence ‘coloring book’ stencil; it’s 6″x6″ so the panel was larger than needed for my finished card.
Because the ink is trapped under the stencil it takes a while to dry. Sometimes I help it along with an air pump, not a heat tool. When it is dry I like to splatter some isopropyl alcohol lightly over the panel to get little dots here and there. I don’t flood it because that would take me back to the beginning of the process. When the ink is dry I lift the stencil to reveal the intricate pattern, then choose which part of the panel I want for my card front. If I don’t like the finished panel I add more isopropyl alcohol and tilt the panel to dilute all the ink and start again. That is the beauty of working on grafix white craft plastic; you get second chances and even third or fourth if you’re fussy like me!
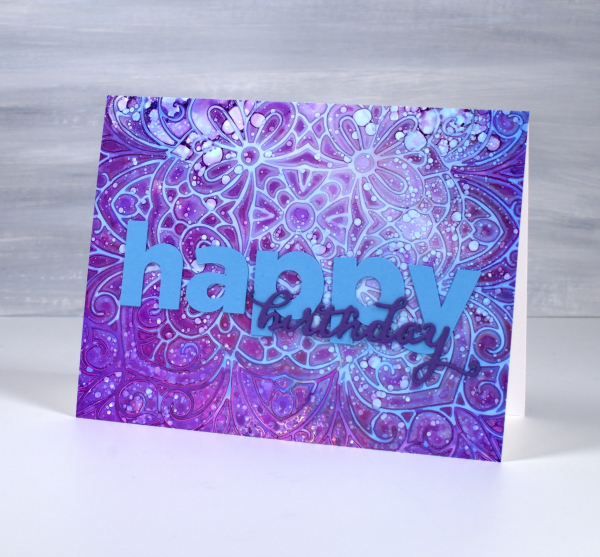
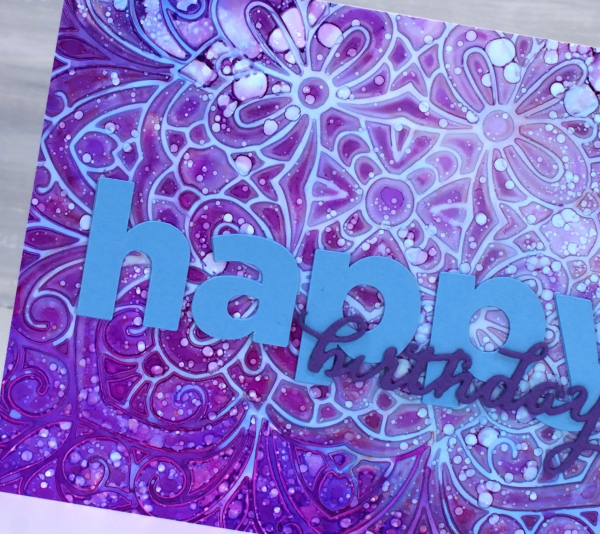
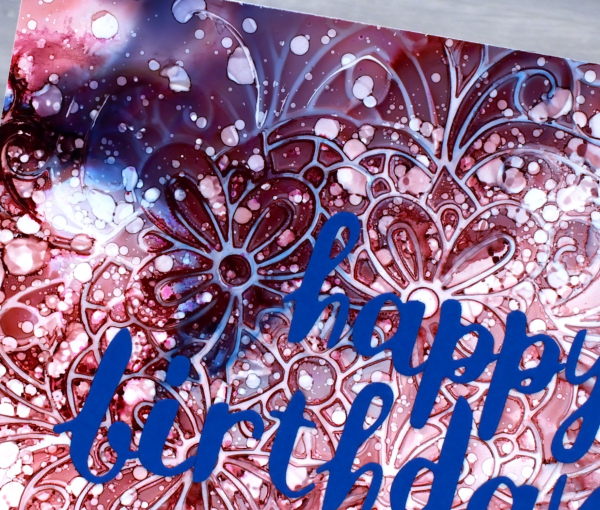
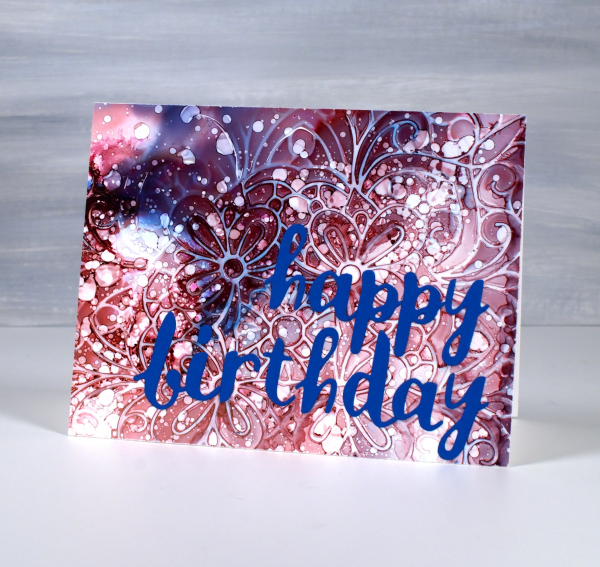
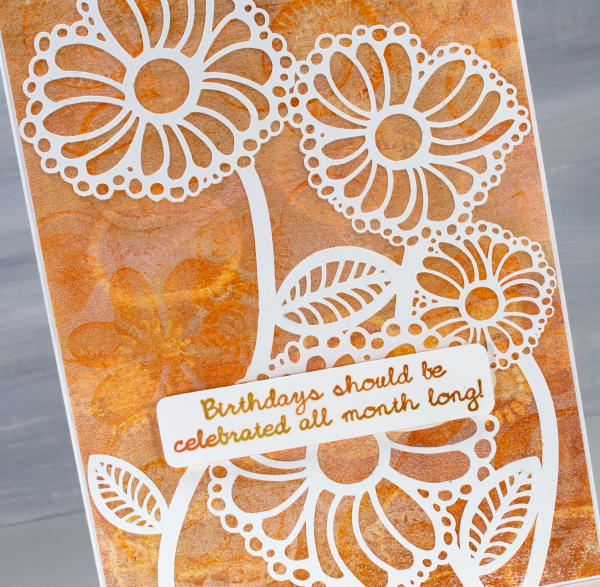
The sentiment on the card above is a combination of cricut letters and a Penny Black birthday die. On the card below I used the Spellbinders brush The sentiment on the card above is a combination of cricut letters and a Penny Black birthday die. On the card below I used the Spellbinders brush lowercase alphabet dies.
Hello Leaves and Lines
Posted: April 19, 2024 Filed under: cricut, Echidna Studios, gel press, leaves and lines | Tags: cricut, Echidna Studios, gel printing, gelli plate, Penny Black creative dies 2 Comments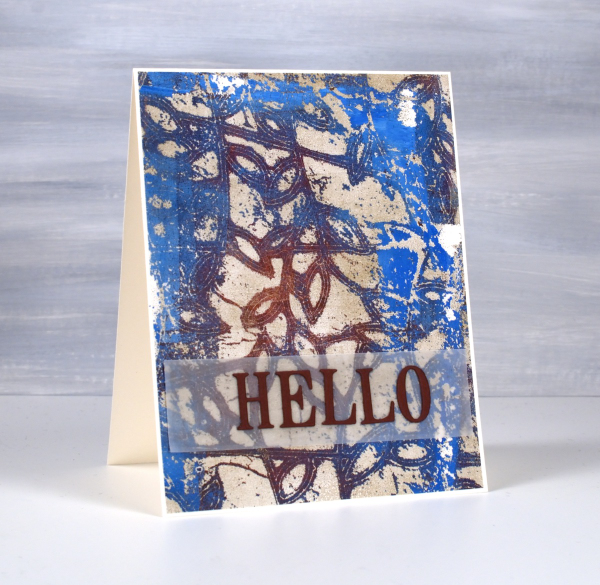
This distressed multicoloured look is one of my favourite gel printing looks. I don’t know that I could recreate it but I usually get at least a couple of these aged looking prints during a gel printing session. The pattern is achieved using a stencil laid over paint on the gel plate. This stencil is called ‘leaves and lines‘ and the digital file is available from Echidna Studios etsy store. To make today’s card I cut a 5″x 6″ stencil from Grafix matte duralar using my Cricut. I also cut it as a larger stencil which I used for a print you can see here.
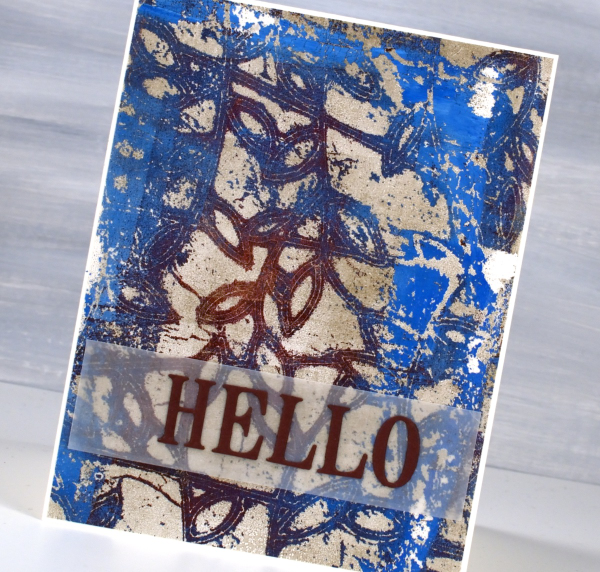
You can see on this print that I used a maroon paint and a bright blue paint; the darker blue is a mix of the two colours. I pulled the print with a pale gold paint so the surface has a bit of shimmer to it.
Because the background is very busy I placed the Penny Black ‘hello’ die-cut sentiment on a strip of vellum to stop it from getting lost in the leaves and lines. This post includes affiliate links from Foiled Fox. If you buy through these links I receive a small commission at no extra cost to you.
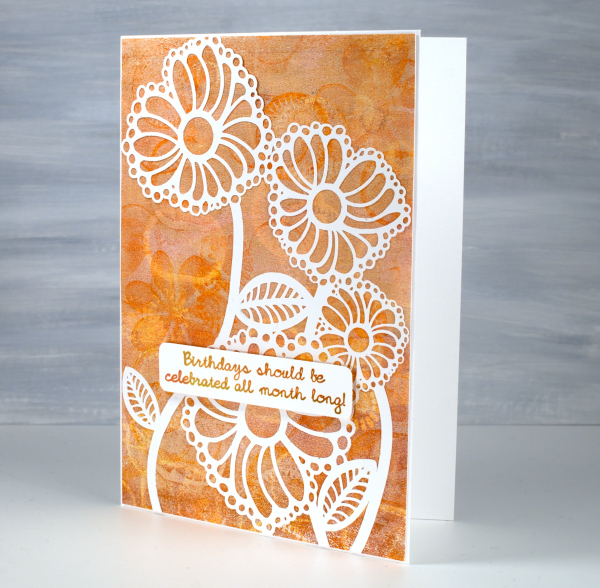
Bubble Flowers
Posted: February 29, 2024 Filed under: bubble flowers, cricut, Echidna Studios, gel press, grafix, Taylored Expressions | Tags: cricut, Echidna Studios, gel printing, grafix, Taylored Expressions 3 Comments
Aren’t these happy flowers? The design is called ‘bubble flowers‘ for obvious reasons and is one of mine. I was inspired by a vintage brooch. The digital design is available in the Echidna Studios etsy store and can be cut on a digital cutting machine as I have for today’s cards. It can also be printed, foiled and cut as a stencil for blending or gel printing. Do you get the idea you’ll be seeing more of the bubble flowers?
I cut the bubble flowers from thin white cardstock and you can probably tell there are some tiny cuts necessary. If I went much smaller than this I started to lose some of the bubbles so I kept it big enough for a 5″x7″ card.
The backgrounds for both cards are gel prints. The multicoloured one above was created with alcohol inks then pulled with white acrylic paint. It was so pretty I didn’t want to cut it up or cut it down, hence the large card with a layer over the top.
The second background panel was all done with acrylic paints and a selection of objects to add texture. I can see one of my die-cut stamps, some chocolate tray shapes, lid shapes and other found textures. I cover a wide range of techniques in my Gel Print Journey class and I think this might have been a print I did just as we finished filming. All my online classes are currently on sale 40% off by using the code LEAPYEAR40 at checkout or by simply clicking the link above.
Because the bubble flowers are a delicate and detailed cut-out I used Grafix Artist Tac to glue them down. Once I had pressed the image onto the background I ran it through my die-cutting machine to burnish it. (quicker than doing it by hand). The sentiment is one I totally agree with and is from Taylored Expressions ‘In & Out Birthday’ set. Thank you for your lovely messages about our family’s February festivities; it was fun to share them with you in my previous post.
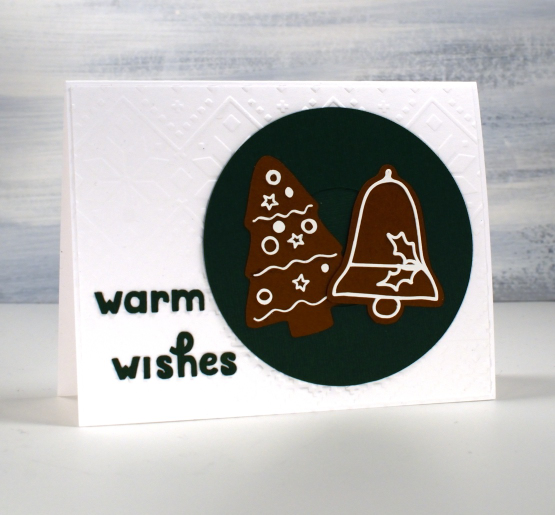
Cosy Cocoa & Cookies
Posted: December 15, 2023 Filed under: cocoa and cookies, cricut, Echidna Studios, Spellbinders | Tags: cricut, digital stamps, Echidna Studios 1 Comment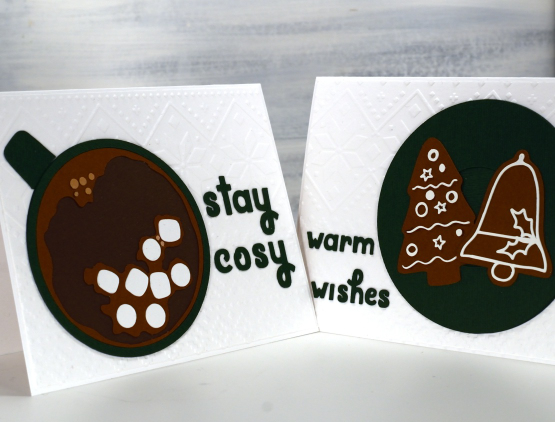
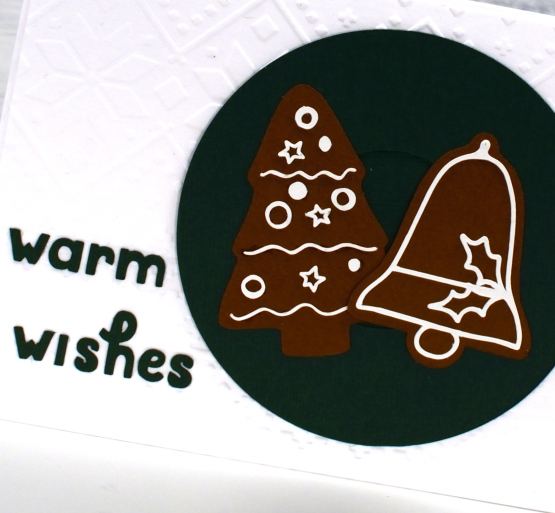
It’s hot chocolate season and my husband has already made a rich, yummy Mexican hot chocolate on two occasions. The cocoa and cookie cutting files from Echidna Studios are almost as appealing as the real thing! I have also made my first batch of gingerbread including plenty of tree and bell shapes.
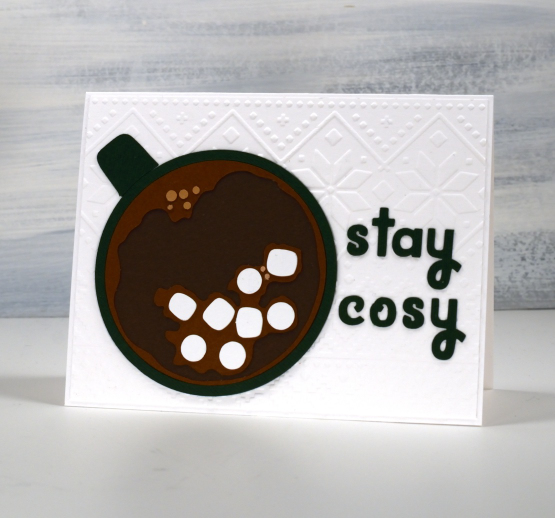
These birds eye views of a mug and a saucer of cookies cut beautifully in different colours for layering a cup of cocoa complete with bubbles and marshmallows and a saucer of decorated gingerbread cookies.

My mug and saucer are dark green even though they might look black and I used three different shades of brown cardstock for the cup of cocoa. I thought the ‘ski lodge‘ embossing folder from Spellbinders made an appropriate background. My sentiments are also cut from green cardstock using the free ‘Agent Q’ font from Cricut design space.
For these cards I cut the image out on the cricut but the files can also be printed for colouring.
Today’s post features an affiliate links to Scrap’n’Stamp. If you buy through this link I receive a small commission at no extra cost to you.
Bethlehem Skyline
Posted: November 30, 2023 Filed under: Bethlehem skyline, cricut, Echidna Studios, Penny Black, Silent Night | Tags: cricut, Echidna Studios, Minc, Penny Black stamps, sennelier watercolours 9 Comments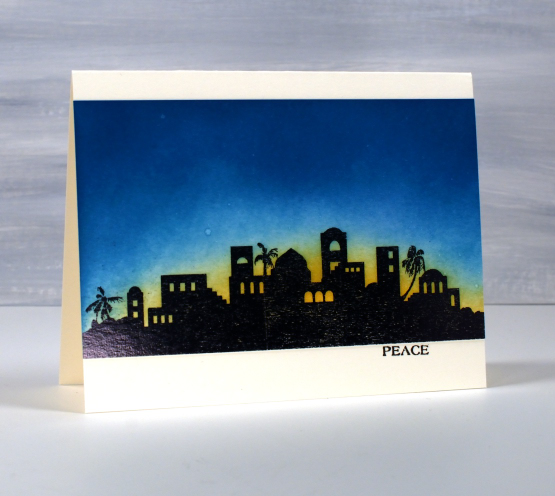
Today’s post is another long one full of photos. I hope you enjoy seeing the different styles and techniques applied to the new Echidna Studios digital set ‘Bethlehem Skyline‘. I requested this image and I think my daughter did a beautiful job with her design. The set includes a black silhouette and an outline image featured further down this blog post.
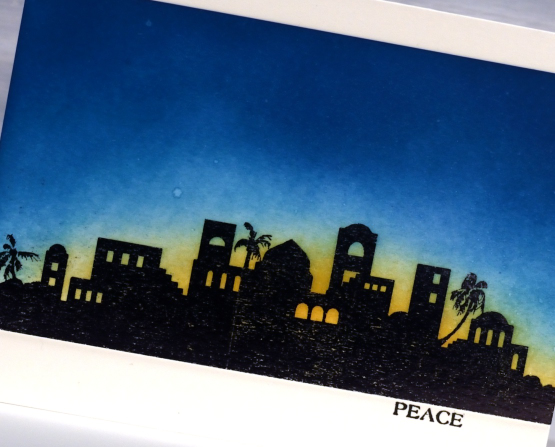
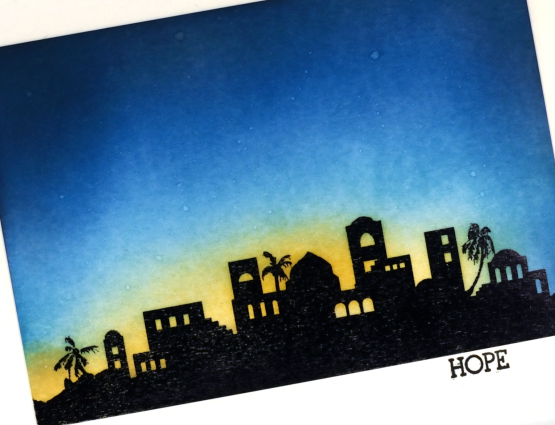
To create these first two cards I printed the silhouette image on white cardstock then foiled over the top with black foil. Using blending brushes I blended first scattered straw distress ink then broken china, and finally uncharted mariner for the deep blue sky. I wanted the colours to blend into each other but I didn’t want too much green where the blue and yellow met so I went carefully in that area.
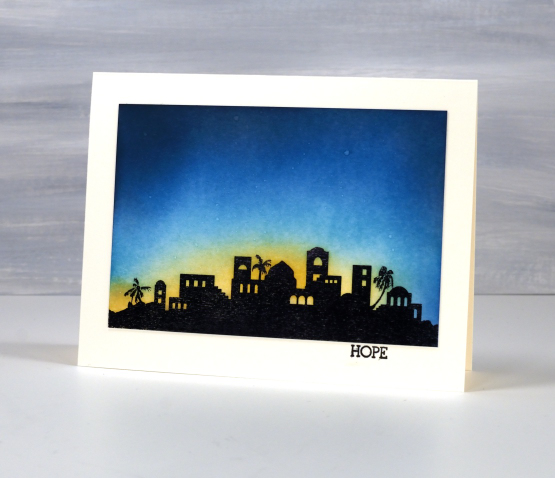
The sky was dark but I wanted a bit darker so blended just a bit of black soot ink around the edges and top of the panel. You might have noticed the image is the same but a different size in each card; that’s the beauty of a scalable digital image. To add stars to the blended sky I spritzed a fine spray of water on the panel and then dabbed it dry with a paper towel. The stars are subtle but they are there. The words Hope and Peace are once again from the PB ‘holiday snippets’ set.
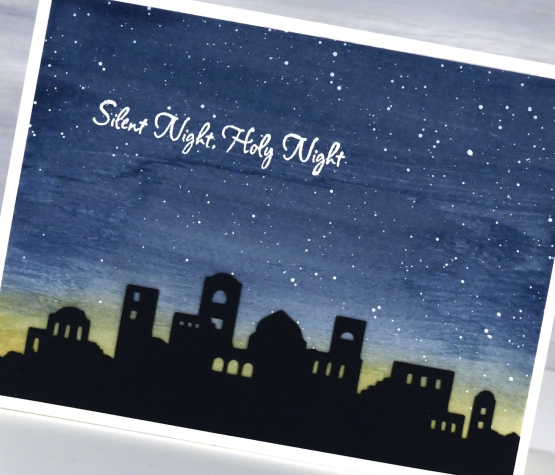
The next style of card features a cut out of the Bethlehem skyline once again using the digital svg file but cut from black cardstock with the cricut. After cutting the silhouette a couple of times we realised the trees were too small for a card sized cut out so added a tree-less image to the set.
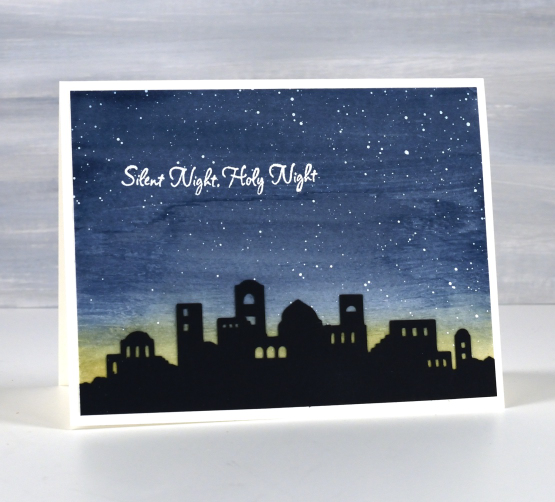
I painted a blue and yellow sky with Sennelier watercolour paints then, once dry splattered white acrylic ink over the blue area. When that was dry I attached the black silhouette and embossed a sentiment from the PB set, ‘silent night’.
When cutting the silhouette from black cardstock I also cut a larger one which I have wrapped around cylindrical glass vase. I put a candle inside the vase and lit it but I am not sure whether the candle is bright enough. I am going to keep experimenting and if I can get a good photo I will share it here on the blog. I think the image would look great cut from vinyl and attached to a wooden panel as a nativity sign. Oh the possibilities!
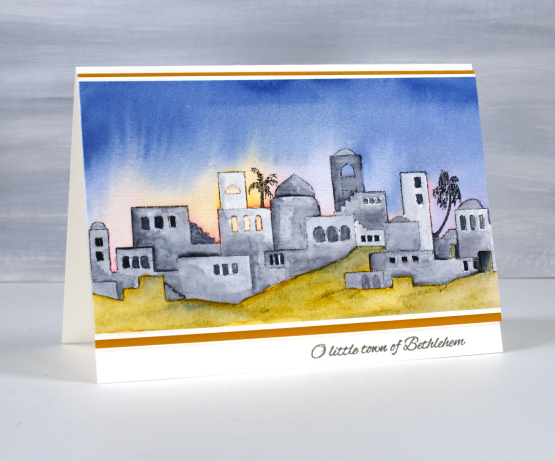
The final card features the other image in the set, an outline of the Bethlehem skyline. I printed it on hot pressed watercolour paper then painted over the buildings with liquid frisket to mask them. The masking made it possible to paint the sky with wet watercolour layers of blue, pink and yellow while preserving the town to paint after the sky dried. To get the soft bleed of pink and yellow into blue I set the panel upside down on the top edge to dry so gravity helped me get the glowing light effect.
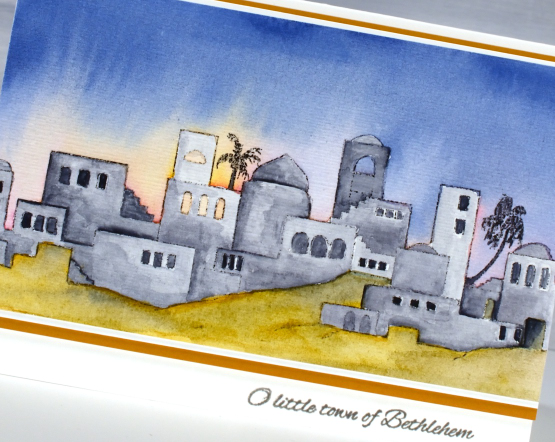
I used a mustard yellow to paint the foreground but it was too bright so I added some of the same blue from the sky to give it some shadow. With both the sky and ground completed I removed the liquid frisket(masking fluid) and painted the buildings with Payne’s grey.

I finished the card with a mat of white then a mat of mustard brown and a little PB sentiment in versafine clair ‘morning mist‘ ink. Thanks for reading this far. I hope you enjoyed my different techniques with this lovely image. I think you’ll be seeing it again; its a new fave!
Today’s post features affiliate links to the following companies. If you buy through these links I receive a small commission at no extra cost to you. The Foiled Fox & Scrap’n’Stamp


