
In the Garden: A Bird on a Branch
Posted: June 10, 2015 Filed under: Dancing Blooms, Winged Beauty | Tags: Penny Black creative dies, Penny Black stamps, Ranger Distress stains, Tsukineko Memento inks 8 Comments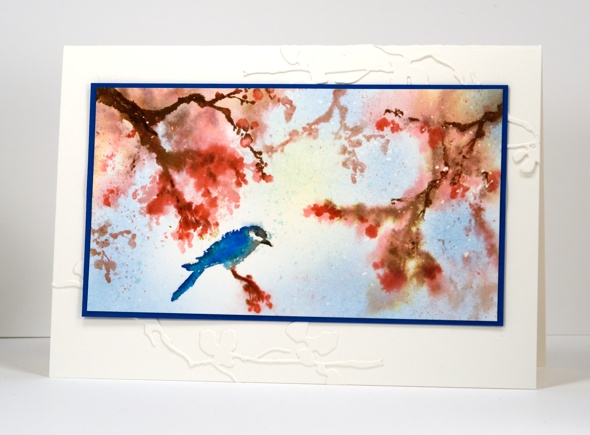
My ‘In the Garden’ mini-series continues today with even less botanical information than yesterday. I can tell you the stamp does in fact feature ‘a bird’ which I inked in blue because birds do come in blue and a branch which I inked in the fairly safe colours, pink and brown. If you are looking for accurate flora and fauna details you have come to the wrong place. I can however tell you how I created this little garden scene. The purpose of my mini-series is to show you some of the smaller floral stamps from the ‘Sunshine and Smiles’ release. Penny Black has brought out some fabulous large floral stamps this year but you can make beautiful cards with the little ones too.

The card above was made using two little slapstick cling stamps from the ‘Winged Beauty’ set. Two of the stamps have the same blossomy foliage so I used them repeatedly to fill the space adding the bird once at the end. I began with watercolour paper speckled with masking fluid. I wet the panel, inked the branches with distress stains and markers and stamped onto the panel. The colour bled out into the surrounding area. When the ink was almost dry I stamped the branches again achieving more defined results. I added the bird when the paper was dry and blended the colour on its feathers. To finish I added a few splatters and some blue and yellow sponging for the sky. I matted in blue cardstock and added a few die cut branches to the cardbase.
I finally filled our bird feeder and hung it in the back yard last week and I think the word is getting around again that there is seed to be had. Unfortunately the squirrels always end up hearing about the free food too and then it doesn’t last very long.
Previous ‘ In My Garden’ cards here and here.
Supplies:
Stamps: Winged Beauty (PB)
Creative Dies: Dancing Blooms (PB)
Inks: London Fog, Rich Cocoa, Baham Blue, Danube Blue, Tuxedo Black Memento Markers, Summer sky, Dandelion Memento ink (ImagineCrafts/Tsukineko) Festive Berries, Worn Lipstick distress stains (Ranger)
Cardstock: Fabriano 100% cotton hot pressed watercolour paper, Blue cardstock
In the Garden: Astilbe
Posted: June 9, 2015 Filed under: Floral & Feathers | Tags: Penny Black stamps, Ranger Distress stains 8 Comments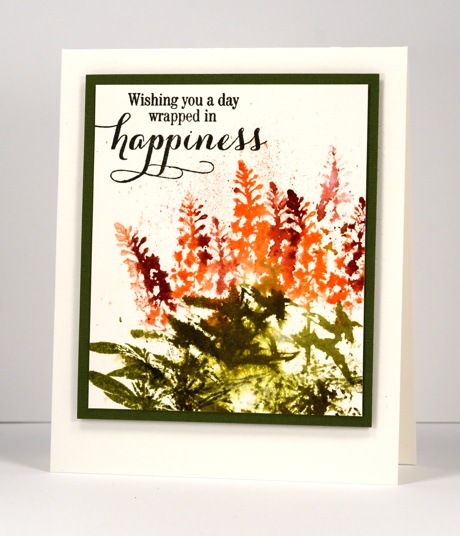
The second of my ‘in the garden’ flowers was harder to identify than the first. The stamp is a silhouette so I have to go by the shape rather than any details. It could be several plants but for the purposes of this post I am labelling it ‘Astilbe’ as seen in the photo here.
The technique for this one is smoosh, stamp, spritz and splatter with distress stains whereas yesterday’s was more controlled swipe, stamp, then paint. When using distress stains to ink a stamp you can’t guarantee an even coverage like you get with an ink pad; I like the unpredictable light and dark and the wetter and dryer areas too. You can’t see in this picture but some of the spritz was pearl-ex and water so there is a subtle gold sheen to the leaves and flowers.
Supplies:
Stamps: Floral & Feathers, Sprinkles & Smiles (PB)
Inks: Forest Moss, Ripe Persimmon, Aged Mahogany distress stains (Ranger) Versafine Onyx Black (ImagineCrafts/Tsukineko)
Cardstock: Fabriano 100% cotton hot pressed watercolour paper, Green cardstock
In the Garden: Magnolias
Posted: June 8, 2015 Filed under: Florets | Tags: Penny Black stamps, Ranger Distress stains 12 Comments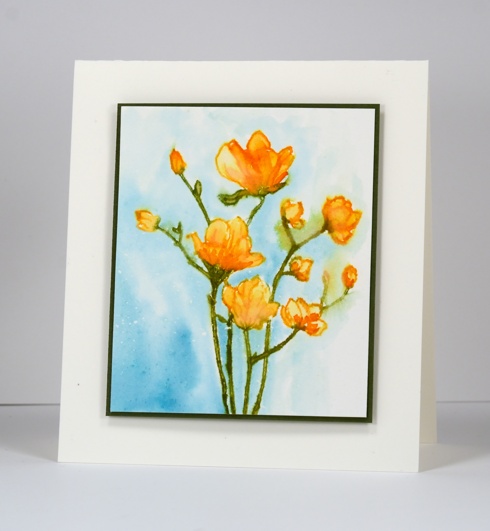
I have the first card in a mini-series of cards for you featuring smaller floral stamps. I’m starting with the branch of magnolia blooms from the ‘Florets’ transparent set. I used the technique shown in my watercolour with distress stains video tutorial where I ink the stamp directly with distress stains and markers then take advantage of the liquid nature of the stain to paint inside the petals and stems. I inked the stamp with a yellow and an orange distress stain as well as a green marker for the stems, stamped on watercolour paper then filled in all the petals with a paintbrush. When the image was almost dry I painted the blue background. I say almost because in places the stamped image bled into the background, an effect I quite like in moderation. I chose orange as my colour scheme without checking whether magnolias come in orange but apparently they do.
In my real life garden progress is being made this year primarily due to my daughter’s efforts while she is not yet working full time. She has done a ton of weeding, picked up some free plants at a plant swap and started putting some in. I have weeded then planted several herbs in hope of cooking with fresh not dried this summer. We even have a few tomatoes growing. Nothing like the garden efforts of my parents but it is something!
Supplies:
Stamps: Florets (PB)
Inks: Broken China, Spiced Marmalade, Scattered Straw distress stains & Forest Moss distress markers (Ranger)
Cardstock: Fabriano 100% cotton hot pressed watercolour paper, Green cardstock
Morning Glory
Posted: June 2, 2015 Filed under: Trumpet Song | Tags: Penny Black stamps, Ranger Distress stains 5 Comments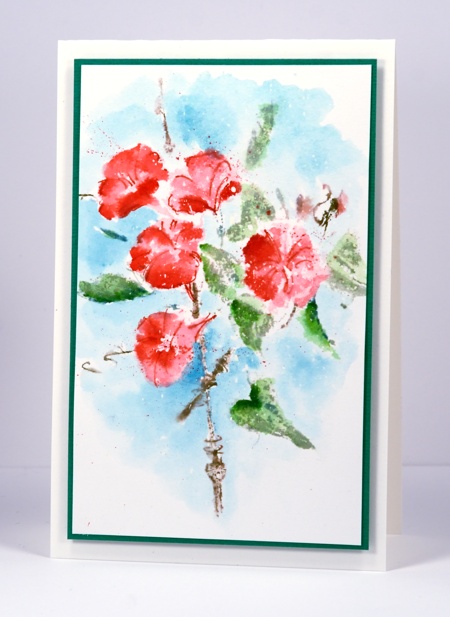
It seems like an age since I sat down and ‘played’ with stamps and ink. I pulled out the ‘Trumpet Song’ stamp to try it with distress stains. Last week’s card with the same stamp was done with Memento inks and retained more of the definition in the stamp. Using distress stains I lost some of the veins and details in the flowers and leaves so I painted some extra colour onto both then added some veins with the pen tip of the distress marker. The image was stamped on watercolour paper which had some masking fluid splatter on it (that’s what makes the tiny white dots). I painted some distress stain around the image fading it out with water at the edges.
Kathy Racoosin is doing her second 30 day Coloring Challenge during June so I hope to participate every few days at least. Although my method of colouring today is one of my favourite techniques I hope to take the challenge to use some techniques and mediums that I haven’t used in a while.

Supplies:
Stamps: Trumpet Song (PB)
Inks: Broken China, Barn Door, Worn Lipstick, Spun Sugar, Bundled Sage, Mowed Lawn distress stain, Pine Needles, Barn Door, Frayed Burlap distress markers (Ranger)
Cardstock: Fabriano 100% cotton hot pressed watercolour paper, Green textured cardstock
Also: Winsor & Newton masking fluid
Church on a hill
Posted: June 1, 2015 Filed under: Watercolour | Tags: Faber-Castell Albrecht Durer Watercolour pencils, Fabriano Watercolour Paper, Kuretake Gansai Tambi watercolour paints 20 Comments
This year marks twenty five years of ministry for the pastor of our church. He arrived in Ottawa shortly before we did in 2000 and our families have been friends ever since. His wife asked me if I would make a card for the occasion with a church on it. I looked through my stamps but the only church stamp was a snowy scene which was mainly trees with a snow laden church in the distance. As we are pretty happy to finally be free of snow I decided against using that stamp. I attempted a painting instead and found several church images as inspiration then combined elements from a few and set my church on a tree filled hillside. Rather than obscure some of the scene I printed the words on vellum and wrapped it round the painted panel. I used my gansai tambi watercolour paints for most of the painting then switched to watercolour pencils to add finishing touches.
Supplies
Cardstock: Fabriano 100% cotton hot pressed watercolour paper, Neenah Natural White 110lb cardstock, Neenah Epic Black cardstock, rust cardstock, vellum
Also: Kuretake Gansai Tambi watercolour paints, Faber-Castell Albrecht Durer watercolour pencils
Trumpet Song
Posted: May 29, 2015 Filed under: Stitched Edges, Trumpet Song | Tags: Penny Black creative dies, Penny Black stamps, Tsukineko Memento inks 11 Comments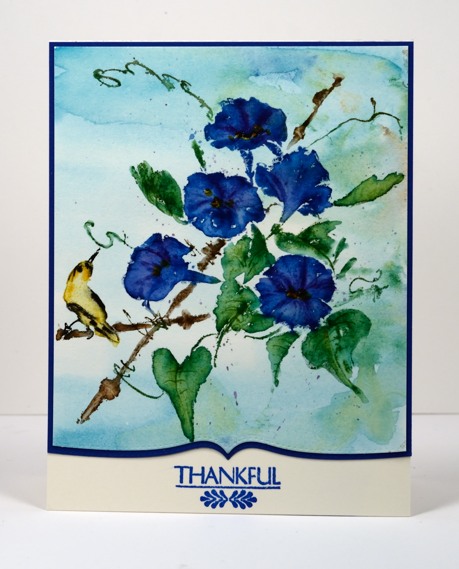
Thanks for joining me this week as I showcased stamps and dies from the new Sunshine and Smiles collection. Today I have this lovely floral slapstick cling stamp to share. I began by painting a pale blue wash over watercolour paper with Broken China distress stain. Once that was dry I inked the Trumpet Song stamp with Danube Blue and Grape Jelly memento markers on the flowers, Bamboo Leaves and Cottage Ivy on the leaves, Dandelion, Cantaloupe and Tuxedo Black on the bird and Rich Cocoa and Black on the twigs. I spritzed the stamp lightly before stamping on the watercolour panel. I used a paint brush to pick up memento ink from an acrylic block which I added to the stamped image. To finish I splattered some grape jelly and cottage ivy ink over the panel.
To complete the card I cut both the painted panel and a blue mat with one of the stitched edge dies, attached it all to a natural white card base then added a sentiment.
Karen has used this stamp on a couple of gorgeous cards recently here and here.
Supplies:
Stamps: Trumpet Song, Pretty Petals (PB)
Creative Dies: Stitched Edges
Inks: Broken China distress stain, Evergreen Bough distress inks (Ranger) Versafine Deep Lagoon, Danube Blue, Grape Jelly, Bamboo Leaves, Cottage Ivy, Dandelion, Cantaloupe, Tuxedo Black, Rich Cocoa memento markers(Imagine Craft/Tsukineko)
Cardstock: Fabriano 100% cotton hot pressed watercolour paper, Neenah Natural White cardstock
Enamor
Posted: May 28, 2015 Filed under: Enamor | Tags: Kuretake Gansai Tambi watercolour paints, Penny Black stamps 6 Comments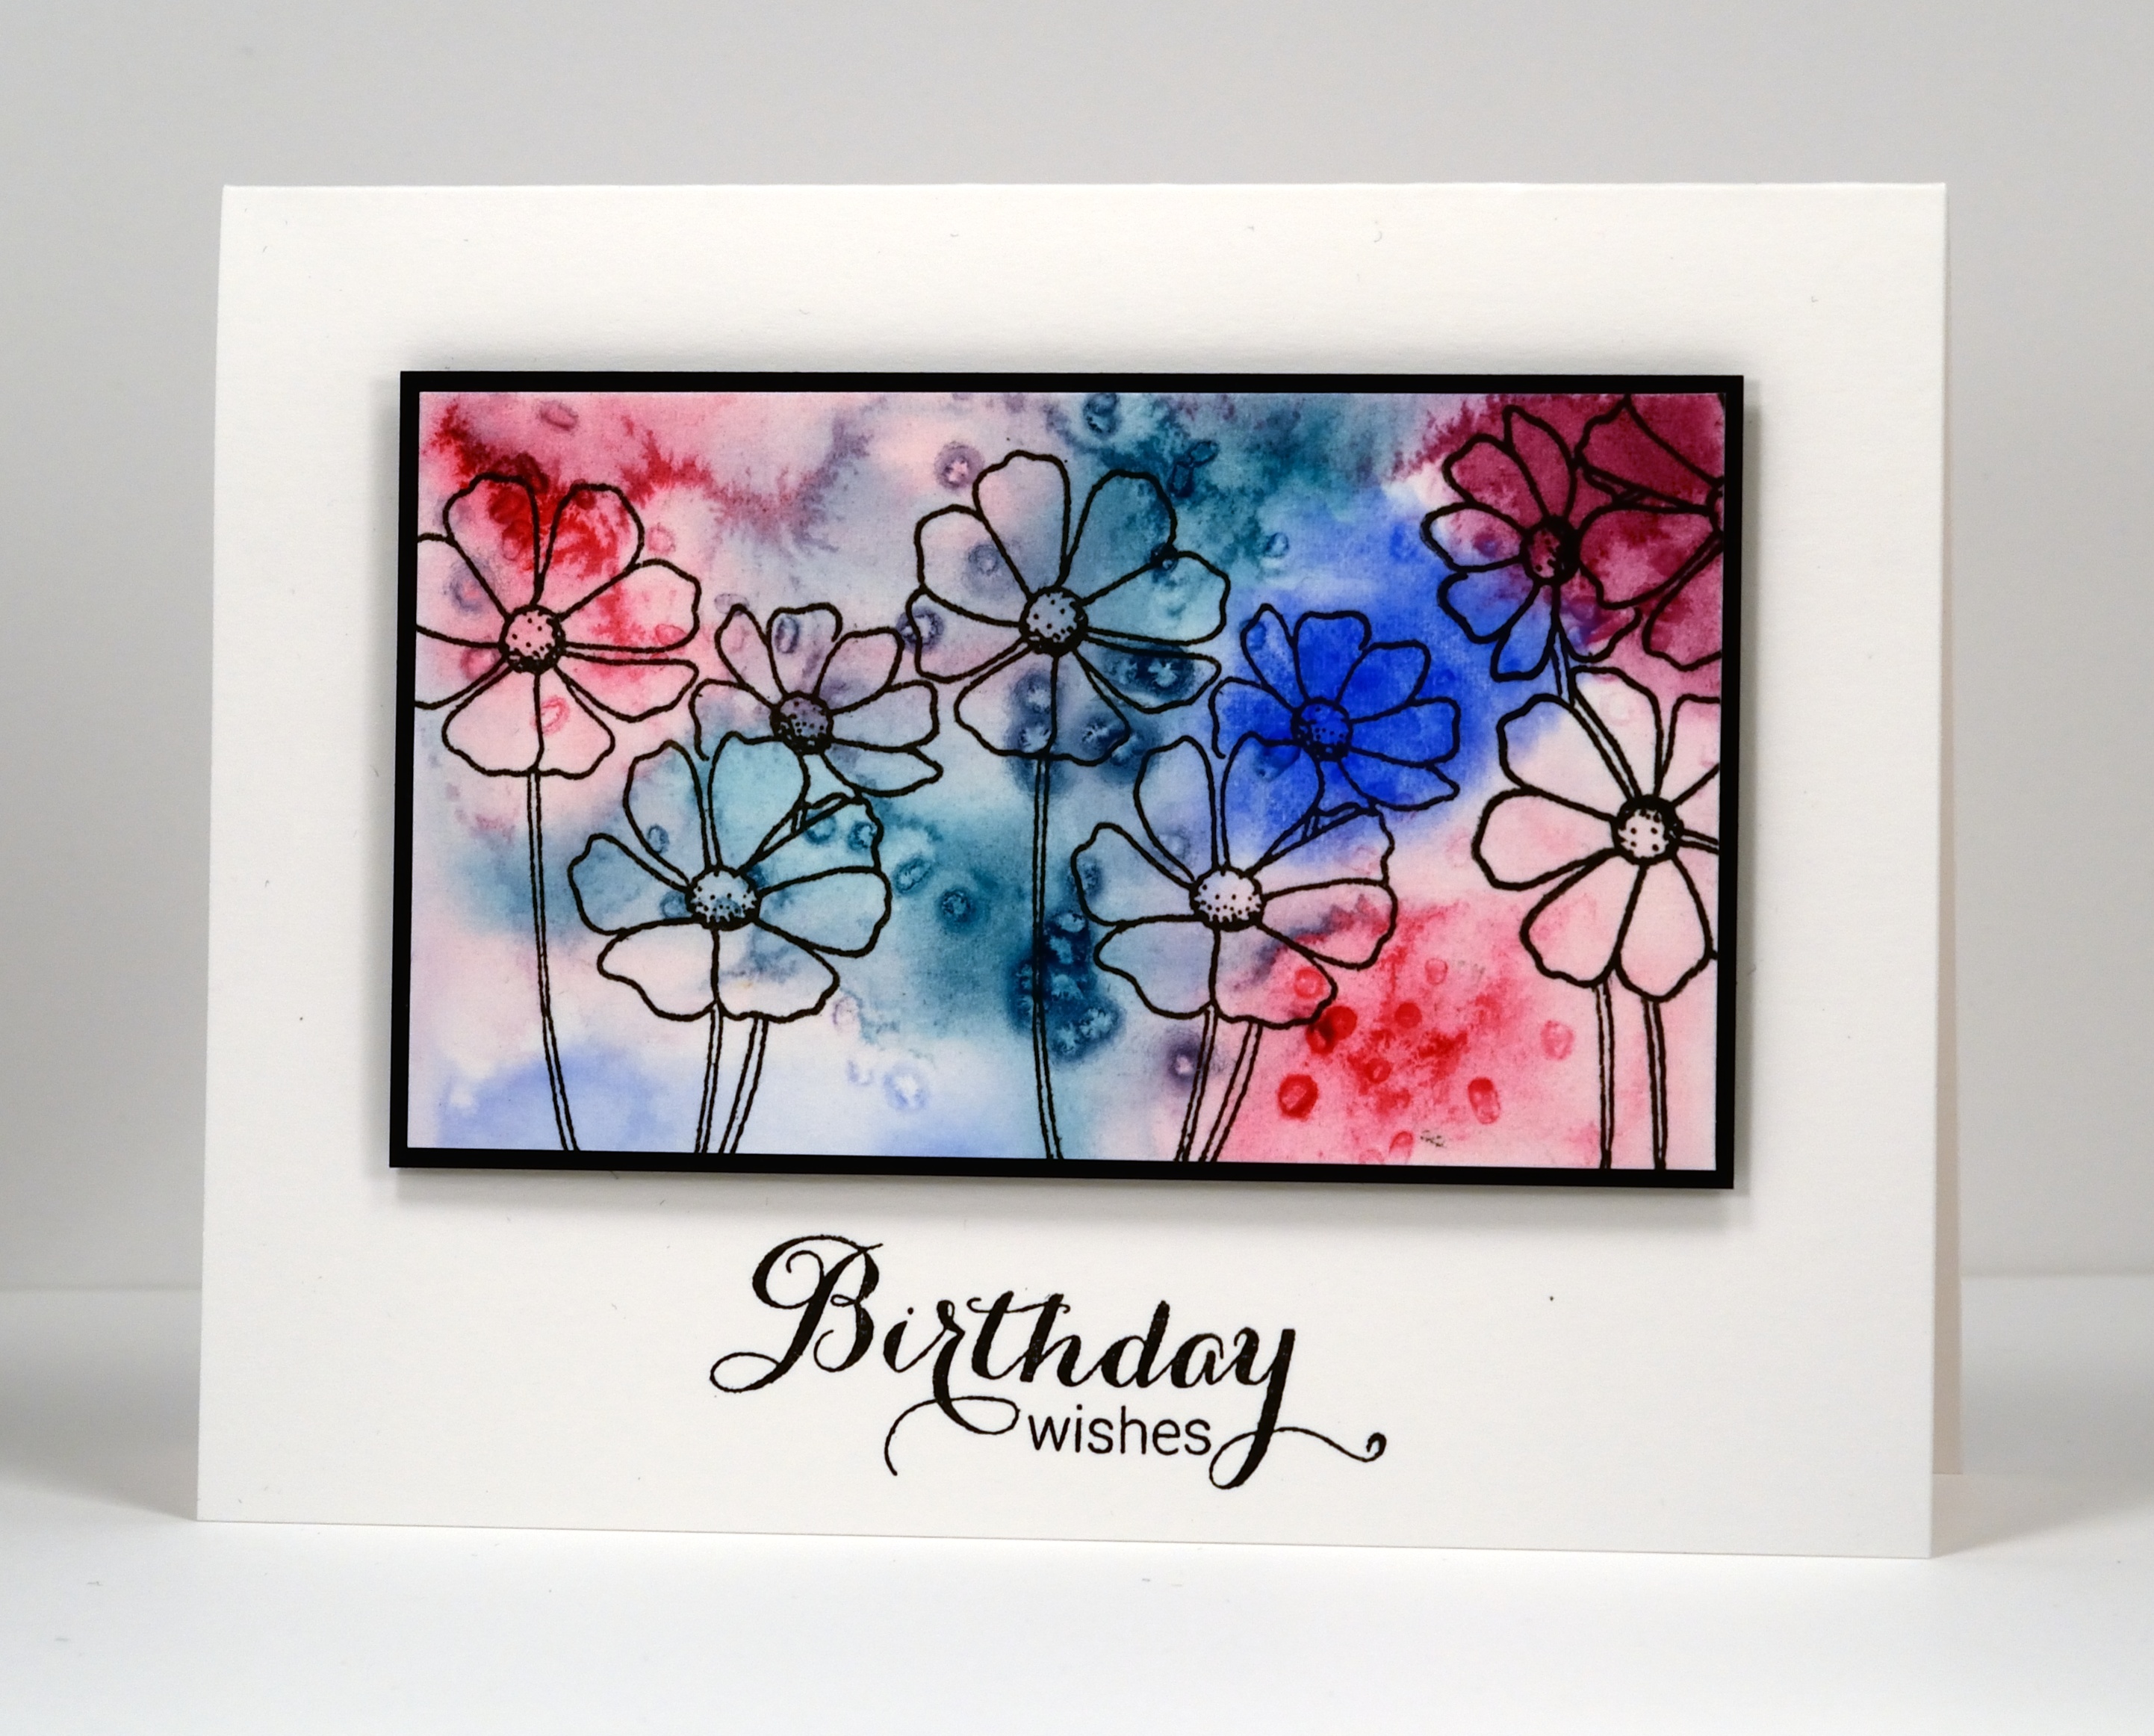
Enamor is a new transparent set of floral stamps from the Sunshine and Smiles collection; it includes both outline and solid stamps. I have featured one of each in today’s projects.
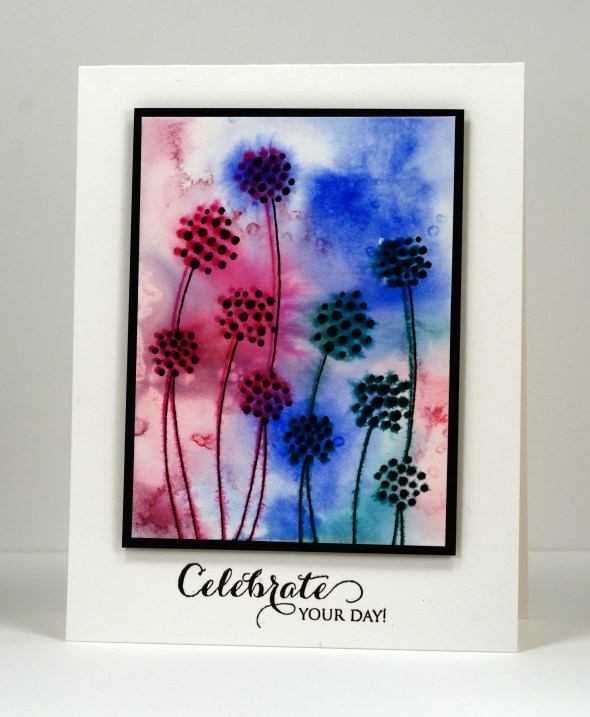
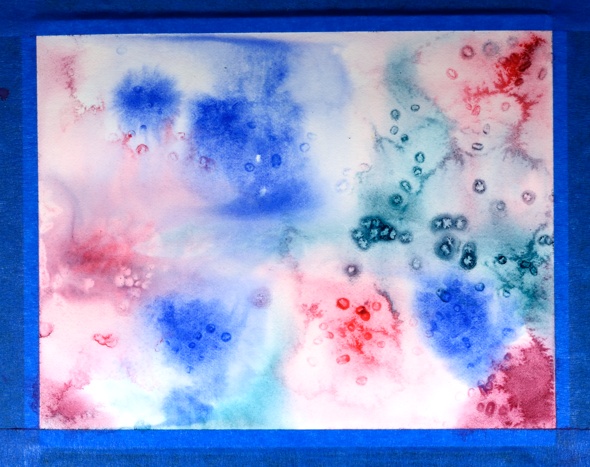
To make these two clean and simple cards I created a ‘wet into wet’ watercolour panel by dropping three colours onto a wet piece of watercolour paper then sprinkling some salt crystals here and there.
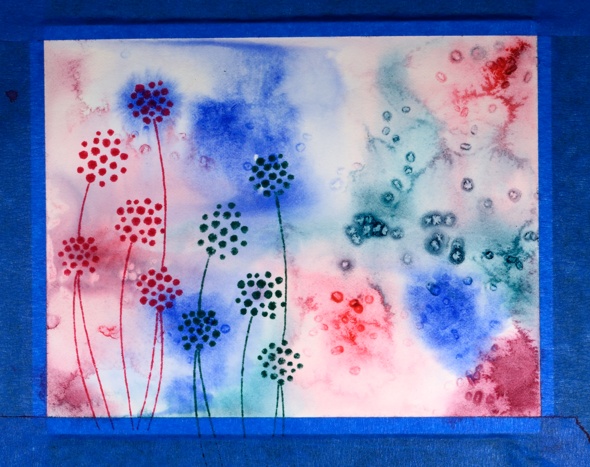
Once the panel was dry I brushed off the salt and stamped twice in colours which matched the background.
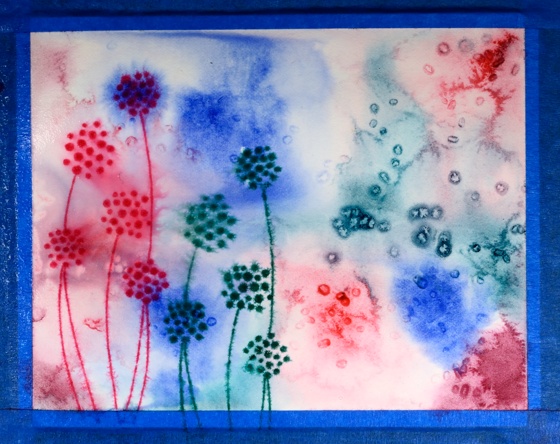
I then spritzed the stamped images and let them bleed into the surrounding area. Once the panel was dry again I stamped again in black then cut it into two pieces.
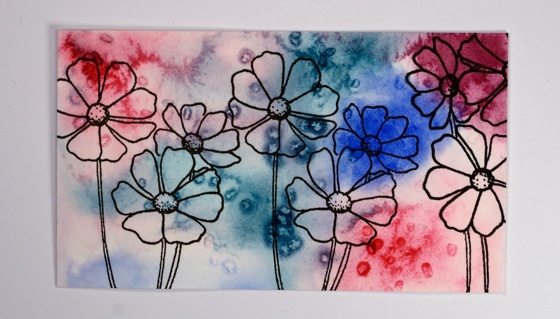
I picked an outline stamp to stamp over the patterns created by the salt on the second piece. I added black mats and sentiments to tie everything together.
Supplies:
Stamps: Enamor, A Sweet Day (PB)
Inks: Picked Raspberry, Evergreen Bough distress inks (Ranger) Versafine onyx Black (Imagine Craft/Tsukineko)
Cardstock: Fabriano 100% cotton hot pressed watercolour paper, Neenah Epic Black & Solar White cardstock
Also: Kuretake gansai tambi watercolour paints
Gentle Breeze
Posted: May 27, 2015 Filed under: Gentle Breeze | Tags: Penny Black stamps, Ranger Distress stains 10 Comments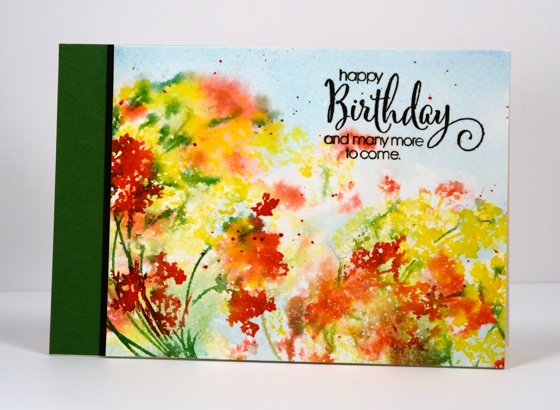
This week I am sharing projects featuring new products from the new Sunshine and Smiles collection. Today’s card features the ‘Gentle Breeze’ stamp I used with tags recently. For a change I stamped on cold pressed watercolour paper which has more texture to it. My piece of watercolour paper already had some fine splatters of masking fluid on it. I inked the stamp with distress stains, spritzed it, stamped once, spritzed again and stamped a second paler image. I then spritzed the paper which caused the colour to bleed even more into the background. When it was dry I stamped the image again creating a more defined image in the foreground. I used a marker to ink a few stems and stamped them over the blooms. When all was dry I flicked a few splatters here and there in red and green.
Supplies:
Stamps: Gentle Breeze, A Sweet Day (PB)
Inks: Festive Berries, Mustard Seed, Tumbled Glass,Evergreen Bough distress stains (Ranger) Cottage Ivy Memento Marker(Imagine Craft/Tsukineko)
Cardstock: Canson cold pressed watercolour paper, Green & Black cardstock
Butterflies Die Photo Tutorial
Posted: May 26, 2015 Filed under: Butterflies, Tutorial, Watercolour | Tags: Kuretake Gansai Tambi watercolour paints, Penny Black creative dies, Tutorial 9 Comments
There are three new dies in the new Sunshine and Smiles. release all set in rectangular frames, which makes them a nice choice for the inlaid die technique. I used the Butterflies die to create the card above. Below is a photo tutorial with instructions below each photo describing my process.
Spritz or paint water onto a piece of cold pressed watercolour paper then add watercolour paint ( I used Kuretake Gansai Tambi on Fabriano cold pressed) in three or four colours. Let it blend, tilt the paper, move it around with a paintbrush if it is not going where you want it to. Let it dry.
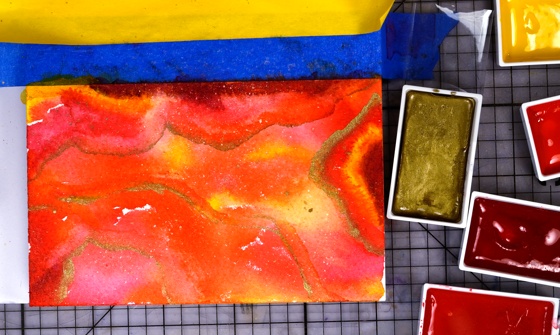
Add more paint to deepen the colours which will have dried paler than when you painted them. Add some metallic gold paint and some splatters. Let panel dry, then trim to desired size.
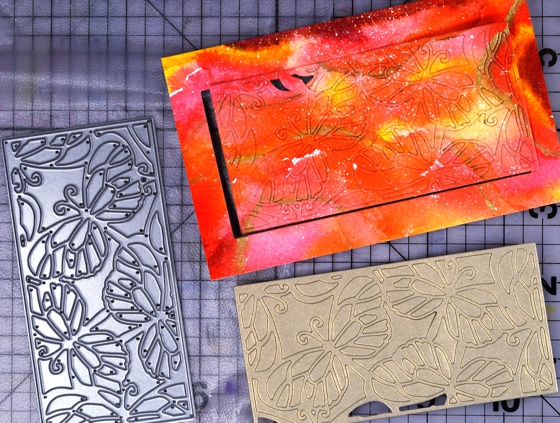
With the ‘Butterflies’ die cut a panel from your watercoloured piece and from a piece of metallic gold cardstock. Press both panels onto some ‘Cling film-Press & Seal’ to keep all the pieces together. I know it looks like I already lost some pieces but don’t worry they were there somewhere!

Attach a piece of double sided adhesive sheet (I used ‘stick it’) to a piece of cardstock larger than your die-cut panel.
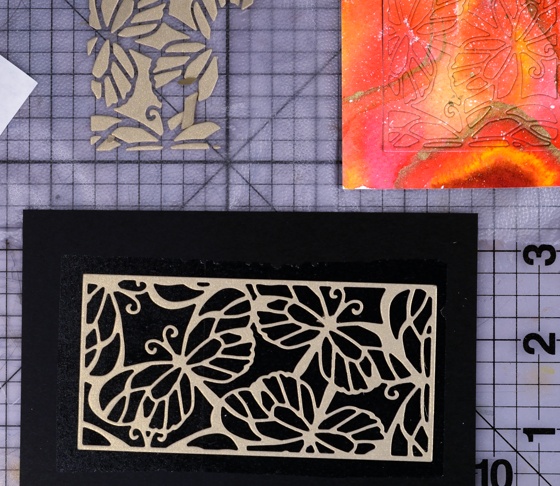
Remove the liner paper from the adhesive and press the gold ‘frame’ part of the butterflies die onto the adhesive covered cardstock.

Transfer the ‘inside’ pieces from the die-cut watercoloured panel into the gold frame pressing each one firmly onto the adhesive backing.
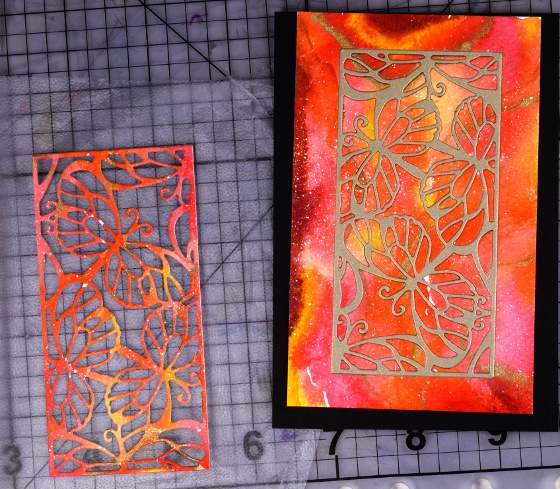
Attach the remaining border piece of watercoloured cardstock around the inlaid die-cut panel. Trim excess cardstock from the completed inlaid die cut panel. Mat with gold card then attach to co-ordinating card base.
Supplies
Creative Dies: Butterflies (PB)
Cardstock: Fabriano 100% cotton hot pressed watercolour paper, Pink and gold cardstock
Also: Kuretake Gansai Tambi watercolour paints, Stick it adhesive sheet
Collage of Wishes Watercolour Video Tutorial
Posted: May 25, 2015 Filed under: Collage of Wishes, Tutorial, Watercolour | Tags: Kuretake Gansai Tambi watercolour paints, Penny Black creative dies, Penny Black stamps, Tutorial, video 14 Comments
I hope you visited the Penny Black blog last week to enjoy a week of inspiration from our talented designer Jill Foster. This week I hope to inspire you with my projects featuring products from the new collection Sunshine and Smiles. Today’s project comes with a video tutorial. I know, unprecedented for me to have a video for you two weeks in a row! Last week I shared my technique for watercolouring with distress stains. Today I have a more traditional ‘keep within the lines’ approach using watercolour paints. The video is long so perhaps you should get a cup of coffee or tea and settle in. I have used the new slapstick cling set ‘Collage of Wishes’ and the pretty flourish die.

Supplies
Stamps: Collage of Wishes (PB)
Creative Dies: Flourish (PB)
Inks: Versafine Smokey Gray (Tsukineko)
Cardstock: Fabriano 100% cotton hot pressed watercolour paper, Kazazz cardstock discontinued
Also: Kuretake Gansai Tambi watercolour paints, Faber-Castell Polychromos pencils, Stick it adhesive sheet


