Oxide Leaves Video
Posted: September 25, 2020 Filed under: Dies, fall foliage, golden delight, Penny Black, pumpkin & leaves, Tutorial | Tags: distress oxide inks, Fabriano Watercolour Paper, Penny Black creative dies, Penny Black stamps, video 5 Comments
There is no denying it anymore, autumn is in the air and on the trees and definitely in the cards. This week the weather has been lovely, the sun has shone and the frost warnings have gone. Can’t complain.
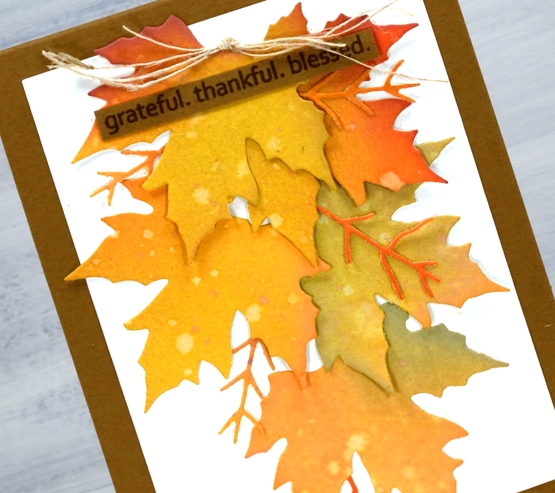
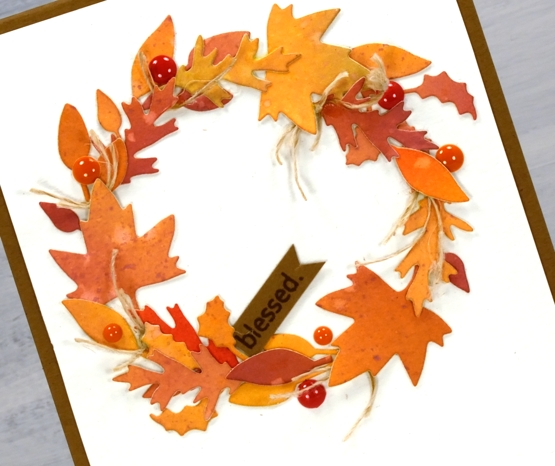
I really am a seasonal stamper; I’m inspired by what is going on outside in the world. With a few exceptions, like Christmas card prep, I like to stamp what I see in the garden and surrounds. The leaves on my trees are beginning to turn, nothing spectacular yet and nothing to rake (yay) but the signs are there. I chose oxide inks to blend several three coloured panels which I then cut up into leaves. The process and chit chat is all in the video below.
After the video was completed I looked at the wreath and decided it needed some brighter pops of colour and luckily I had some enamel dots which matched exactly. I added them before taking the photos below.
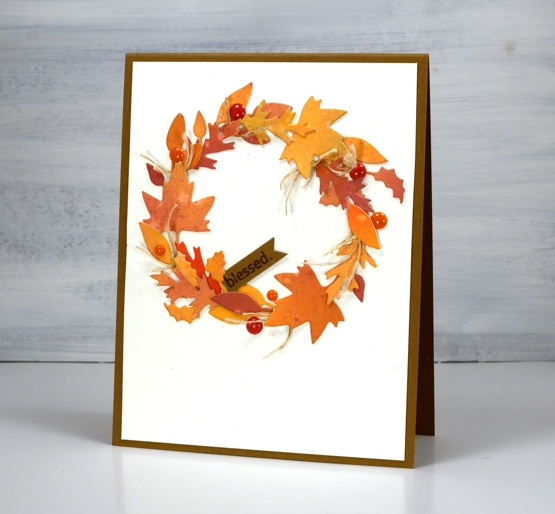
I really enjoy arranging all the elements on die cut cards like the two I’ve shared today but the gluing drives me a little crazy. Sometimes I use double sided adhesive but if the die cuts are not going to be sitting flat that doesn’t really work. If you have any suggestions for attaching fiddly little die cuts please leave them in the comments; I’d love to know. You might notice I try not to include much gluing in the video because it doesn’t make for very entertaining viewing.
I hope you are surrounded by some fall beauty where you are or perhaps enjoying some spring sunshine in the southern hemisphere.
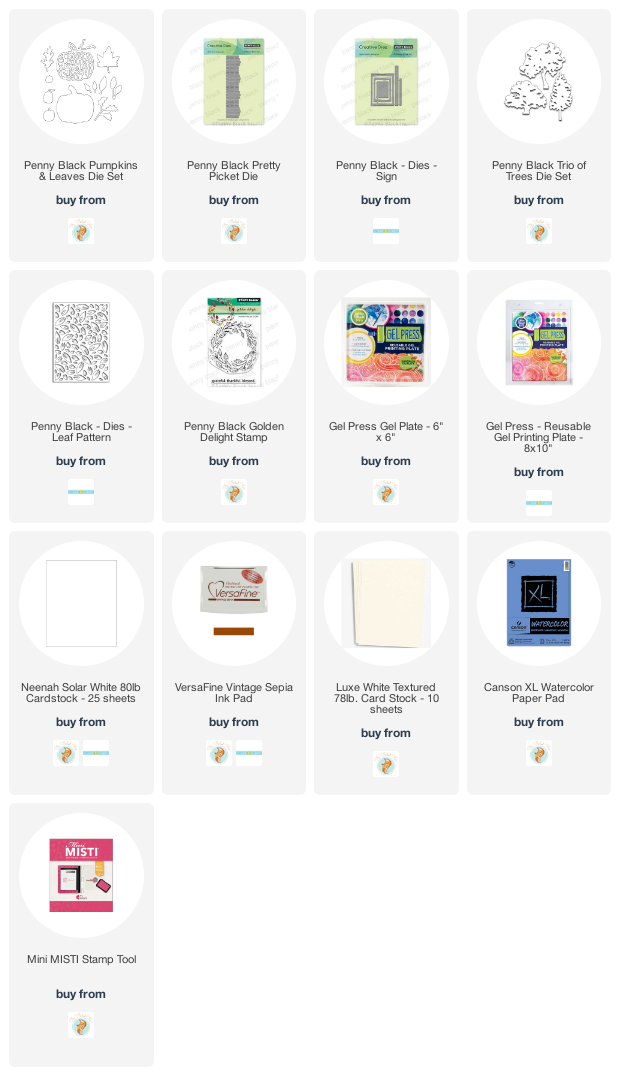
Supplies
Gel print pumpkins
Posted: September 21, 2020 Filed under: gel press, leaf pattern, Penny Black, pretty picket, pumpkin & leaves, sign, trio of trees | Tags: gel press, gel printing, Penny Black creative dies, Penny Black stamps 4 Comments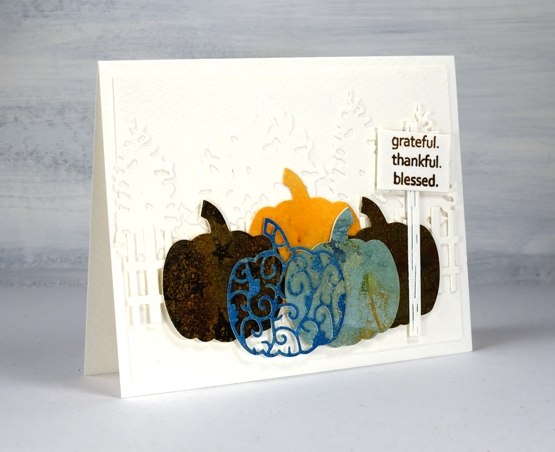
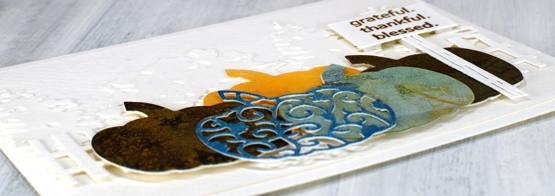
Despite what the title suggests this post isn’t about gel printing, it’s about using more dies on one card than I’ve ever done before. I tend to use dies sparingly, not because I don’t like them, but because they are usually called in to highlight or frame some watercolouring. This time the dies are the feature and I used some leftover pieces of gel printed paper for the pumpkins.
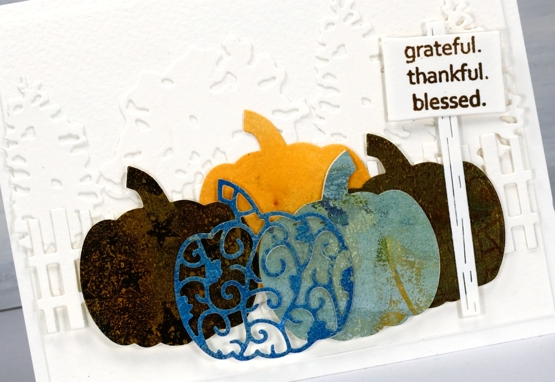
On the first card I built up a background for the gel print pumpkins with a row of die cut trees and then a die cut picket fence. Each pumpkin is two layer as the original cardstock used for printing was light weight. I tried to find prints in pumpkin colours and found a couple of blue/greens, some goldy browns and a pale orange; I didn’t have a strong orange in the pile. The fact that one of the prints had stars on it was definitely a bonus.
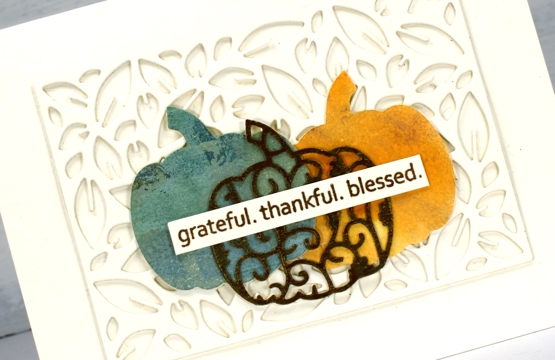
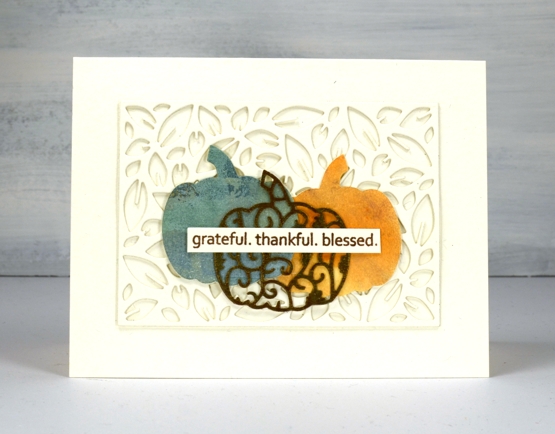
On the second card I stacked two leaf pattern die cut panels to create a textured background then layered the pumpkins on top of that. All the background die cutting and card bases are either luxe textured white cardstock or a cheap cold pressed watercolour paper that I thought was luxe textured white until I placed them side by side and had to rearrange things a bit.
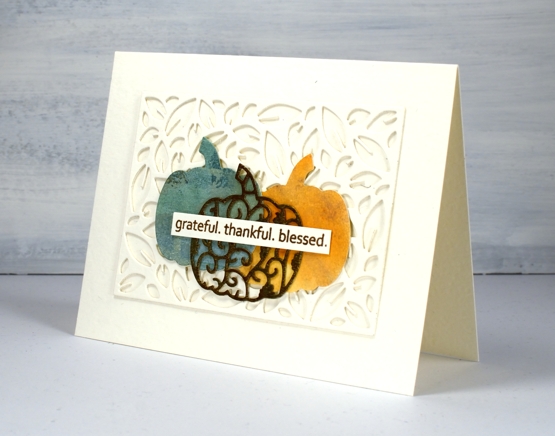
All the dies are listed and linked below and I made two messages with the same ‘golden delight’ sentiment stamp. I know I have other sentiments for thanksgiving but I can’t go past this one. For the cute little sign by the pumpkin patch I stamped one word, masked, then next word, masked and then the last one and wonder of wonders, it worked first go!
The layering and adhering of dies was a labour of love because I am just not great at the whole fiddly nature of gluing die cuts. When I imagined the card in my head it was way more intricate than either of these but it’s important to know your own limits and sometimes quit while you’re ahead!
Supplies