Oxide Leaves Video
Posted: September 25, 2020 Filed under: Dies, fall foliage, golden delight, Penny Black, pumpkin & leaves, Tutorial | Tags: distress oxide inks, Fabriano Watercolour Paper, Penny Black creative dies, Penny Black stamps, video 5 Comments
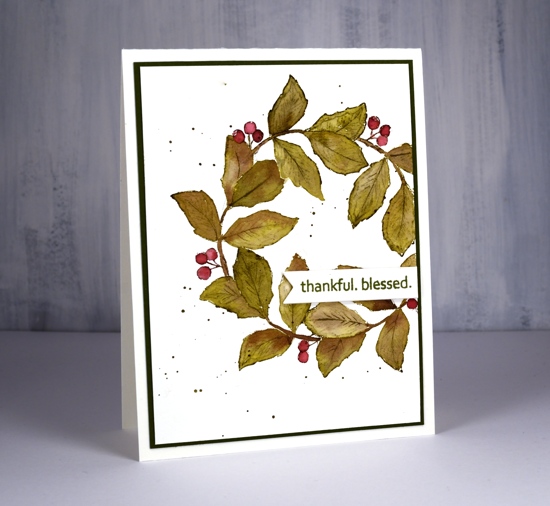
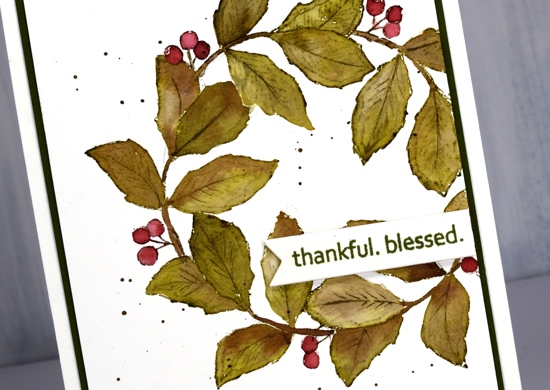
There is no denying it anymore, autumn is in the air and on the trees and definitely in the cards. This week the weather has been lovely, the sun has shone and the frost warnings have gone. Can’t complain.

I really am a seasonal stamper; I’m inspired by what is going on outside in the world. With a few exceptions, like Christmas card prep, I like to stamp what I see in the garden and surrounds. The leaves on my trees are beginning to turn, nothing spectacular yet and nothing to rake (yay) but the signs are there. I chose oxide inks to blend several three coloured panels which I then cut up into leaves. The process and chit chat is all in the video below.
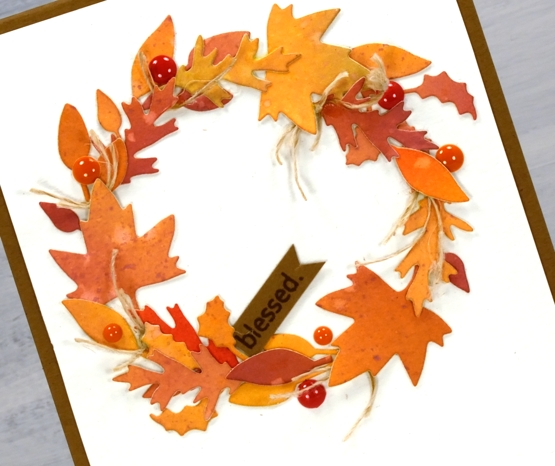
After the video was completed I looked at the wreath and decided it needed some brighter pops of colour and luckily I had some enamel dots which matched exactly. I added them before taking the photos below.
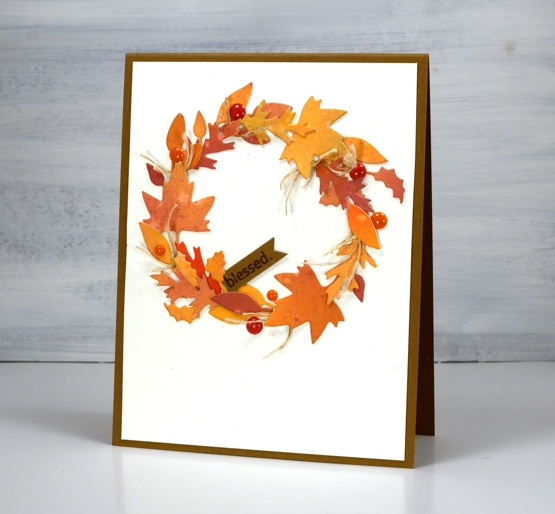
I really enjoy arranging all the elements on die cut cards like the two I’ve shared today but the gluing drives me a little crazy. Sometimes I use double sided adhesive but if the die cuts are not going to be sitting flat that doesn’t really work. If you have any suggestions for attaching fiddly little die cuts please leave them in the comments; I’d love to know. You might notice I try not to include much gluing in the video because it doesn’t make for very entertaining viewing.
I hope you are surrounded by some fall beauty where you are or perhaps enjoying some spring sunshine in the southern hemisphere.
Supplies
Golden Delight
Posted: October 8, 2019 Filed under: Color Burst, golden delight | Tags: color burst, Penny Black creative dies, Penny Black stamps 5 Comments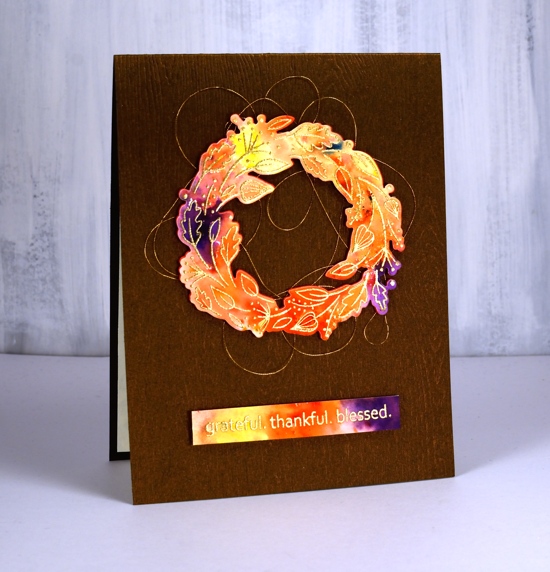
I decided to let the colorburst paint powders do the colouring for me on this cute little wreath from Penny Black. I embossed the wreath in gold on hot pressed watercolour paper and embossed the sentiment at the same time.
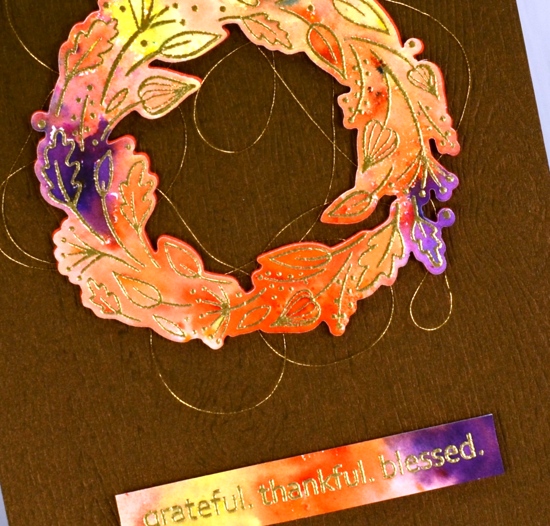
I sprinkled four colours of Ken Oliver’s colorburst powders over the embossing then spritzed with water and watched the colours emerge and spread. I helped them out a little with a paintbrush so paint filled every nook and cranny. Once the panel was dry I die cut the wreath and trimmed the sentiment to the right size then cut a wreath from adhesive backed foam also to pop up the watercoloured one. Before I attached the wreath to the card base I looped some gold embroidery thread back and forth around the wreath letting the adhesive hold it in place.
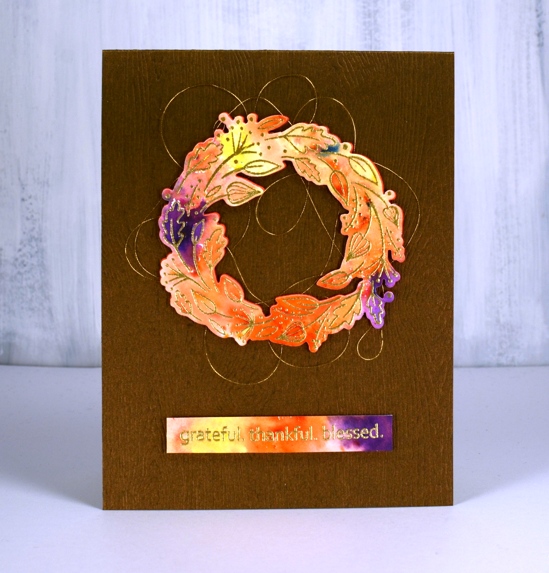
The woodgrained card base not only has texture it also has a little bronze shimmer to it. I bought it from my local scrapbooking store but you could get the same effect with a woodgrain embossing folder.
Feeling grateful, thankful and blessed to be part of this encouraging and inspiring community.
Supplies
Homespun blessing
Posted: September 25, 2019 Filed under: Dies, golden delight, homespun, Penny Black | Tags: Penny Black stamps, Ranger Distress inks 16 Comments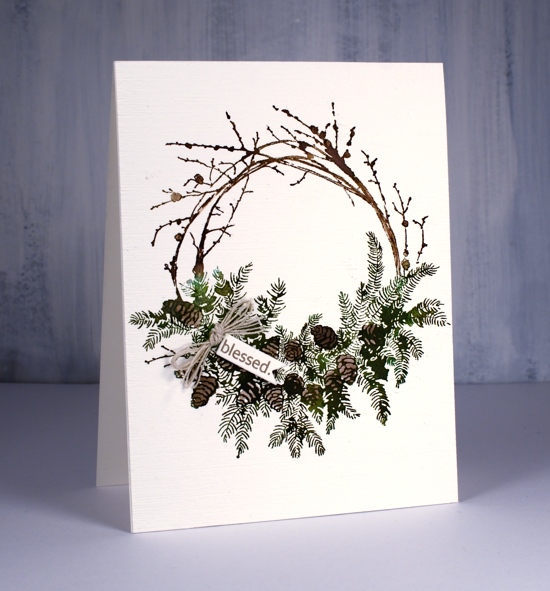
This beautiful wreath is part of the PB ‘Merry & Joy’ release. I know it is perfect for Christmas but I am putting it to use as a thanksgiving wreath first. I inked the wreath with two brown and two green distress inks both in marker and ink pad form. I inked the branch area in vintage photo and ground espresso inks and stamped a couple of times for good coverage on hot pressed watercolour paper. I inked the foliage area in forest moss and lucky clover inks then after stamping once it was easier to see on the stamp where the pine cones were so I could ink the pine cones in ground espresso ink and stamp again.
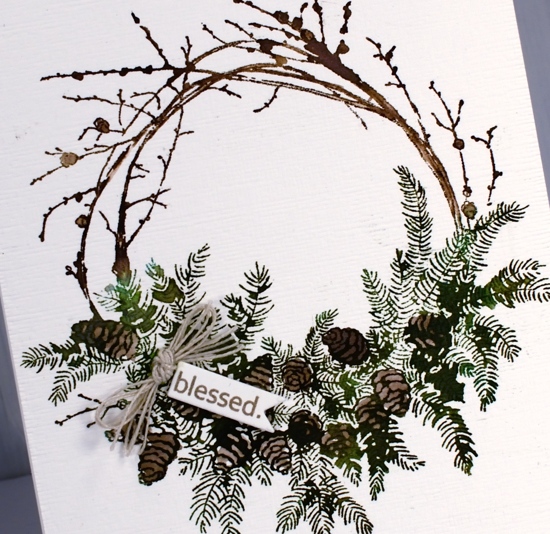
After the stamped image was complete I painted some water onto the stamp and stamped again (I kept the stamp in the MISTI the whole time) The amount of water transferred by the stamp was just enough to fill and darken parts of the image. I also coloured some of the pinecones in with a marker. One word from the PB ‘golden delight’ sentiment fitted on a tiny tag cut with a die from the PB ‘gift card pocket’ set. I rarely make gift card pockets but I use the different tag and label dies from this set often. To complete the wreath I added some hemp twine and popped up the tiny tag.
Supplies

Autumn wreaths
Posted: September 13, 2019 Filed under: A Pocket Full, all natural, golden delight, Penny Black | Tags: Penny Black creative dies, Penny Black stamps, Ranger Distress inks, Tsukineko Versafine inks 10 Comments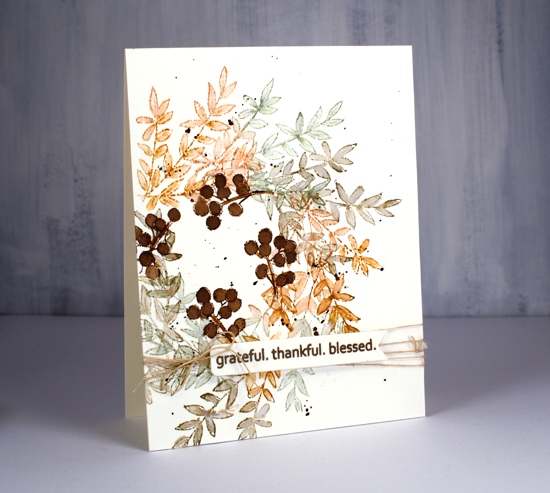
Much as I hate to admit it, things are beginning to feel distinctly autumnal. I don’t have any autumn wreaths to hang at home but if I did I think I would like one a bit like this, soft colours and delicate leaves.
I worked in my stamp positioner to create this panel on hot pressed watercolour paper but I think you could easily do it with the stamp on an acrylic block, it might even be faster. I started by tracing a circle on my panel with a pencil. Using the circle as I guide I positioned the branch stamp from Penny Black’s new ‘All Natural’ set so the base stems were on the circle. I inked with rusty hinge, stamped, moved the stamp around the circle a little, stamped in bundled sage, moved it again, stamped in frayed burlap and then repeated until I was all the way around the circle. I used a small watercolour brush to blend inside the leaves adding extra ink when necessary. I love the combination of colours; frayed burlap is new to my collection and I like the way it gets along with the other two inks. Once the blended ink was dry I stamped just a section of the berry stamp around the centre of the wreath in gathered twigs distress ink then blended it to fill the berries.
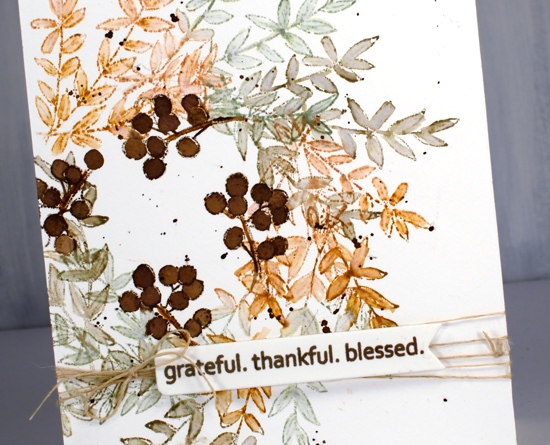
I used the same sentiment for both cards, it’s from another new and cute PB set called ‘golden delight’. I stamped both times on a little tag from the PB ‘a pocket full’ die set. To finish off the card I wrapped some twine around the panel, added a bow and popped the tag on top.
For the second card I grabbed another stamp from all natural and used the same process but needed a leaf mask cut from post-it note a couple of times where the leaves would have stamped over previous ones. This little stamp has both leaves and berries as well as a curved stem which just happened to conveniently match the curve of my traced circle. I used the same technique of blending the leaves and berries after stamping with forest moss and aged mahogany distress inks.
Both cards requested the splatter treatment and the second card wanted a olive green mat as well.
Hope the days are warm and sunny where you are.
Supplies