
Popped up grevillea
Posted: July 23, 2018 Filed under: grevilleas | Tags: Darkroom Door stamps, Ranger Distress stains 4 Comments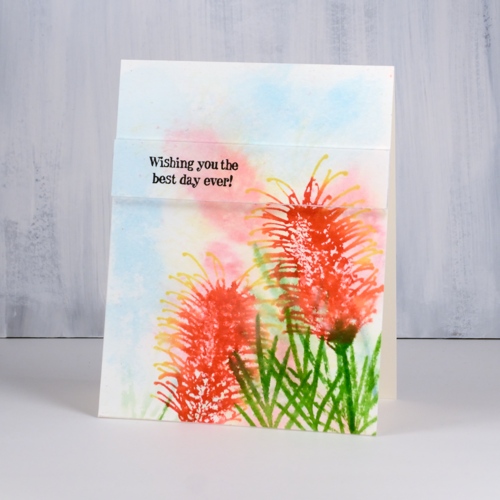
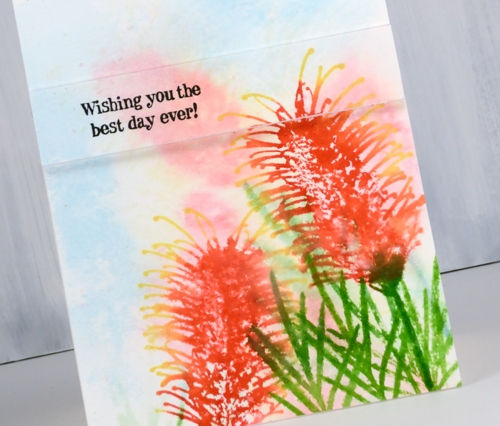
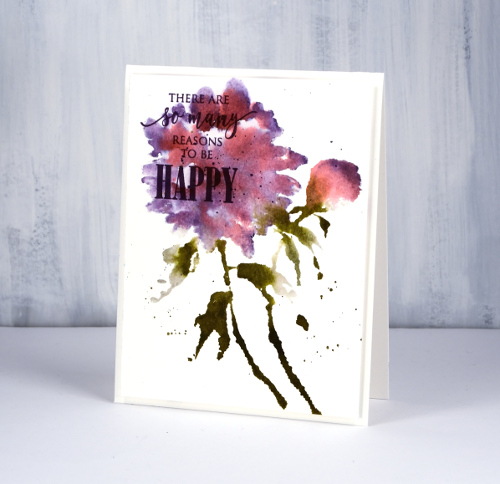
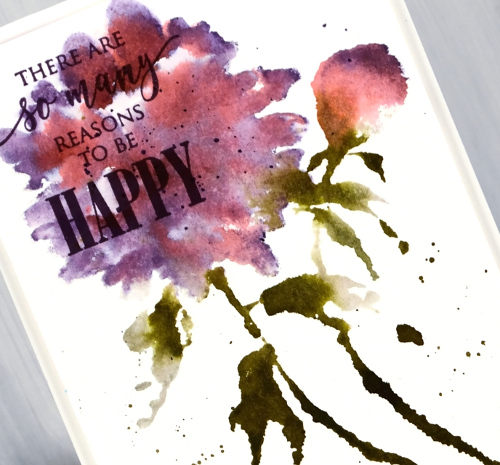
I have a second grevillea card today featuring another of the flowers from the Darkroom Door ‘grevilleas’ set. (you can see my first one here) There are many different shapes, sizes and colours of grevilleas; this one I coloured to look like the ‘coastal sunset grevillea’. To get my background grevilleas I stamped ‘wet into wet’. I painted water over a piece of cold pressed watercolour paper, inked my stamps with distress stains and stamped onto the wet panel. The ink immediately bled into the surrounding area giving me a loose watery image. I blotted the panel with paper towel to stop the ink from moving too much and to soften the depth of colour. I painted a little blue stain around the edges.
I wanted the foreground images to be sharper so I dried the panel with a heat tool. In order to keep the tips of the grevillea yellow and the rest of the styles red, I stamped first in yellow then in red but I wiped red stain off the ends. I used one of the foliage stamps and inked it with two greens for a more realistic look. I spritzed ever so slightly to make the inks blend a little but not so much as to loose the definition in the detailed stamp.
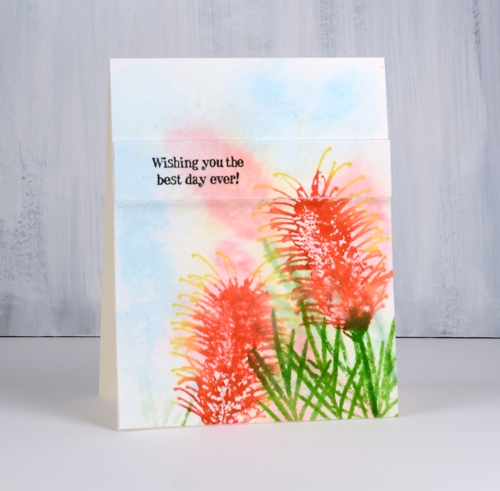
Once my panel was complete, stamped with one sentiment from the new ‘happy birthday’ strip, I cut across the panel to separate the piece containing the sentiment so I could pop it up on a piece of foam.
Supplies
Stamps: grevilleas, happy birthday (DD)


Inks: mowed lawn, peeled paint, scattered straw, festive berries, tumbled glass distress stains, nocturne versafine clair


Paper: hot pressed watercolour paper, neenah natural white cardstock


Also: adhesive backed foam

.
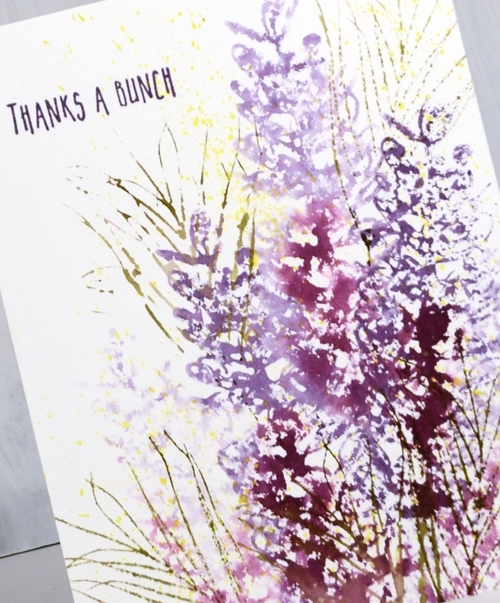
‘Simply Sarah’ grevillea
Posted: July 5, 2018 Filed under: grevilleas | Tags: Darkroom Door stamps, Ranger Distress stains 11 Comments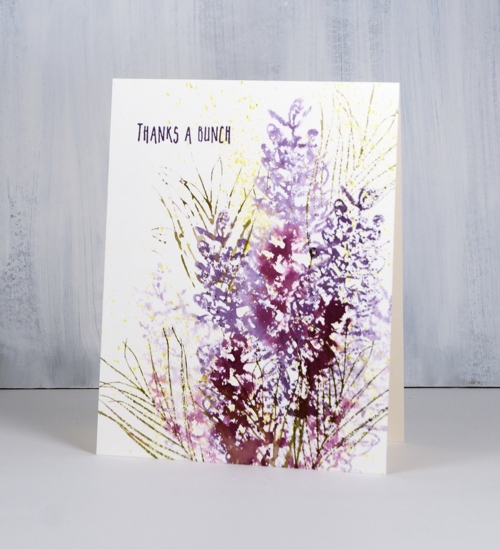
My father is visiting from Australia at present; he has attended all three graduations with us. Before he left home I asked him to pick up some new stamps from Darkroom Door. It’s been pretty busy here but I finally found some time earlier this week to try them out. Grevillea is a plant native to Australia and some other southern hemisphere islands. There is a wide range of grevilleas with different shapes and colours. The new grevillea stamp set includes four different shaped flower heads and a couple of foliage stamps.
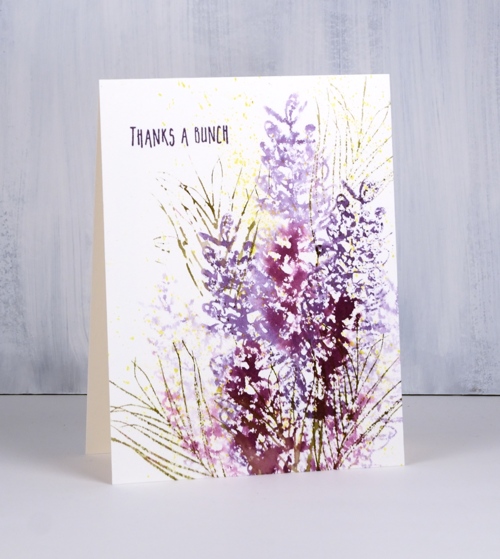
I searched for grevillea images on line and chose a couple of different colour schemes including this purple/burgandy one know as ‘Simply Sarah‘. I used both dusty concord and seedless preserves distress stains to ink the stamp, spritzed, then stamped on hot pressed watercolour paper. I spritzed again without reinking, stamped again and repeated a couple of times to get lighter images. I inked one of the foliage stamps with forest moss distress stain and stamped it a few times in and around the flowers. Finally I splattered some dots of scattered straw stain over the panel and added a sentiment from another new DD set, ‘thank you’. All the thank you sentiments are on one long strip so I masked with some post it notes to leave a space for just one sentiment.
When my dad first arrived he took a close look at the stamps he’d brought and came up with a challenge for me, but that will be a post for another day.
Supplies
Stamps: grevilleas, thank you DDSE002 (DD)
Inks: scattered straw, seedless preserves, dusty concord, forest moss distress stains, monarch versafine clair


Paper: hot pressed watercolour paper, neenah natural white cardstock
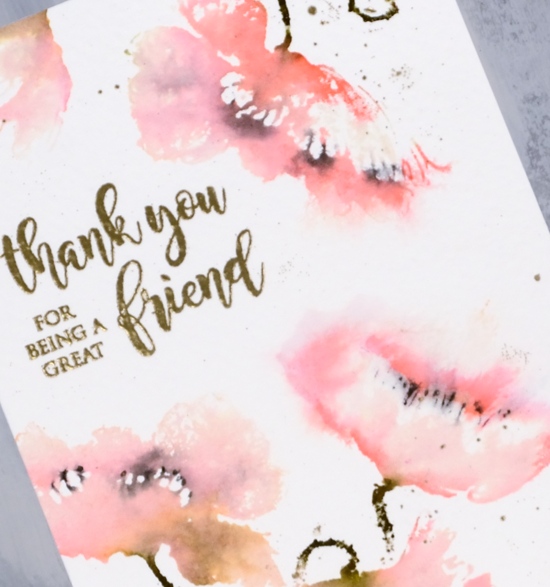
Soft pink poppies & a give away
Posted: June 25, 2018 Filed under: spontaneous joy | Tags: Penny Black stamps, Ranger Distress inks, Ranger Distress stains 31 Comments
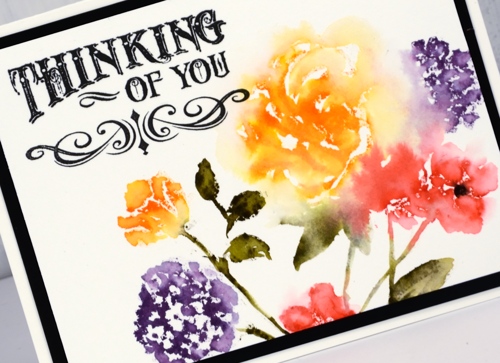
You can find me over on the Foiled Fox blog today sharing all the details about this soft summery card. It reminds me of one I made a couple of years ago with an all over poppy pattern. I used distress stains and markers to get a loose watery look then gold embossing powder for the sentiment and some gold splatter. You can read about my process on the Foiled Fox blog.
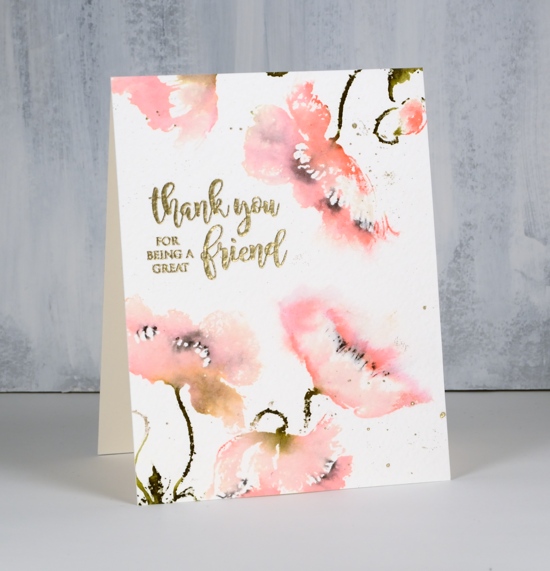
I have teamed up with the Foiled Fox today to not only share this card but also a GIVEAWAY! If you comment here or on the Foiled Fox blog you will be entered to win a $25 gift certificate to spend at the Foiled Fox online store. You have until the end of Sunday, July 8th to enter.

For extra entries you can follow Foiled Fox or me on youtube, instagram or pinterest. All the links are listed below.
Enjoy your summer days!
Supplies
Stamps: spontaneous joy 40-597, happy wishes 30-419


Paper: cold pressed watercolour, neenah natural white

Inks & Stains: versamark (tsukineko) spun sugar, tattered rose, forest moss distress stains, abandoned coral mini ink pad, black soot distress markers (ranger)


Also: metallic rich gold embossing powder (WOW), stamping platform


Garden gems
Posted: May 4, 2018 Filed under: garden gems | Tags: Penny Black stamps, Ranger Distress stains 4 Comments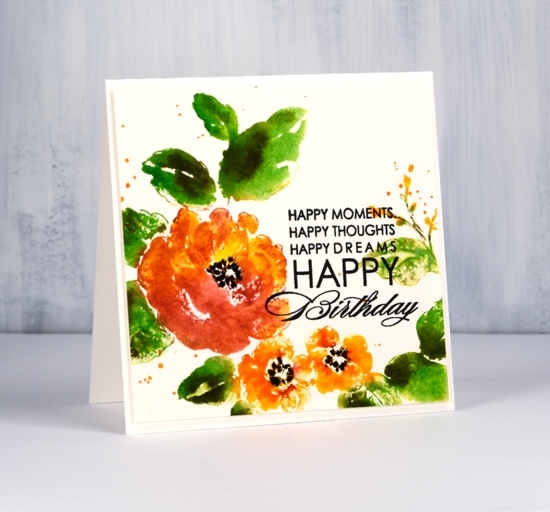
It’s been flowers, flowers and more flowers this week, all part of the new Nature’s Art release from Penny Black
To wrap up the week I have a card that features the ‘garden gems’ rubber cling stamp and was coloured with distress stains, just four colours applied to the stamp one by one then spritzed to get a loose watercolour look.
I used fired brick and carved pumpkin stains on the flowers then forest moss and peeled paint stains on the leaves. By using the stamp positioner I was able to stamp the lighter colour first then dab the darker stain on the stamp and print again adding some shadow and variety to leaves and petals. I drew the black centres straight onto the panel with a black marker and added a sentiment in black also.
Even though it meant losing some of the design I cropped the panel to a square, backed it with foam and attached to a square card base.
Supplies
Stamps: garden gems 40-591, smile today 30-461 (PB)


Stains: fired brick, carved pumpkin, forest moss, peeled paint distress stains


Marker: black soot
Ink: nocturne versafine clair
Paper: hot pressed watercolour paper
Also: foam sheet
Norah Head lighthouse
Posted: April 16, 2018 Filed under: lighthouse | Tags: Darkroom Door stamps, Ranger Distress inks, Ranger Distress stains 19 Comments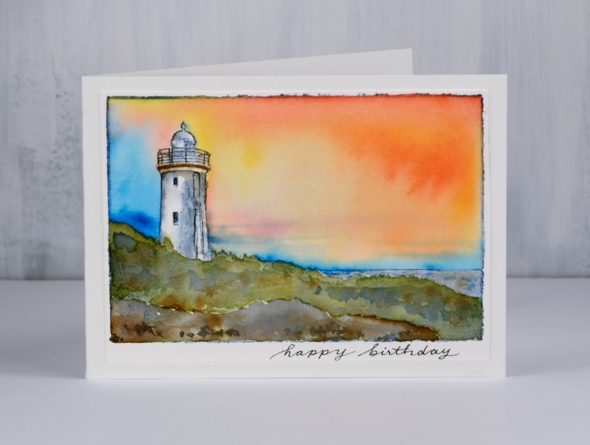
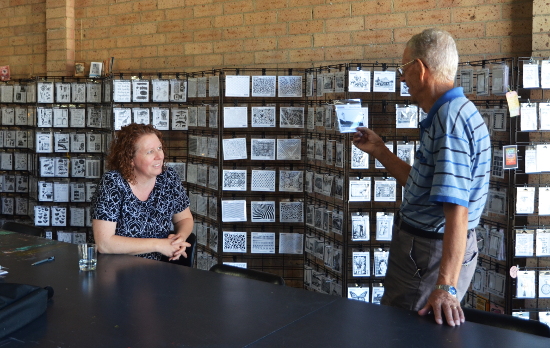
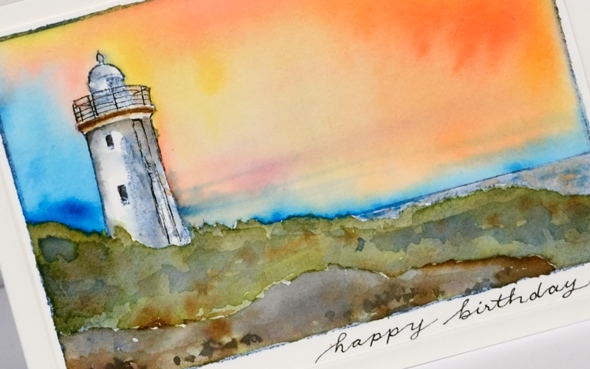
Today’s card has been sent to my dad for his birthday but considering the time it takes for mail to get from Canada to Australia these days and my own postal disorder it did not arrive in time. He is currently visiting my brother so this post provides a sneak peak before the real thing arrives in his mail box. Happy Birthday, Dad! I chose this stamp from Darkroom Door for several reasons. When I first visited Darkroom Door in 2016 I enjoyed visiting and talking with the owners Rachel and Stewart. When my dad returned to pick me up he walked in, looked at all the DD stamps displayed and was drawn to two stamps in particular; this was one of them. During the same 2016 trip Dad and I went to the Norah Head lighthouse, featured on this stamp and not too far from my parents’ home. We went for a quick look and discovered there was a guided tour about to start so we joined in. We heard the history of the light and enjoyed the views from several vantage points.
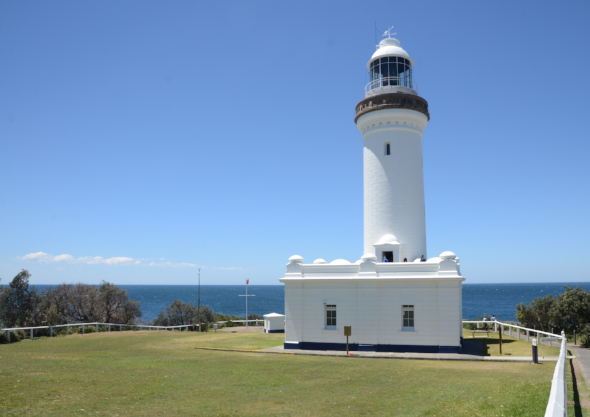

To paint this scene I stamped the scene in distress inks, the top border, sea and light in stormy sky, the land around the light in forest moss and the foreground rocks in black. I then used stains to paint the scene; I’ve listed them below. After painting I used a fine tip micron pen to re-draw the railing and details on the light then wrote a sentiment.
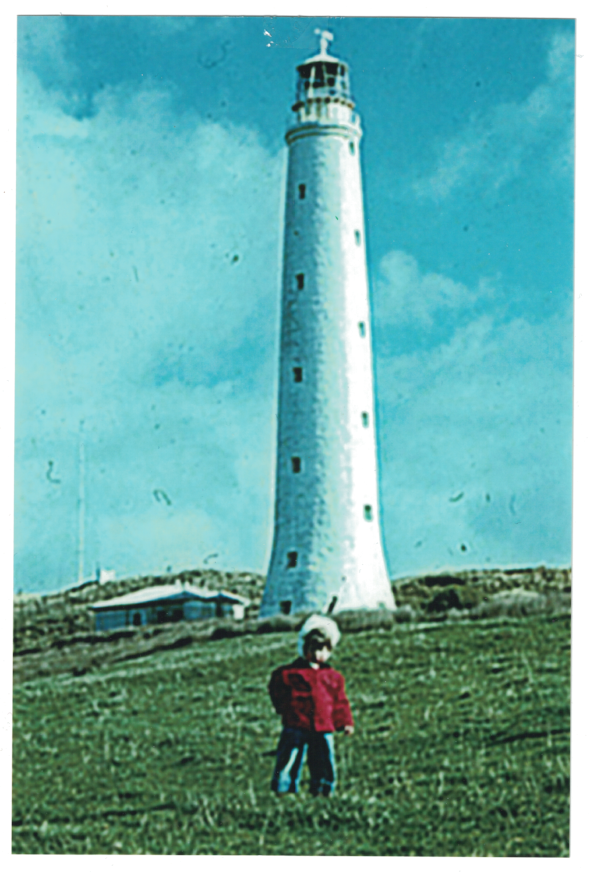
My father has been interested in lighthouses for years and has visited many around the world. I have a connection to one from very early in my life. I was born on King Island in Bass Strait, off the coast of Tasmania and home of the tall Cape Wickham lighthouse. Although I don’t remember the occasion I have a photograph Dad took of me in front of the light.
Supplies
Stamp: lighthouse (DD)

Inks: stormy sky, forest moss, black soot distress inks & markers


Stains: worn lipstick, mustard seed, salty ocean, forest moss, black soot, stormy sky, vintage photo distress


Paper: hot pressed watercolour paper
Tools: stamping platform
Also: micron pen .01

Becoming
Posted: April 12, 2018 Filed under: becoming | Tags: Penny Black stamps, Ranger Distress stains, Tsukineko Versafine inks 5 Comments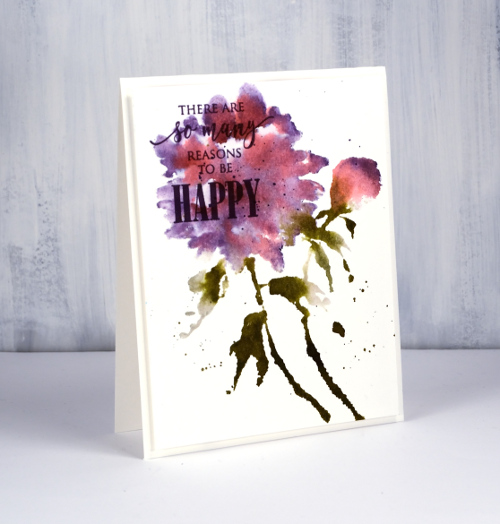
I am sharing this card on the Foiled Fox blog today, a great place to visit if you are looking for some inspiring content or some lovely products (in their online store). I am grateful to The Foiled Fox for supporting my creative work in a variety of ways and I want to let you know my blog includes affiliate links to their online store which give me a small commission.
Yet again I used my distress stains to work with a Penny Black floral stamp. You may have heard the distress stain daubers are being discontinued but the spray stains are not so I intend to refill my daubers from my spray stains; the stain is the same in both bottles. If you don’t want to get messy and do refills you can just paint stain onto your stamp with a brush or use an ink pad and spritz your stamp for a looser, more watery look.
I started in my stamping platform by inking the flower and bud with worn lipstick stain. I stamped then cleaned the stamp so I would not contaminate the dauber of the dusty concord distress stain when I added that next. I kept the dusty concord mainly around the edges of the flower and tip of the bud but it blended into the flower a little which is what I was after.
I added a sentiment in versafine clair monarch ink then popped up the whole panel on white foam before adding it to card base.
Supplies
Stamps: PB Becoming, Just Believe


Distress stains: pumice stone, forest moss, worn lipstick, dusty concord


Ink: versafine clair monarch
Paper:
Also: white foam
Flower Pageant
Posted: April 9, 2018 Filed under: flower pageant | Tags: Penny Black stamps, Ranger Distress stains 4 Comments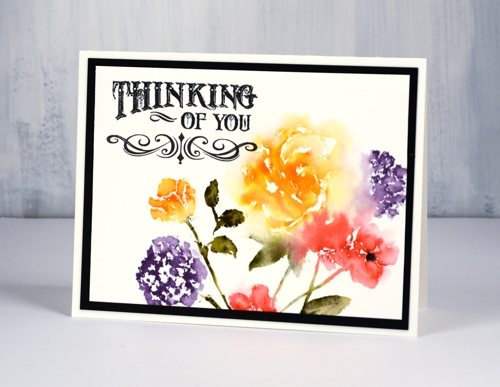
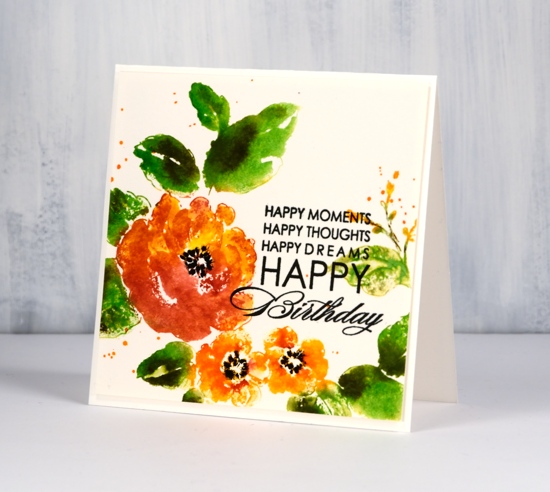
Yes, I used my distress stains for watercolouring again! I could definitely have used ink pads or markers but I really like the uneven amount of pigment and liquid the stains lay down when stamped. Odd isn’t it that I like the coverage to be uneven? With uneven coverage I think the stamping looks more handpainted. I used a stamp positioning tool because you can’t be sure with stain exactly what kind of impression you will get first go. I started with the large flower that is flanked by four little flowers. First I just inked the rose with spiced marmalade distress stain then used a paint brush and water to blend the stain out into pale petals. Next I added the dusty concord, festive berries and forest moss stain to the flowers and leaves surrounding the orange rose. I also blended them with a little water, just enough for them to soften into each other but not lose all definition.
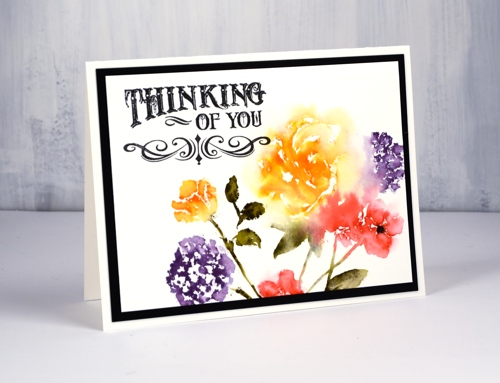
To fill out the design I stamped one of the smaller stamps and blended slightly with water also. At this point I felt my design was looking a bit vintagy so I pulled out an older PB sentiment set incorporating a vintage style font and paired it with one of the new flourish border stamps.
A wide black mat tied it all together. I think these stamps might lend themselves to a repeat pattern on a larger piece of paper. Might have to try that.
Supplies
Stamps: flower pageant, flourish borders, sentimental


Distress stains: forest moss, spiced marmalade, festive berries, dusty concord

Ink: versafine clair nocturne
Paper: hot pressed watercolour, neenah black

Exquisite
Posted: March 9, 2018 Filed under: birds and banners, exquisite, Script | Tags: Penny Black creative dies, Penny Black stamps, Ranger Distress stains 7 Comments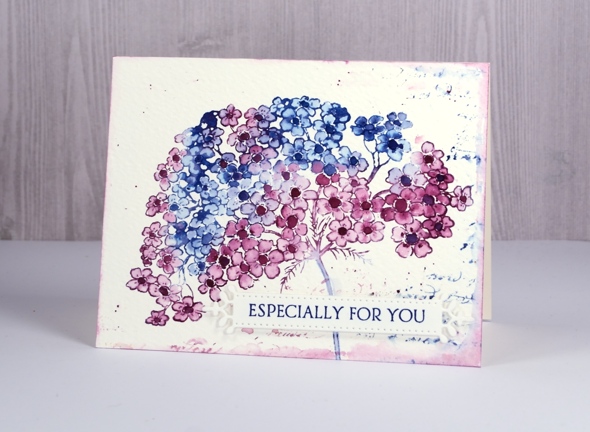
My final springy card for this week features this lovely big flower in two of my favourite distress stains, chipped sapphire and seedless preserves. I stamped this one on cold pressed watercolour paper so once again having the panel in a stamp positioner helped me get a good impression. I inked first with chipped sapphire over parts of the flower, stamped, wiped off the stamp and inked sections again but this time with seedless preserves. I ended up with some blue flowers, some pink and some a purple mix.
I blended the petals of all the flowers with a damp brush and let them all dry. I was going to leave all the centres white but it didn’t look right so I ended up painting them all darker with undiluted stain. To create a soft textured background I dropped a few drops of water around the flower then partially stamped the script stamp in the same ink stains. I dabbed out some ink with a paper towel and added some splatter as well. To frame the whole panel I ran the seedless preserves dauber around the edges then softened the colour with a damp brush.
To complete the card I stamped a sentiment on a fancy little die cut banner and popped it up over the stem of the flower.
Supplies
Stamps: exquisite, script, banner sentiment (Penny Black)


Die: birds & banners

Inks: chipped sapphire & seedless preserves distress stains, majestic blue versafine ink


Paper: cold & hot pressed watercolour paper


Lilacs
Posted: February 28, 2018 Filed under: lilacs | Tags: Penny Black stamps, Ranger Distress stains, Tsukineko Versafine inks 5 Comments
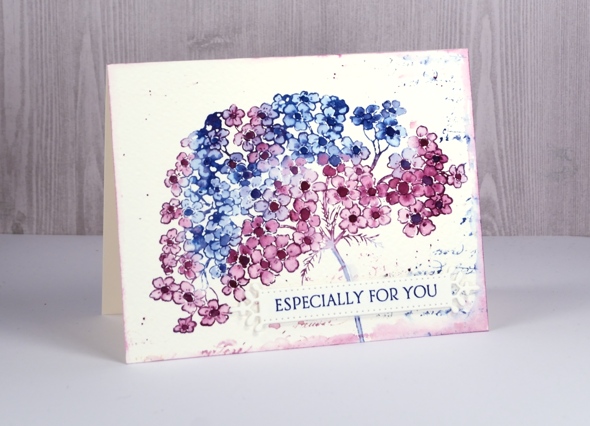
Spring is in the air at Penny Black and is beginning to feel like it here in Ottawa too. The method for this card is exactly the same as shown in my lilac video tutorial This card was stamped with distress stains, one of my favourite mediums for creating a loose watercoloury look. I have used the distress stain daubers for years now to ink my stamps but you may have heard, sadly the daubers are being discontinued. Even though I have a healthy supply of daubers I decided to use the spray stains for this card instead just to see if I could get the same effects with a paint brush. It takes an extra step but it worked and the results made me just as happy. If you have the daubers you apply stain directly to the stamp. (I will just add that the daubers are still available at the Foiled Fox right now; I intend to keep using my daubers and refill them from the spray stain bottles. To do this I just carefully lever off the dauber top and pour in some stain then press the dauber top firmly back on.)
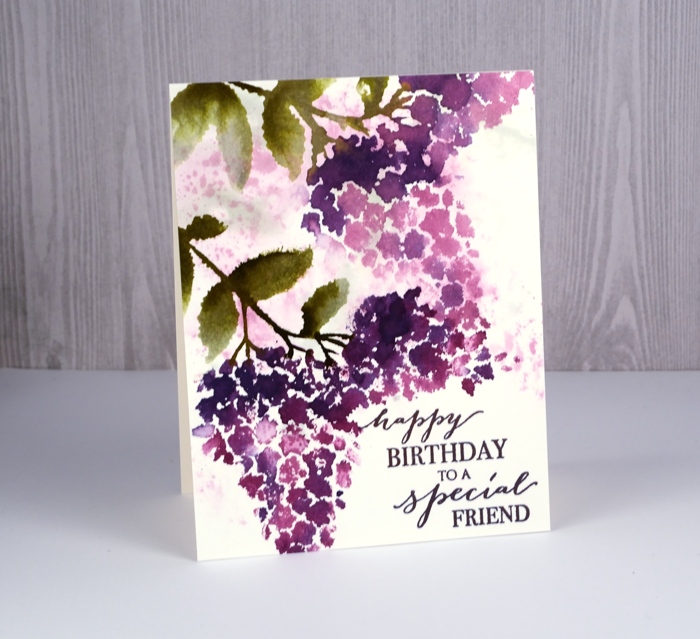
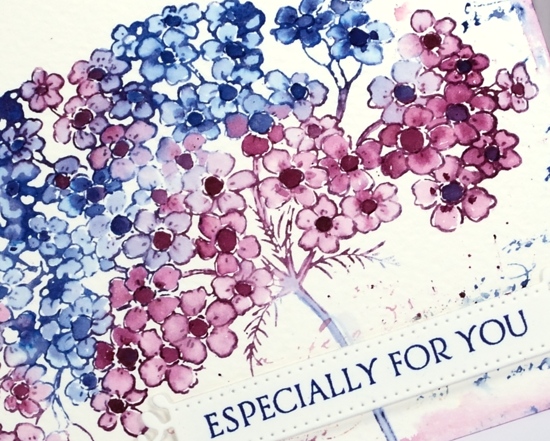
Rather than dob stain on the stamp with the dauber I sprayed some stain into a palette and painted it on to the ‘lilacs’ stamp with a watercolour brush. I used bundled sage and forest moss on the leaves and seedless preserves and dusty concord on the petals. There are some pale lilacs in the background; I stamped them first by painting stain (bundled sage and seedless preserves) onto the stamp and stamping it on a wet piece of hot pressed watercolour paper. I just stamped randomly to spread some colour around then pressed a paper towel over the panel to remove excess water and colour. I dried the panel completely then transferred it to my stamping platform so I could stamp one colour at a time. I painted seedless preserves stain on the stamp first and stamped onto my panel. Without cleaning the stamp I added some dusty concord to a few areas on the stamp and stamped again. The stain blended both on the stamp and on the paper. I cleaned the stamp and used the same technique for the leaves, bundled sage first then forest moss in a few areas to create shadow and depth to the image.
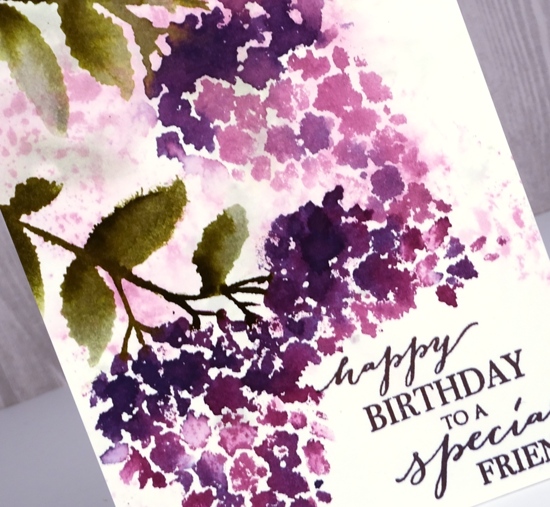
To add another couple of flowers I repeated the process described above after repositioning the panel. I added a sentiment from the new ‘grateful heart’ set with imperial purple versafine ink.
Thanks for dropping by and thanks for all your encouragement.
Supplies
Stamps: lilacs, grateful heart
.

Distress stains: bundled sage, forest moss, seedless preserves, dusty concord
.

Ink: versafine imperial purple ink
Paper: hot pressed watercolour
Also: MISTI or stamping platform

Lilacs video tutorial
Posted: February 19, 2018 Filed under: lilacs, Tutorial | Tags: Penny Black stamps, Ranger Distress stains, video 12 Comments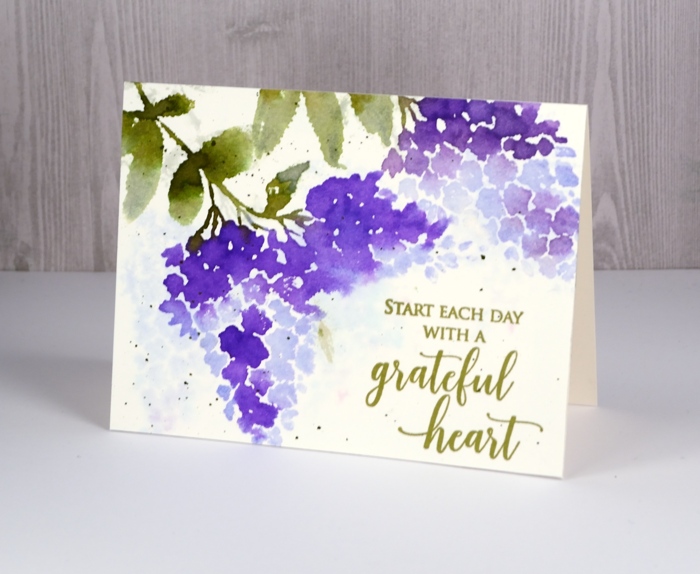
I am excited to share not only these pretty new stamps today but a video tutorial as well! I know, it is hard to believe.
I created this card using a technique I love to use with brushstroke stamps: watercolour with distress stains. I generally use the dauber topped distress stains but as they are being discontinued I thought I would try applying stain with a paint brush. It adds another step in application but the end result is just as pretty.
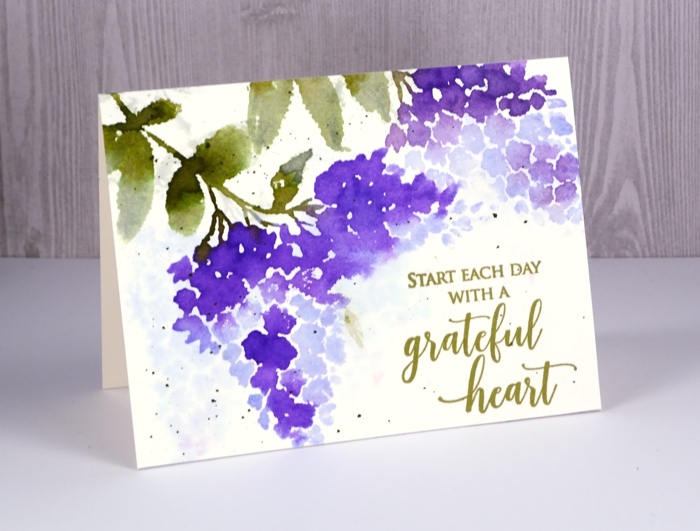
I filmed this video and a couple more with my son’s new camera which I am still getting used to so there are some focusing issues where the camera chooses to focus on my hand instead of the panel. I didn’t think it was enough of a problem to start again so I hope it isn’t too annoying. You get to see me drop my paintbrush with stain on it in the middle of the panel and come up with a quick fix too. I hope you enjoy the video and get to do some creating of your own.
Thanks for dropping by.
Supplies
Stamps: lilacs, grateful heart
Distress stains: shaded lilacs, wilted violet, bundled sage, peeled paint


Inks: Spanish moss versafine ink
Paper: hot pressed watercolour, neenah natural white

Tools: MISTI


