
Disappearing lilacs
Posted: June 3, 2020 Filed under: lilacs, Penny Black | Tags: Fabriano Watercolour Paper, Penny Black stamps, Ranger Distress inks, Tsukineko Versafine inks 9 Comments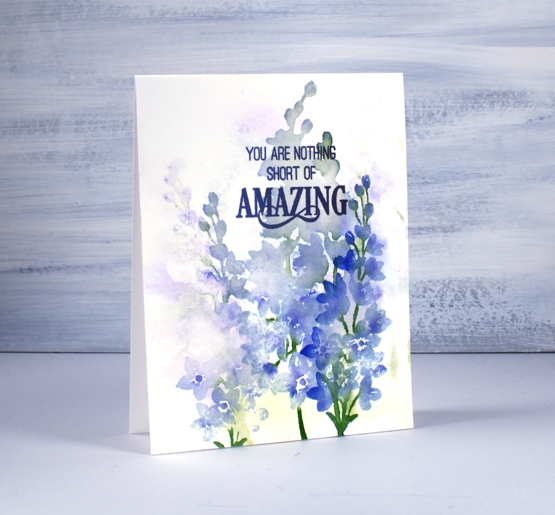
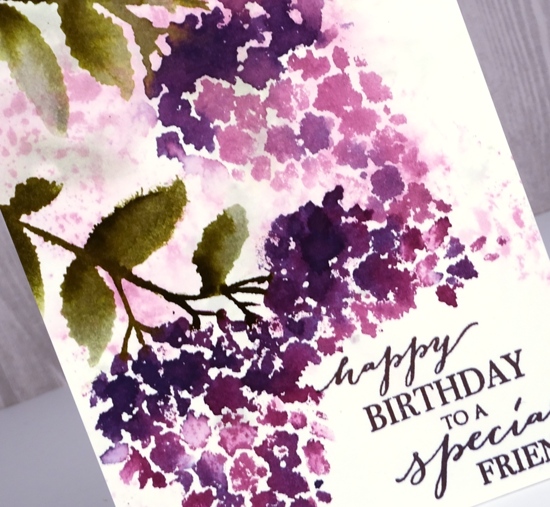
I keep returning to these lovely stamps because they handle watercolour effects so well. My other examples are more defined than this one but I like both techniques. I worked on cold pressed watercolour paper for this one and started by wetting the panel so I could stamp a pale washy background. I used only three distress inks, shaded lilac, blueprint sketch and mowed lawn. I inked the stamp with mostly shaded lilac and mowed lawn, spritzed it with water then stamped on the wet panel. The result is the pale disappearing images you see in the background.
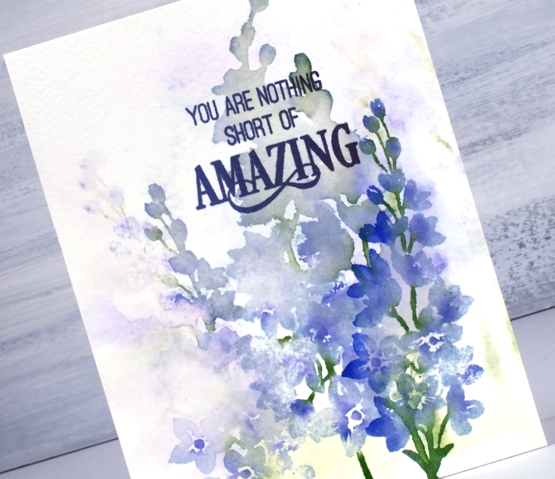
I dried the panel before doing another impression with the lilac stamp, this time I added a few drops of water onto the panel and a spritz of water to the stamp. The ink blended on the stamp and pooled a little on the panel. My last impression was the more defined print on the right hand side. For this one the panel was dry but the stamp still got a spritz of water to move the ink.
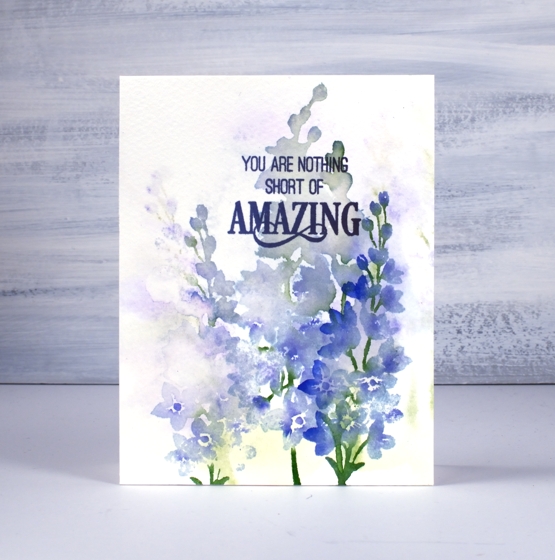
I chose an area of stamping with very little definition as the spot for my sentiment stamped in versafine imperial purple.
Are your lilacs blooming? Mine are along with the first iris and some lupins so the blues and pinks are currently well represented in my garden. Yay!
Supplies

Lilacs
Posted: February 28, 2018 Filed under: lilacs | Tags: Penny Black stamps, Ranger Distress stains, Tsukineko Versafine inks 5 Comments
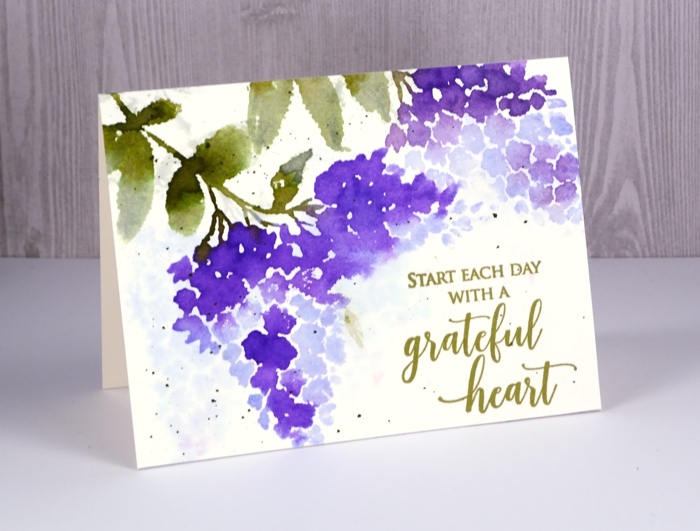
Spring is in the air at Penny Black and is beginning to feel like it here in Ottawa too. The method for this card is exactly the same as shown in my lilac video tutorial This card was stamped with distress stains, one of my favourite mediums for creating a loose watercoloury look. I have used the distress stain daubers for years now to ink my stamps but you may have heard, sadly the daubers are being discontinued. Even though I have a healthy supply of daubers I decided to use the spray stains for this card instead just to see if I could get the same effects with a paint brush. It takes an extra step but it worked and the results made me just as happy. If you have the daubers you apply stain directly to the stamp. (I will just add that the daubers are still available at the Foiled Fox right now; I intend to keep using my daubers and refill them from the spray stain bottles. To do this I just carefully lever off the dauber top and pour in some stain then press the dauber top firmly back on.)
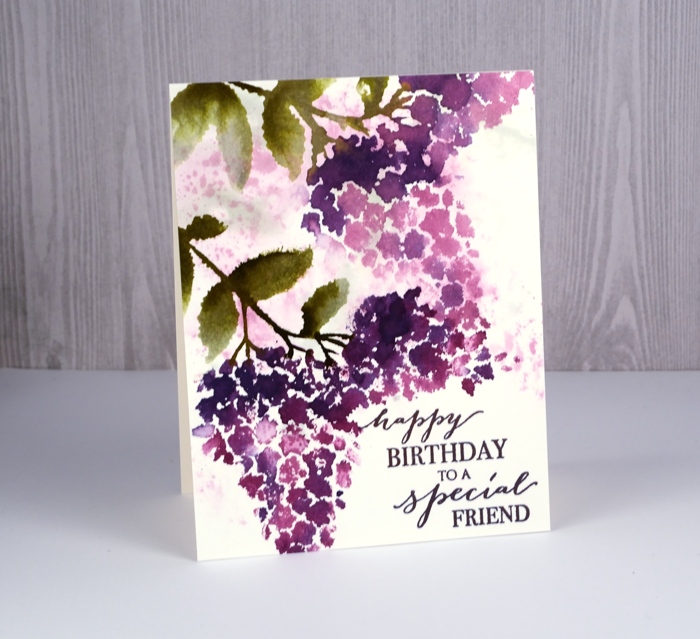
Rather than dob stain on the stamp with the dauber I sprayed some stain into a palette and painted it on to the ‘lilacs’ stamp with a watercolour brush. I used bundled sage and forest moss on the leaves and seedless preserves and dusty concord on the petals. There are some pale lilacs in the background; I stamped them first by painting stain (bundled sage and seedless preserves) onto the stamp and stamping it on a wet piece of hot pressed watercolour paper. I just stamped randomly to spread some colour around then pressed a paper towel over the panel to remove excess water and colour. I dried the panel completely then transferred it to my stamping platform so I could stamp one colour at a time. I painted seedless preserves stain on the stamp first and stamped onto my panel. Without cleaning the stamp I added some dusty concord to a few areas on the stamp and stamped again. The stain blended both on the stamp and on the paper. I cleaned the stamp and used the same technique for the leaves, bundled sage first then forest moss in a few areas to create shadow and depth to the image.
To add another couple of flowers I repeated the process described above after repositioning the panel. I added a sentiment from the new ‘grateful heart’ set with imperial purple versafine ink.
Thanks for dropping by and thanks for all your encouragement.
Supplies
Stamps: lilacs, grateful heart
.

Distress stains: bundled sage, forest moss, seedless preserves, dusty concord
.


Ink: versafine imperial purple ink
Paper: hot pressed watercolour

Also: MISTI or stamping platform


Lilacs video tutorial
Posted: February 19, 2018 Filed under: lilacs, Tutorial | Tags: Penny Black stamps, Ranger Distress stains, video 12 Comments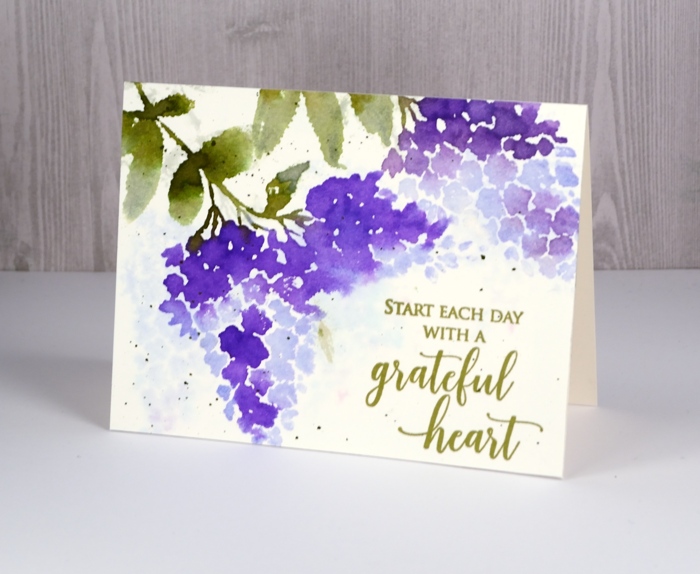
I am excited to share not only these pretty new stamps today but a video tutorial as well! I know, it is hard to believe.
I created this card using a technique I love to use with brushstroke stamps: watercolour with distress stains. I generally use the dauber topped distress stains but as they are being discontinued I thought I would try applying stain with a paint brush. It adds another step in application but the end result is just as pretty.
I filmed this video and a couple more with my son’s new camera which I am still getting used to so there are some focusing issues where the camera chooses to focus on my hand instead of the panel. I didn’t think it was enough of a problem to start again so I hope it isn’t too annoying. You get to see me drop my paintbrush with stain on it in the middle of the panel and come up with a quick fix too. I hope you enjoy the video and get to do some creating of your own.
Thanks for dropping by.
Supplies
Stamps: lilacs, grateful heart
Distress stains: shaded lilacs, wilted violet, bundled sage, peeled paint


Inks: Spanish moss versafine ink
Paper: hot pressed watercolour, neenah natural white


Tools: MISTI


