Mini Festive Fragrance
Posted: December 28, 2023 Filed under: festive fragrance, Penny Black, Sizzix | Tags: Penny Black stamps, sizzix embossing folder 5 Comments
Today’s card features ‘festive fragrance‘ a Penny Black brushstroke stamp, which I think could be used all year round especially if you choose colours accordingly. I used the following distress inks (either ink pads or markers) to ink the stamp: brushed corduroy, forest moss, rustic wilderness, mowed lawn, festive berries, aged mahogany, candied apple. I spritzed the stamp lightly before stamping on hot pressed watercolour paper. After stamping once I reapplied ink to the stamp if necessary to get more coverage but in some cases all that was needed was some blending with a paintbrush to fill the leaves or berries.
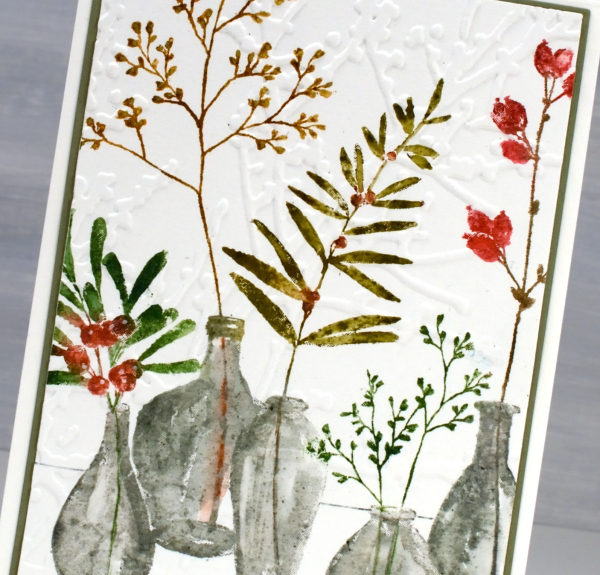
I definitely did more blending on the vases then ruled a thin line behind the vases to ground the image. You may have noticed on some of my recent cards I have embossed the panels after stamping and watercolouring. I did so on this one with the twiggy embossing folder from Sizzix/Tim Holtz (sorry I don’t know the name). I knew I was taking a risk embossing a perfectly good panel with a large non-symmetrical embossing folder but I think it worked.
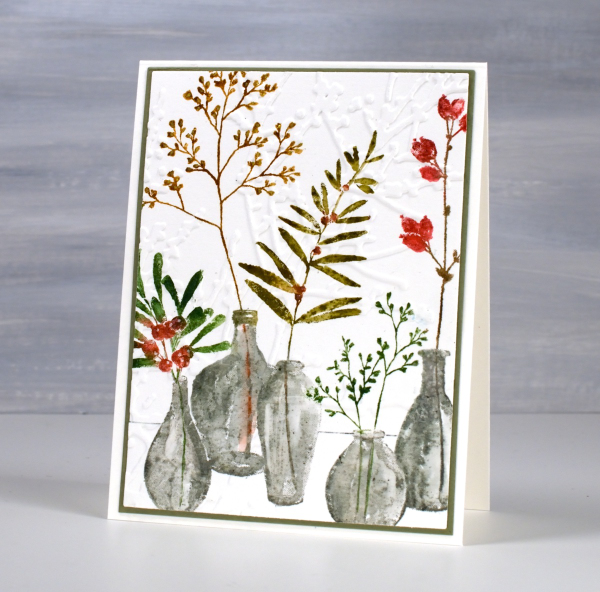
You can’t tell from the photo but this is a smaller card than my usual A2 cards. This one is 5″x 3¾”, which is half an inch smaller in height and width. I’ve chosen to make some cards this size because I have some envelopes this size to use up and sometimes smaller is cuter. To see the image on an A2 card take a look at an earlier card here. Today’s post features affiliate links to the following companies. If you buy through these links I receive a small commission at no extra cost to you. The Foiled Fox & Scrap’n’Stamp.
Chipboard Decorations
Posted: December 9, 2022 Filed under: chipboard, christmas ornaments, gel press, grafix, Sizzix, Tutorial | Tags: collage, gel press, gel printing, grafix, Tutorial 3 Comments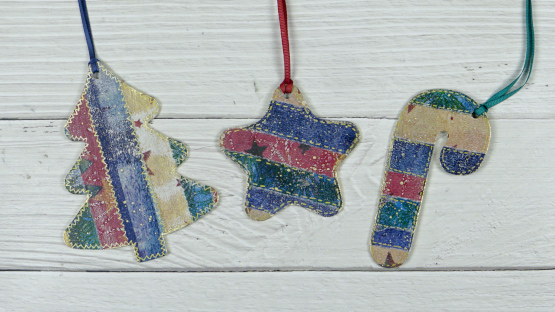
I have been creating collage panels with my many gel prints lately, most for Christmas cards. The striped and patchworked collages looked so pretty I decided to try the process on Grafix chipboard.
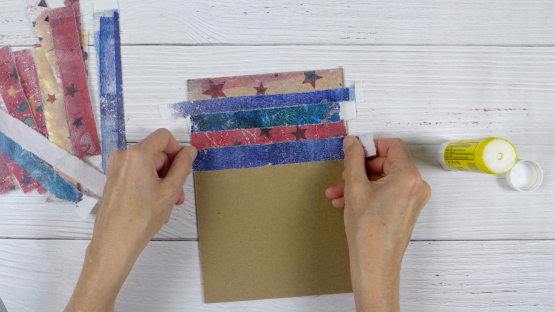
I collaged on both sides and love the way they turned out. I made a video of the process then made more chipboard decorations in different colours.
I used a serious chipboard cutting die to cut the ornaments. It is from Sizzix and I was pleased to see how clean the cuts were. If you have a digital cutting machine you would be able to cut the chipboard into any number of shapes.
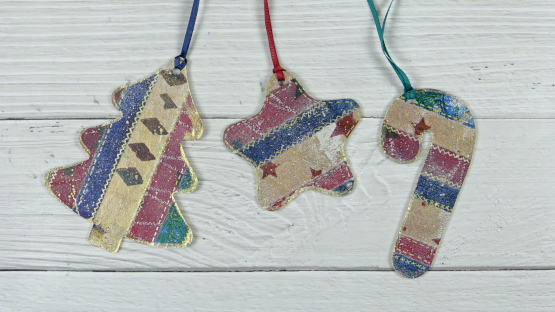
After cutting out the shapes I used a gold gel pen to add stitching lines and gold paint to coat the edges. A crop-a-dile made quick work of punching holes so I could add ribbon to the shapes.
(Compensated affiliate links from Foiled Fox, Scrap n Stamp)
Alcohol Ink + Masks
Posted: July 13, 2022 Filed under: Alcohol Ink, artsy stems, classic motorcycles, Darkroom Door, grafix, Sizzix, you are everything | Tags: Darkroom Door stamps, grafix, grafix craft plastic 6 Comments
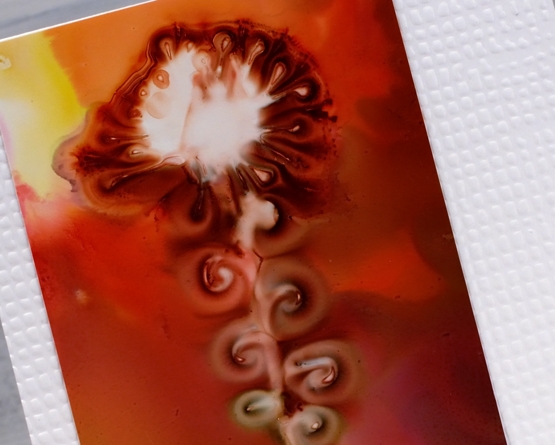
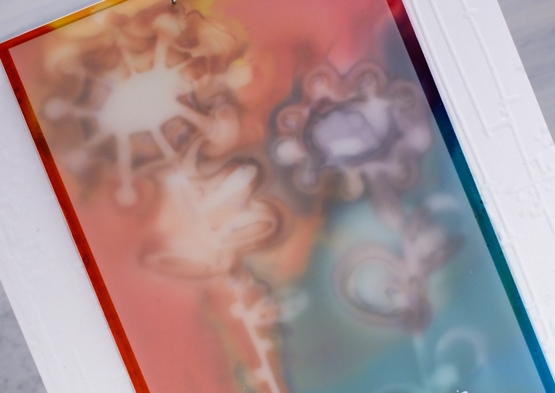
I’ve played with stencils and alcohol inks before so it wasn’t much of a stretch to try the same with masks. Masks are basically stencils without any frame around them. The ones I used for today’s cards are homemade from Grafix white craft plastic (also known as white opaque dura-lar).
I used the Sizzix ‘artsy stems’ dies to cut flowers from craft plastic. I also used craft plastic for the alcohol ink panels. I first tried this technique when making bookmarks for a Grafix video tutorial. I used the same funky die-cuts and alcohol inks so check out the video below for the process.
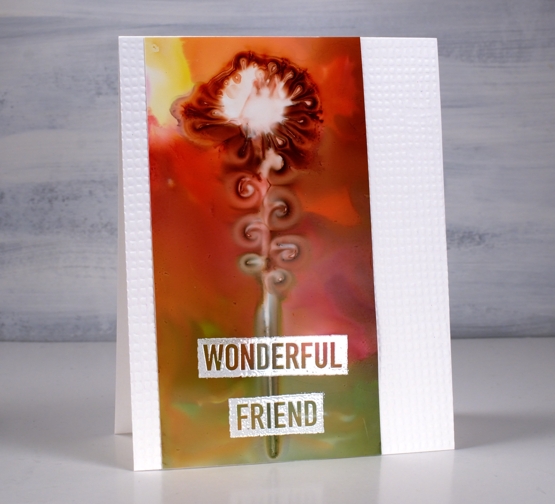
One thing I really like about working with Grafix craft plastic and matt dura-lar (in the final card) is that you can emboss on it. I make sure I preheat the heat tool so I can quickly activate the embossing powder. The craft plastic doesn’t melt or warp if you keep the heat tool moving.
All the sentiments are from Darkroom Door sets (linked below) two were embossed and the other stamped with a new ink from Ciao Bella. It took a while to dry on the craft plastic but I am impressed with the solid matte look once dry.
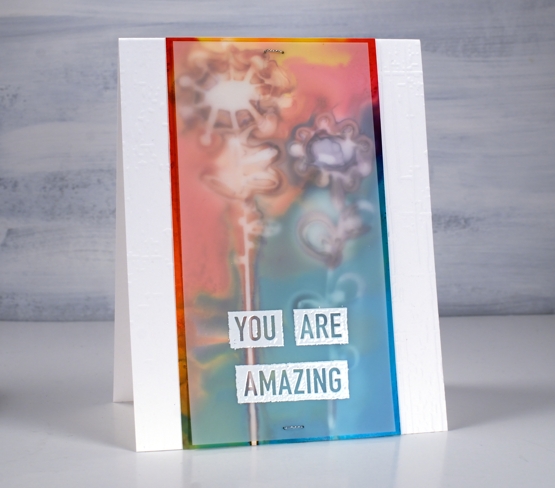
You can see on this last card I had to come up with a way to attach the semi transparent matte dura-lar to the coloured panel underneath. I didn’t want to use tape which would show so I poked a couple of holes through both layers and sewed the panels together with some silver cord.
All the alcohol ink panels are attached to white card bases embossed with embossing folders for some subtle texture and interest.
Supplies
(Compensated affiliate links used when possible)