
Bejeweled
Posted: February 13, 2016 Filed under: Bejeweled | Tags: CAS, Fabriano Watercolour Paper, Penny Black creative dies, Penny Black stamps 11 Comments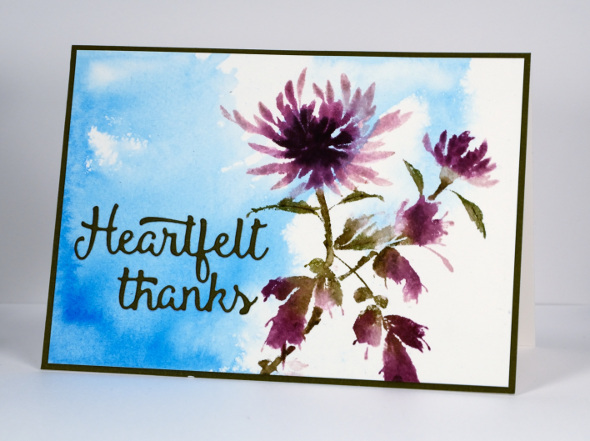
I am featuring another new stamp on today’s card created in the same way as yesterday’s. I painted the sky first and let it dry completely before stamping the flowers into the whiter (cloudier) side of my panel. Once again I inked the stamp with distress stains then used elderberry marker on a second stamping to add some depth to the centre of the flower. This time I chose a dark green cardstock rather than black for the co-ordinating sentiment and mat.
Don’t forget to keep visiting the PB blog for more teasers and a chance to win a shopping spree.
Supplies:
Stamps: Bejeweled (PB)
Dies: heartfelt thanks (PB)
Inks: Seedless preserves, frayed burlap, milled lavender distress stains (Ranger) Elderberry memento marker (Tsukineko)
Paint: Phthalo blue Dr Ph. Martin Hydrus
Cardstock: Fabriano 100% cotton hot pressed watercolour paper, green cardstock
The Unfolding
Posted: February 12, 2016 Filed under: The Unfolding | Tags: CAS, Fabriano Watercolour Paper, Penny Black creative dies, Penny Black stamps 18 Comments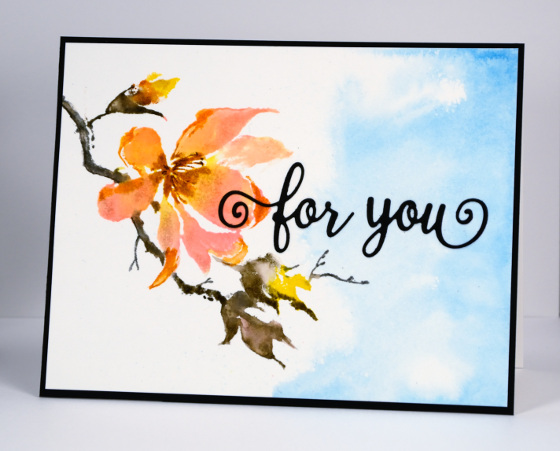
I have some new stamps and dies to share over the next little while, all with the promise of spring. The new release from Penny Black is called ‘So Special’ and it will soon be available in the online store. If you haven’t already seen the teasers on the Penny Black blog then pop over there and browse through the last two weeks of posts. There are prizes to be won by four lucky people so make sure you stop by and check it out.
I painted a pale blue sky on watercolour paper before using distress stains to colour this striking new magnolia stamp. To finish I die cut one of the new sentiments in black and framed the flower in black also.
Supplies:
Stamps: The Unfolding (PB)
Dies: party for you (PB)
Inks: spiced marmalade, spun sugar, worn lipstick, hickory smoke, forest moss distress stains (Ranger)
Paint: Phthalo blue Dr Ph. Martin Hydrus
Cardstock: Fabriano 100% cotton hot pressed watercolour paper,Neenah epic -black cardstock
Pink Poppy Time
Posted: January 23, 2016 Filed under: Fresh, Poppy Time | Tags: Fabriano Watercolour Paper, Penny Black stamps, Ranger Distress stains 13 Comments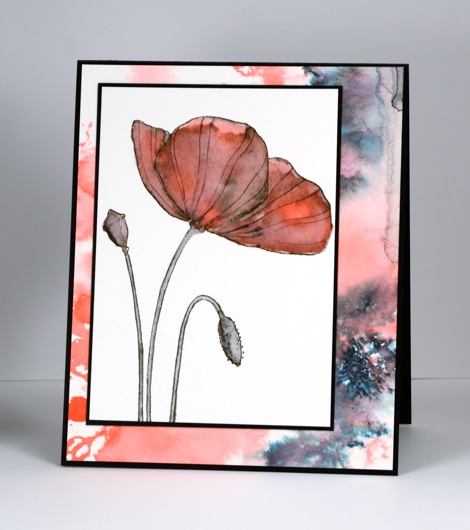
I don’t often add more than one mat or layer to a stamped panel but it was fun co-ordinating a patterned panel with the focal image. By working on two panels at once I was able to create one very controlled image panel along with a loose background one.
The single poppy I stamped in black soot ink then drew over a few of the outlines with the ‘elegant writer’ pen. When I started filling the poppy with pink stain the black ink bled into the pink giving it the watermarked grungy look. To create the patterned paper behind the panel I stamped the ‘Fresh’ poppy stamp in pink stain, added some detail with the elegant writer pen again and then flooded the panel with a spritzer. The pink spread and the black bled into black, pink and green.
I doubt you will start seeing oodles of layers on my cards; there are talented card makers who do that so well. From time to time however it is fun to get fancy with a few extra layers. Speaking of layers (or lack of)there is one day left to enter the One Layer Simplicity challenge for January. Even if you can’t squeak in with a card, check out the cool’sky inspired’ cards linked up there.
Supplies
Stamps: Poppy Time, Fresh (Penny Black)
Inks: Elegant Writer pen (Speedball) Black soot distress ink, Worn Lipstick distress stain (Ranger)
Cardstock: Fabriano cold pressed watercolour paper, Black cardstock
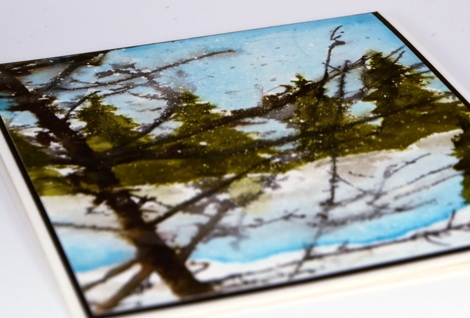
Moonlit snowscape
Posted: January 20, 2016 Filed under: Soft Whisper, Spread Cheer, Stamped Landscapes | Tags: Dr Ph Martin Hydrus watercolor paints, Penny Black stamps 24 Comments
I have more winter scenery for you today because, let’s face it, a snowy landscape can be so very pretty. On the snow scapes I posted last week I let the sky and trees blend a little; today’s technique is a little different. To create this one I masked the moon with frisket film and splattered masking fluid first then painted the sky with Dr Ph Martin’s Hydrus watercolours. One thing I am enjoying about these liquid watercolours is they are colourfast once dry. I painted the sky first, removed the moon mask, added the background trees to the wet sky but waited until everything dried before adding the foreground tree. That way I was able to add the foreground tree then blend colour and add water to the trunk without having it bleed into the sky. The whole tree stamp contains more twigs and some blossom; I just inked what I wanted with markers for the initial impression then switched to paint and a paintbrush to finish. Once the whole panel was dry I removed the masking fluid and added some more white snow with a white wink of stella pen.

I have quite the lovely array of floral stamps at my finger tips now because the new Penny Black release is imminent but the scenery outside my window is still calling to be stamped and painted. Once the new release is available from PB you will definitely see some flowery goodness here to make you dream of spring.
Stamps: Soft Whisper, Spread Cheer (PB)
Inks: Memento Paris dusk, Expresso truffle, Tuxedo black (Tsukineko)
Paint: Dr Ph Martin’s Hydrus watercolours
Cardstock: Canson 100% cotton hot pressed watercolour paper, black cardstock
Also: Winsor & Newton masking fluid, Grafix frisket film, White wink of stella
Fancy Hearts
Posted: January 19, 2016 Filed under: Brusho, Fancy Heart, Triple love | Tags: Brusho, Penny Black creative dies 5 Comments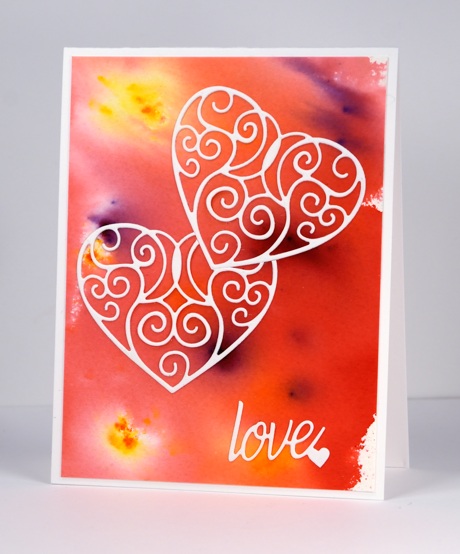
There are a bunch of new heart die in the new ‘Love Always’ release, some solid and some with pretty patterns like this one. I cut two, then snipped out a little section so I could fit them together. The little word is snipped from the ‘triple love die’and I added ‘stick it’ adhesive to the back of the cardstock before die cutting to make it easy to attach. The background is brusho magic in pink, yellow and purple.
Keeping it short and sweet this time; I hope you have a great day.
Supplies:
Dies: Triple Love, Fancy Heart (PB)
Paint: Brusho (C0lourcraft)
Cardstock: Cold pressed Fabriano watercolour paper
All Abloom
Posted: January 18, 2016 Filed under: All Abloom | Tags: CAS, Penny Black stamps, Ranger Distress stains 10 Comments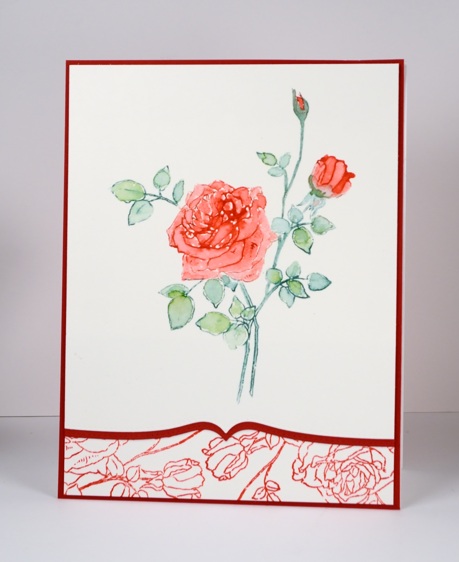
This week I will be sharing cards made with stamps and dies from Penny Black’s new ‘Love Always‘ release. This delicate rose is from a transparent set of floral stamps. I inked it with a mix of red and green distress stains and markers. I pulled the colour into the petals and leaves with a small paintbrush adding extra here and there where needed. To finish I used the same stamp to create an outline patterned panel at the bottom of the card front and the stitched edge die to shape the bottom of the panel and red mat underneath.
Once again the Valentine’s stamps prompted me to pull out red ink; I’m not sure why I can’t break free from that mould. Perhaps I should have tried black. A friend of mine bought a black rose bush at the end of last season and is eager to see what it looks like once summer comes around. There is such a thing as a blue rose too although that does not seem quite right.
Supplies:
Stamps: All Abloom (PB)
Dies: Stitched Edges (PB)
Inks: Festive berries, Peeled Paint, Pine needles distress stains and markers (Ranger), Versafine Satin red ink (Tsukineko)
Cardstock: Hotpressed Fabriano watercolour paper, Neenah chili red
Winter Weather
Posted: January 16, 2016 Filed under: Nature's Friend, Soft Whisper, Stamped Landscapes | Tags: Penny Black stamps, Ranger Distress inks, Ranger Distress stains 11 Comments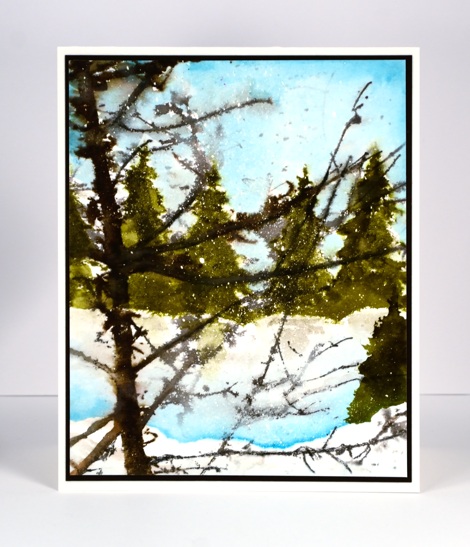
Remember back in December when I kept mentioning the lack of snow around here? There wasn’t just a lack of snow there was really no winter weather at all. Well, that is over; we have snow, ice and it’s cold outside! The winter weather has inspired me to create some snowy scenes.
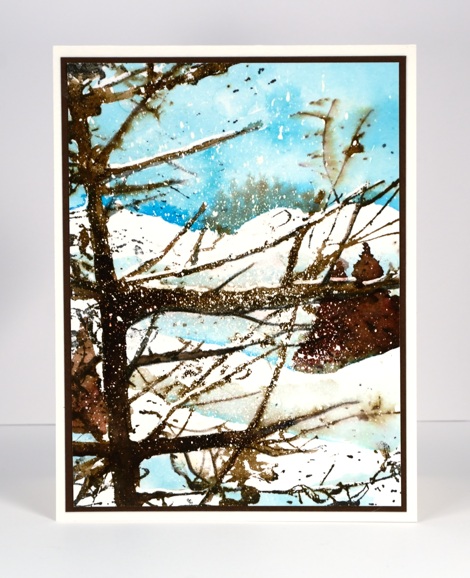
I stamped and painted these two winter scenes beginning both times with a splatter of masking fluid to create the look of falling snow. Once the masking fluid was dry I stamped the large tree trunk stamp, ‘Soft Whisper’ in brown and then added some more masking fluid on the top of the branches (on the snowier card) and added extra definition to the branches and trunk with light brown, dark brown and black paint.
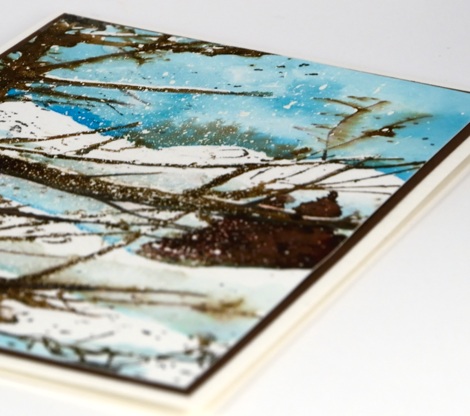
On one card I stamped the trees in green distress stain on the other I painted trees in brown brusho. It was interesting to limit my colour palette to brown and blue for one card and the additional green on the other card. I added the sky and snow banks after the branches so there is some bleeding of brown into blue here and there.
I was interested to read the comments on my recent gelli plate post; I will be trying the different techniques described when I get a chance. I am also hoping to share more art journal pages this year including the one I started yesterday.
Stamps: Soft Whisper, Nature’s friend (PB)
Inks: Black Soot, Gathered Twigs, Forest Moss, Broken China distress inks and stains (Ranger)
Paint: Colourcraft Brusho
Cardstock: Canson 100% cotton hot pressed watercolour paper
Also: Winsor & Newton masking fluid
A mixed media card!
Posted: January 13, 2016 Filed under: Camelia | Tags: gelli plate, Penny Black creative dies, Penny Black stamps 6 Comments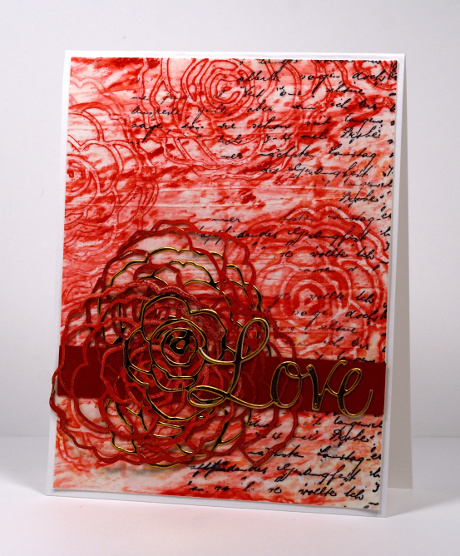
It seems that mixed media doesn’t appear on this blog very often but if I make a bit more progress in my art journals that might change. The card above features the first and only use of my gelli plate. I have seen lots of wonderful creating done with gelli plates but mine is currently stranded on Mount Techniques-To-Try along with other cool stuff!
I began by laying rose die cuts on my gelli plate then brayering red printing ink over plate and roses. I removed the roses before making a print of the pattern on deli paper. Out of several prints this one showed the most detail. I was going to throw away the very messy rose die cuts but a friend who was busy creating at the same time convinced me to hold onto them. Once they were dry they made delicate details which co-ordinated with the paper. I added some text to the paper, a solid strip to ground the embellishments and some gold die cuts for the focal element.
Have you gelli-printed? I intend to get back to my plate and would love to hear your favourite way to use one.
Supplies:
Stamps: Letter Background (PB)
Dies: Camelia die, Love & Joy die (PB)
Inks: Red Printing ink (Speedball), Black archival ink (Ranger)
Cardstock: Mixed media paper, deli paper, gold foil cardstock
Happy Anniversary, Baby
Posted: January 7, 2016 Filed under: Bridal March | Tags: Penny Black stamps, Ranger Distress stains 39 Comments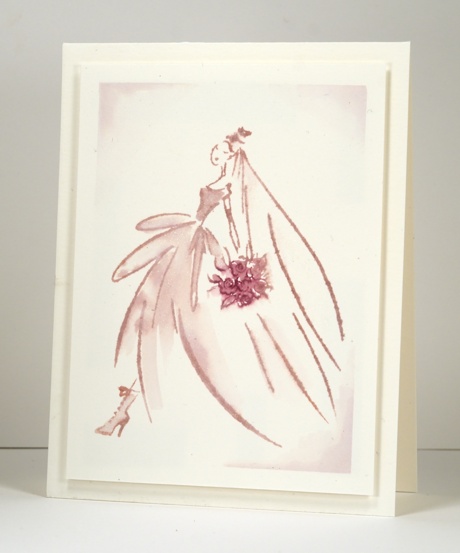
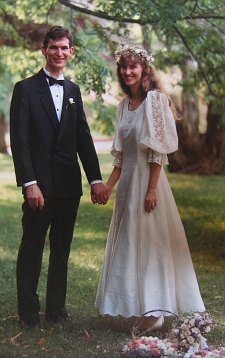
It was my wedding anniversary yesterday so a wedding related card seems appropriate. I don’t do many cards with people in them and do not have skills in painting skin colour. Making this a monochrome card solved that little problem nicely. I only used two colours, both from the purple family, and managed to blend enough colour within the outline to provide some dimension. I stamped with distress stain and pulled colour from the stamping while it was still wet. Masking tape around the original panel created a frame then popping it up on dimensional tape which created another subtle frame.
This elegant dress looks nothing like my wedding dress, nor did I have a veil or fancy boots like those above. I did design and make my wedding dress myself and still love it despite how dated it seems now. My mother borrowed her wedding dress from a dear friend; it was extremely elegant and would not look out of place today. Mine will not be back in style until enormous sleeves return!
Supplies:
Stamps: Bridal March (PB)
Inks: Milled lavender, Aged Mahogany distress stains (Ranger)
Cardstock: Hotpressed Fabriano watercolour paper
Brusho Hearts
Posted: January 5, 2016 Filed under: All my hearts, Brusho, Love & Hugs, Love is growing, Triple love | Tags: Brusho, Penny Black creative dies, Penny Black stamps 13 Comments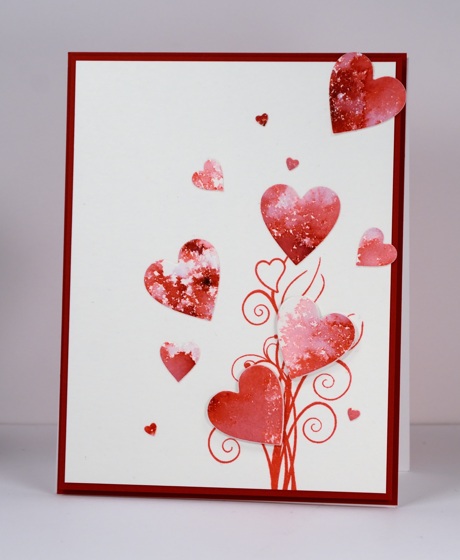
‘Tis the season for creating Valentine cards but the fresh snow outside my window is calling me to keep creating snowy scenes! New stamps and dies however, were calling from inside my craft room so red, pink and hearts it is. The new release from Penny Black is full of love, hearts and sweet wishes and is available in the online store now.
I created a red and pink panel with brusho then die cut a bunch of different sized hearts using three different dies. Aren’t those tiny ones cute? I popped up two of the hearts on fun foam and attached the others directly onto the stamped panel.
What are you creating in the new year?
Supplies:
Stamps: Love & Hugs (PB)
Dies: Triple love, Love is growing, All my hearts (PB)
Mediums: Brusho powders, Versafine Satin red ink
Cardstock: Hotpressed Fabriano watercolour paper, Neenah chili red
Also: white fun foam


