
Color Burst Birthday
Posted: October 10, 2015 Filed under: Color Burst, Oodles of Love | Tags: color burst, Penny Black creative dies 15 Comments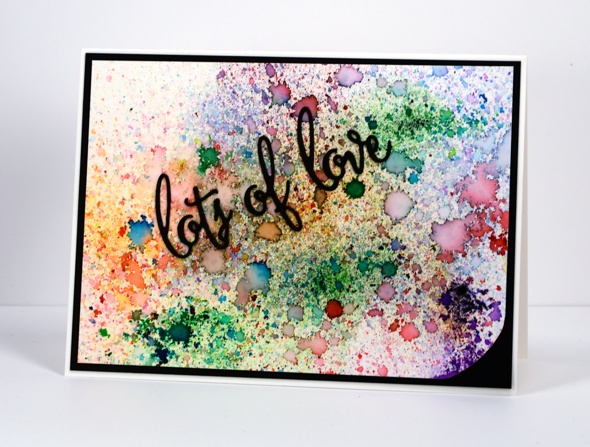
It was my son’s birthday yesterday so I wanted to make a card he hadn’t seen rather than reach into the stash. Unfortunately I am dealing with a sore wrist/hand/thumb at present and of course holding pens, paintbrushes, scissors seems to be the worst thing for it. I needed a technique which didn’t require me to over use the right hand. Working with color burst powder was great because it creates its own magic with the help of some spritzed water. I should have stamped a single sentiment instead of stacking die cuts though.
I created the coloured panel one powder colour at a time by spritzing water, then dropping powder. I tried to take it slowly so I could see how much each colour was going to react before I added the next spritz or sprinkle. I love the way the larger drops of water have their own darker border and then there is a fine splatter of colour around them.
Supplies:
Creative dies: Oodles of love (Penny Black)
Inks: Color burst watercolour powders(Ken Oliver)
Cardstock: Canson hot pressed watercolour paper, Neenah epic black cardstock
Also: Stick it adhesive sheet (Ken Oliver)
Brush Pines tag card
Posted: October 9, 2015 Filed under: Brush Pines | Tags: Penny Black creative dies, Penny Black stamps, Tsukineko Memento inks 5 Comments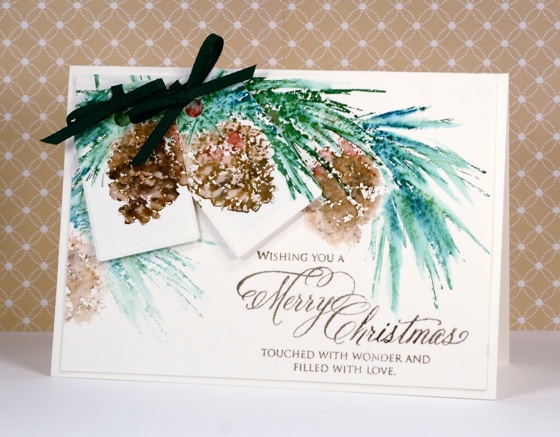
The Penny Black designers are playing with tags again and have added them to cards this time. I chose the ‘brush pines’ stamp and some cold-pressed watercolour paper for my layered pinecones card. I stamped the pine cones several times so I would have extra images for the tags. I also stamped a few times without re-inking to create paler impressions. The ink was applied with Memento markers and blended with water to soften and spread the colours. I die cut the tags with the smaller die from the ‘tagged’ set popped them up over the stamped panel.
Supplies:
Stamps: Brush Pines, Believe (PB)
Dies: Tagged (PB)
Inks: Memento teal zeal, cottage ivy, rhubarb stalk, rich cocoa markers, versafine vintage sepia ink (Tsukineko), gathered twigs distress markers (Ranger)
Cardstock: Canson cold pressed watercolor paper
Also: green grosgrain ribbon
Die cut snowflakes
Posted: October 7, 2015 Filed under: Snow Drops, Snowflake trio | Tags: Penny Black creative dies 9 Comments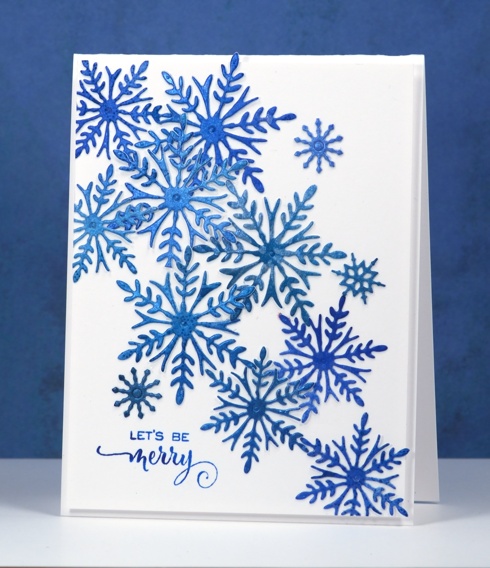
Although this card is very different to the forest card I last posted, the way it came about is similar. When planning class projects I cast aside a couple of panels of shimmery blue. I had brayered two colours of blue ink over the panels to begin then spread interference blue pearl-ex powder over the inking. I used a soft paintbrush to spread it out evenly and the finished effect was very shimmery when tilted in and out of the light. Sadly you can’t see just how shimmery here. I didn’t end up using the panels or technique in my class so I die-cut as many snowflakes as I could from the left over panels then cascaded them down a white card front and added a sentiment.
Supplies
Stamps: Seasons Gifts, (Penny Black)
Dies: Snow Drops, Snowflake Trio (Penny Black)
Inks:Memento Danube Blue, Teal Zeal, (Tsukineko)
Cardstock: Neenah solar white cardstock
Watercoloured leaves the distressing way
Posted: September 30, 2015 Filed under: Filigree Foliage, Wishes | Tags: Penny Black creative dies, Penny Black stamps, Ranger Distress inks, Ranger Distress stains 18 Comments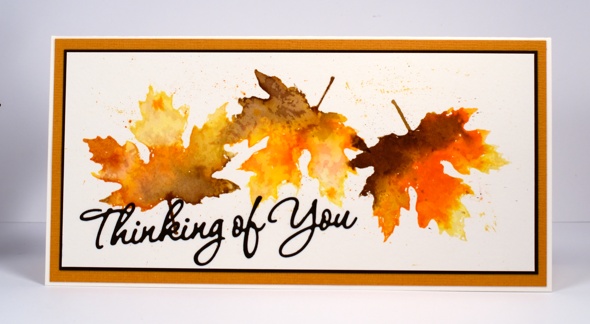
Watercolour and autumn were made for each other were they not? I went for a run this morning and there were deep red maple leaves lying on the path looking like mini masterpieces. I kept wanting to pick them up and bring them home to inspire some painting. I did not want to carry them however and there will be thousands (I am not kidding) in my yard over the next 6-8 weeks (again, not kidding).
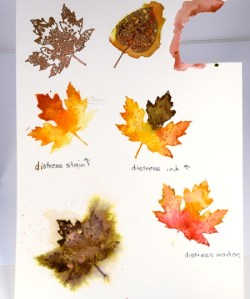
I did a periscope comparing painting leaves with distress stains, ink pads and markers this morning. These cards use the same techniques I demonstrated on the video. The first one is my favourite distress technique, stamping with stains then moving the stain with a paintbrush to fill the stamped image. I added fine splatter to the leaves on this one but kept the next one fairly clean.
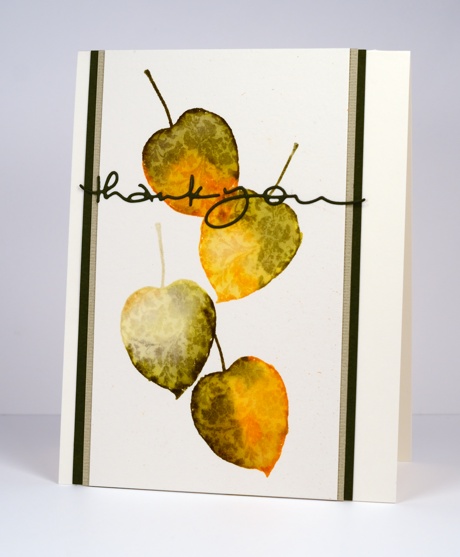
I used the same ‘stamp then paint and blend’ technique for the second card but inked the stamp with ink pads. The main difference is less liquid on the stamp and an image that soaks into the watercolour paper more quickly. The result once blended with water is similar but more of the stamped outline remains. Using markers gives a similar result to inkpads but transfers even less liquid on the stamp. With markers however you can apply colour to small areas of the stamp and have a more detailed and intricate colour result.
To finish I matched cardstock to the stamping for mats and die cut sentiments.
Supplies
Farewell to summer: Beach
Posted: September 24, 2015 Filed under: A Pocket Full, Hand drawn, So Lucky | Tags: Penny Black creative dies, Penny Black stamps, Ranger Distress stains 7 Comments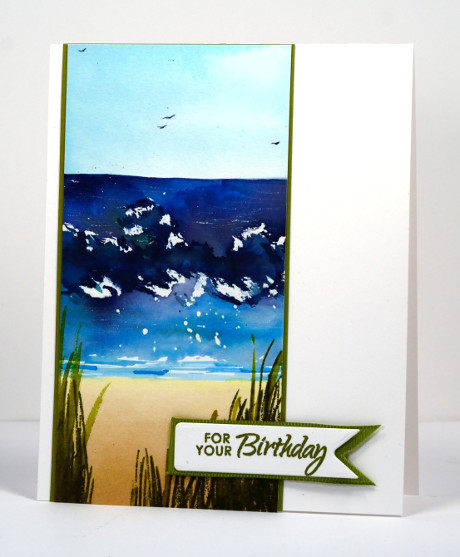
This hand-painted card depicts one of my favourite summer activities, sadly one that I rarely get to enjoy these days. Growing up we had a beach holiday every summer. I don’t live anywhere near the beach now but I did enjoy a couple of trips to the lake during July and August. One trip was to Sandbanks on Lake Ontario. The lake is so huge that it looks like an ocean beach but the water just doesn’t taste right! Apparently the wind does whip up waves most days but when we were there it was flat, flat, flat.
The card above is based on my memories of Australian beaches. We would walk over a little or large dune and reach the beach, usually a surf beach, and check out how good the waves were going to be that day. I painted with distress stains over some masking fluid ‘white caps’ and added some grass with a stamp from the ‘so lucky’ transparent set.
This is the last in my Farewell to summer mini series, it will be pretty much autumn and winter themed cards for a while now!
Supplies:
Stamps: So Lucky, Special Wishes (PB)
Creative Dies: A pocketfull (PB)
Inks: chipped sapphire, salty ocean, tumbled glass, broken china, pine needles, scattered straw, mustard seed, vintage photo distress stains, peeled paint, crushed olive distress inks (Ranger)
Cardstock: Fabriano 100% cotton hot pressed watercolour paper, Neenah avon brilliant white, green cardstock
Farewell to summer: Fuchsias
Posted: September 16, 2015 Filed under: Fuchsia | Tags: Kuretake Gansai Tambi watercolour paints, Penny Black creative dies 16 Comments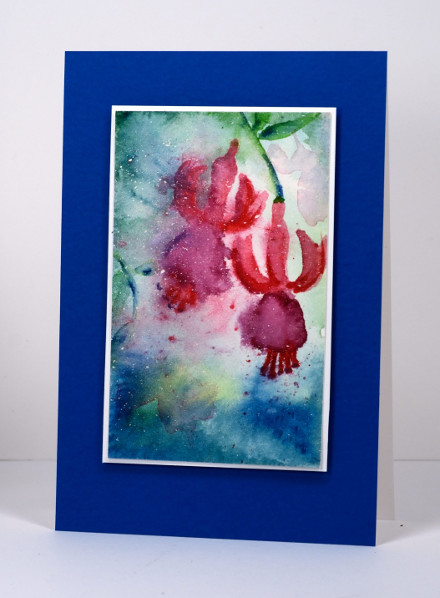
This one is a stamp-less card! I created a stencil for myself by cutting the fuchsia die from a piece of plastic then painting through it. I wasn’t able to achieve sharp edges or details but I wasn’t really after that look. Before using the stencil I wet the whole panel with water and painted blue and green paints around the edges. The middle wasn’t totally white but it was paler so my pinks would not end up changing too much. I used kuretake gansai tambi paints which are highly pigmented so it is easy to get some really strong colour. I did add a bit of definition to the petals after removing the stencil. I also painted some very very pale fuchsias through the stencil and added a little splatter. Before fuchsias fully open the lower petals form a little balloon which just screams out to be popped. Did anyone else pop them when they were a child?
Supplies:
Creative Dies: Fuchsia (PB)
Paint: Kuretake Gansai Tambi
Cardstock: Fabriano 100% cotton hot pressed watercolour paper, Neenah solar white cardstock, PB clear skies paper
Also: Winsor & Newton masking fluid
Poppies with love
Posted: September 14, 2015 Filed under: Efflorescence, Flourish, No Card Left Behind | Tags: Fabriano Watercolour Paper, Penny Black creative dies, Penny Black stamps, Ranger Distress stains, Tsukineko Memento inks 16 Comments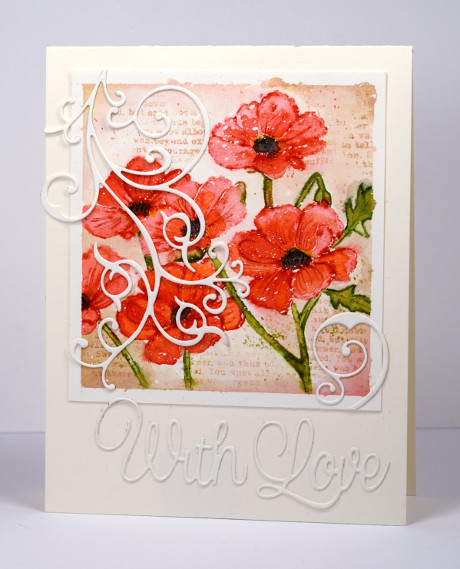
I have another card featuring one of my favourite techniques, ‘watercolouring with distress stains‘. I worked on a panel of watercolour paper taped to a board and splattered with masking fluid. The stamp is an outline stamp which I inked with festive berries and ripe persimmon stain on the petals and peeled paint on the stems. I painted colour into the petals straight away so the outlines would blend with the colour in the whole petal. I drew a bud and a few leaves with a marker to fill the space more evenly. Once the flowers were almost dry I painted the background with desert sand ink and added some text also. I added black to the flower centres with a marker and blended with water to soften the edges a little.
When I removed the tape and the masking fluid I wasn’t entirely happy with the finished panel. Instead of trying to alter any part of the watercolouring I decided to add another element, the die cut flourish over the top. I tied the flourish in with a swirly sentiment and attached all the elements to a natural card base.
Supplies:
Stamps: Efflorescence, Footnotes (PB)
Creative Dies: Flourish, For You (PB)
Inks: Festive Berries, Ripe Persimmon, Peeled Paint Distress stains, Desert sand ink, Tuxedo Black, Northern Pine memento markers (Tsukineko)
Paper: Fabriano 100% cotton hot pressed watercolour paper, Neenah natural white cardstock
Also: Winsor & Newton masking fluid
Rose of roses
Posted: September 12, 2015 Filed under: Rose | Tags: Penny Black creative dies 6 Comments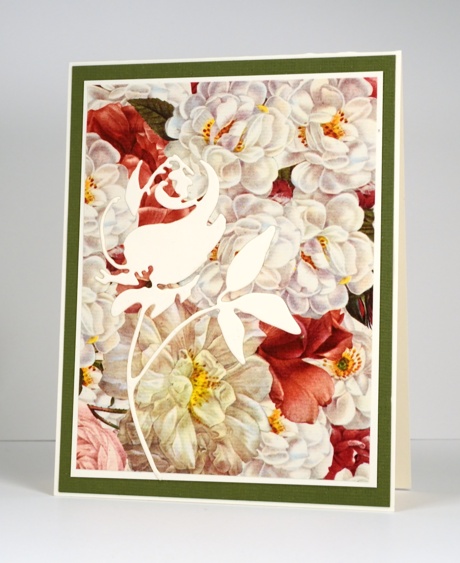
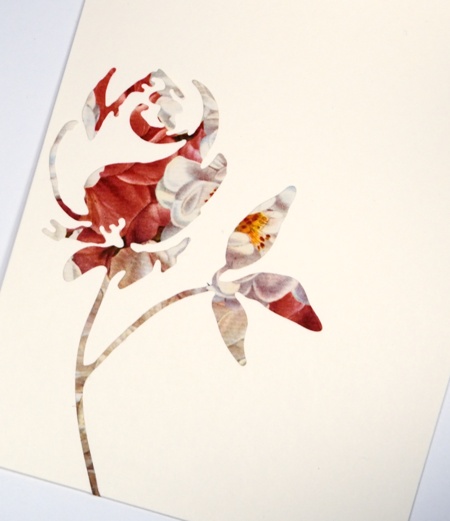
I have something a little different to share today. I am currently prepping for classes I will be teaching this week using some gorgeous Italian papers. Our local scrapbooking store brought them in and I was so taken with them I designed a class around them. The card shown here is not part of the class lineup but does show off one of the papers. The papers all have a cream base colour which matches perfectly with Neenah natural white cardstock. I took a panel of patterned paper and die cut the rose from it, then inlaid a natural white cardstock rose in its place. I attached the patterned rose inside the card. I double matted with the natural white plus a green textured cardstock. I don’t often fiddle around with patterned papers but I am really enjoying pairing these papers with Penny Black dies. The papers have a bit of a vintage feel and come in all sorts of designs and themes.
Supplies:
Creative Dies: Rose, (PB)
Paper: Neenah natural white 110lb cardstock, green textured cardstock, Grafiche Tassotti paper
Full Bloom
Posted: September 4, 2015 Filed under: Full Bloom | Tags: Fabriano Watercolour Paper, Penny Black creative dies, Penny Black stamps, Ranger Distress stains 7 Comments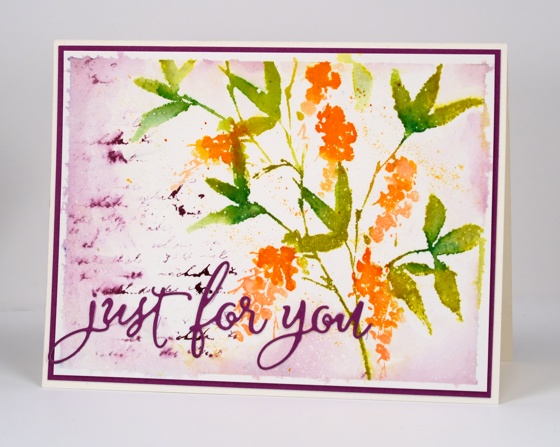
‘Full Bloom’, the stamp featured on this card, will be a great stamp to use year round. The hanging blooms could be flowers or berries just by varying the ink colour or details added. I chose to make it in fall colours with a contrasting background. I inked the stamp with distress stains, spritzed it, then stamped on watercolour paper. I inked the ‘ever useful letter background stamp’ with purple stain, spritzed with water, stamped then painted over the script to spread the colour and blur the letters. The masking tape holding the panel left a white border when removed; I added a purple mat and die cut sentiment.
Supplies:
Stamps: Full Bloom, Letter Background (PB)
Creative Die: For You (PB)
Inks: Spiced marmalade, Dried Marigold, Pine needles, Crushed Olive, Seedless preserves distress stains (Ranger)
Cardstock: Fabriano 100% cotton hot pressed watercolour paper & purple card
Also: Winsor & Newton masking fluid
La Fleur Rouge
Posted: August 27, 2015 Filed under: La Fleur Rouge, World of Wishes | Tags: Penny Black creative dies, Penny Black stamps, Ranger Distress stains 5 Comments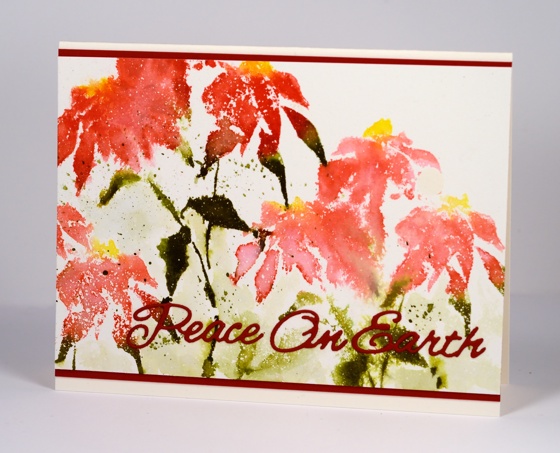
Penny Black seems to come out with at least one pretty new poinsettia stamp every year and this year’s, featured above, is called ‘La Fleur Rouge’. The stamp has three flower heads on it and I have stamped it three times on the panel. You can see from the white speckled effect that I started with masking fluid splattered on my watercolour paper. I stamped with distress stain three times but rather than re-inking the stamp I just spritzed with water between stampings. The result is lighter images the second and third times. I also spritzed the panel to get some of the stain to bleed into the surrounding area and painted pale green between some of the flowers. When all was dry I added some green splatter. To finish the card I matted with red to match the red die cut sentiment. To see how Jill Foster used this stamp check out the PB blog
Thanks for dropping by; I hope you’re having a great day.
Supplies:
Stamps: La Fleur Rouge (PB)
Creative Die: World of Wishes (PB)
Inks: Forest Moss, Festive Berries, Mustard Seed, Barn Door, Peeled Paint distress stains/markers(Ranger)
Cardstock: Fabriano 100% cotton hot pressed watercolour paper, red cardstock
Also: Winsor & Newton masking fluid












