
More Alcohol Inks on the Gel Plate
Posted: September 25, 2023 Filed under: Alcohol Ink, Dies, Flutters, gel press, Lavinia, Penny Black, pods stencil, Taylored Expressions | Tags: Alcohol Ink, gel press, gel printing, Lavinia, Penny Black creative dies, Taylored Expressions 1 Comment
Using alcohol inks and stencils on the gel plate is a bit of an addiction for me right now so I filmed another one to show you. A friend let me know that if you receive my blog posts by email the video doesn’t show up in the email. To see the video just click on the title of the blog post and it will take you to my blog. If you would like to subscribe to my youtube channel too that would be delightful.
I started this print with the Lavinia pods stencil already covered in ink and then added more ink and isopropyl alcohol when it was on the gel plate. Take a look at the video below to see the process.
I would love to hear if you try this technique. As I mentioned last week I like pulling the prints with paper or cardstock because they are surfaces that I wouldn’t normally use with alcohol inks.

The finished card does include most of the print; it is a larger size than my usual A2 cards. I decided to add the Penny Black dragonflies in the wine colour which matches the alcohol ink I added very sparingly. In retrospect you will probably agree I could have added more. The sentiment is from Taylored Expressions ‘In and Out Birthday’ stamped in Chianti versafine clair ink.

My blog features affiliate links to the following companies. If you buy through these links I receive a small commission at no extra cost to you.
Ecstasy Crafts (Ecstasy Crafts offers a discount code heathertecs10 you can use for a 10% discount at checkout)
Alcohol Inks + Stencil on the Gel Plate
Posted: September 18, 2023 Filed under: Alcohol Ink, Dies, gel press, Lavinia, Penny Black, Tutorial | Tags: Alcohol Ink, gel press, Lavinia, Tutorial, video 5 Comments
Recently I posted a card featuring a gel print made with alcohol inks and a stencil. You can check out that card here. There was quite a lot of interest in seeing a video of my process so that is what I have for you today. One of the bonuses of this technique is the way I can make more than one print from the same initial application of alcohol ink. I worked with T-Rex alcohol inks on a 5″x7″ gel plate.

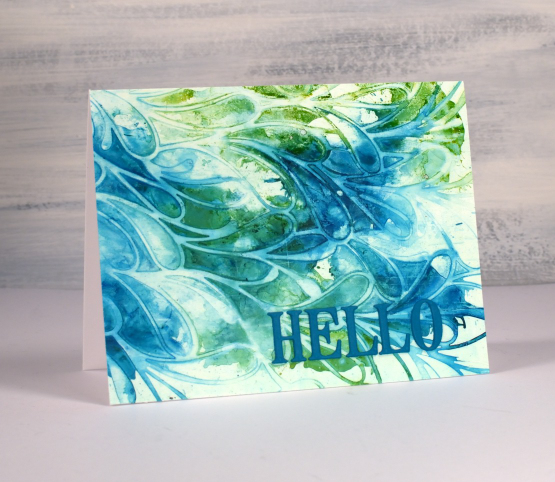
As you will see in the video the first card (shown above) is made from the first print pulled from the gel plate.
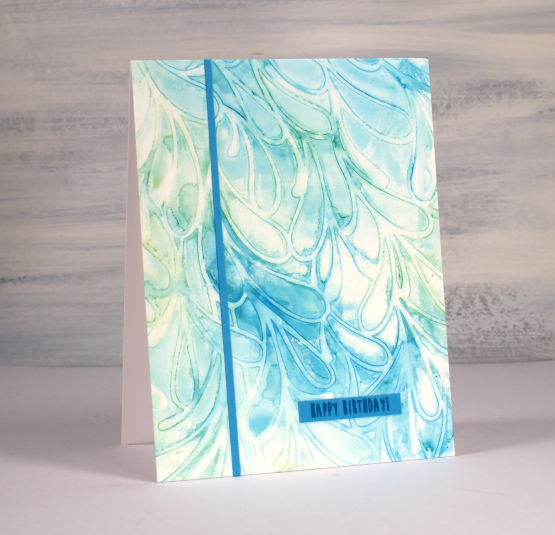
The second print pulled from the gel plate features the same inks but they are more muted because I diluted them to move them from the stencil to the plate. I quite like the softness of the second print.

If a print works for me and honestly, they don’t all work, I often don’t want to cover them up with extra decoration or die cuts. That’s why I kept these card designs very simple with just a die cut ‘hello’ added to the first card. The second print which I made into the card below features an even smaller birthday sentiment and one thin strip of the same cardstock.

One of the reasons I like to work with alcohol inks on the gel plate is the fact that I can pull the prints with a piece of paper, in the case of these prints I used printer paper. When I work with alcohol inks apart from the gel plate I generally use a thicker plastic surface such as yupo or craft plastic. The inks move beautifully on those surfaces but the plastics are bulkier and a bit more expensive so it is nice to have the gel plate + paper option. The featured prints from today’s video were done on a 5″ x 7″ gel plate which meant I could get a 5.5″ x 4.25″ card front as well as a left over strip to add to the envelope.
If you are new to gel printing in general and would like to know more about creating a range of patterned prints please consider my online class, Gel Print Journey, where I cover all the basics with acrylic paint and all sorts of patterned and textured items. If you purchase any of my online classes before the end of September use the code: ENDOFSUMMERSALE for a 20% discount.


