
Early light
Posted: June 21, 2013 Filed under: CAS, Enjoy LIfe, Every Happiness | Tags: CAS, Penny Black stamps 39 Comments
Now that I am back from my trip to DC and half way through the piles of washing I found a little time to create a card. I have some great design team tasks to tackle and new class projects to design for August but before I dive into them I played around with a new toy. I know it doesn’t look like anything new here but I cut my mask with one of my new spellbinders square dies. Creating a mask with a die is that little bit easier than lining up the four post-it notes. (not a ground breaking technique, I know!)
With my mask in place I sponged Memento pistachio ink on the lower two thirds of the square and summer sky in the top third. Before removing the mask I stamped the grasses across the bottom of the scene. After removing the mask I added the grass and sentiment in olive grove.
I hope to settle back into a routine of visiting and commenting on your blogs; thank you so much for dropping in here.
Supplies:
Stamps: Enjoy Life, Every Happiness (PB)
Inks: Memento Pistachio, Olive Grove, Summer Sky (Tsukineko)
My unusual creative process
Posted: January 20, 2013 Filed under: Background Stamps, Penny Black, Social Butterfly, Watercolour | Tags: arts, CAS, Penny Black stamps 18 Comments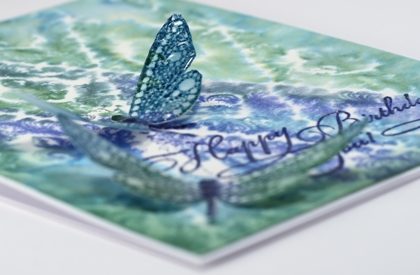
I visited my Handmade Cards board on Pinterest this afternoon for inspiration. However, the inspiration pic. and my finished card bear absolutely no resemblance to each other. I had a totally different design almost ready to put together when I decided to try and watercolour a background stamp, just in case I wanted a bit more going on in the card. (Unusual for me, I know) As it turned out I liked the background panel so much it became the main event, I tossed the other panel and kept only the little dragonflies from my original design.
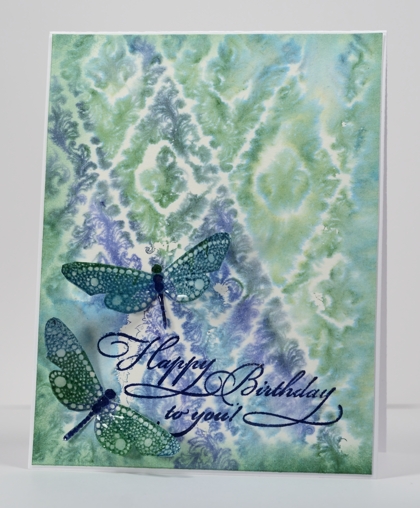
So, without mentioning the discarded process, here is how I made this card:
- dampened a piece of watercolour paper, inked the dragonfly stamp in blues and green and stamped it on the damp paper.
- when the dragonflies were dry I cut them out, added a little sponging and used a marker to darken their spines.
- stamped the dragon flies with a versamark pad to totally cover them then embossed with a thick glossy embossing powder, twice.
- to make the background panel, I wet a piece of watercolour paper (much wetter than for the dragonflies).
- I inked the background stamp randomly in the two blues and the green ink and stamped it onto the wet paper.
- when all was dry I trimmed the background panel, sponged the edges and embossed the sentiment.
- attached the background to the card base and the dragonflies with glue dots.
Not what I set out to create, and if I told you I my initial intention was to make a friendship themed card for the Less is More challenge you would just laugh wouldn’t you?
Supplies
Stamps: Special Time, Wall Paper Print, Social Butterfly (PB)
Ink: Memento Teal Zeal, Paris Dusk, Cottage Ivy and Versamark (Tsukineko)
Also: Thick Glaze embossing powder
Snowscape glimpse
Posted: January 4, 2013 Filed under: CAS, Christmas Park, Stamped Landscapes | Tags: CAS, Penny Black stamps 33 Comments
Sometimes a small snapshot of a scene is all that is necessary to give you the big picture. That’s why I like making stamped landscapes which are either wide and short or narrow and tall; they give you a glimpse of a larger scene.
The challenge at CAS-ual Fridays today is to make a clean and simple thank you card. I need a few thank you cards so I decided to keep it simple and enter the challenge. This card started out as a one layer card masked top and bottom with post-it notes but I stamped a simple “thank you” and got two extra black dots I hadn’t asked for. Not to worry, I sliced the stamped panel out of the card and stuck it on a white card base and proceeded to stamp the sentiment again. This time no dots, but crooked! I peeled off the snowscape panel and re-positioned it over the crooked ‘thank you” then wrote my own. The landscape was stamped in the following order:
- Position top and bottom masks then curved horizon mask
- Stamp trees in Paris dusk over the horizon.
- Re-position curved mask and stamp trees in black, emboss in clear.
- Return curved mask to horizon, add a post-it circle for the moon and sponge the sky in Summer sky and Paris dusk
- Return curved mask to lower hill position and sponge snow bank in Summer sky
- Remove curved mask and sponge lower edge in Paris dusk
My son has gone downhill skiing with a friend today for the first time. He’ll probably love it…
Supplies:
Stamps: Christmas Park(PB)
Inks: Memento Summer Sky, Paris Dusk, Versafine Onyx Black, Versamark(Tsukineko)
Also: Clear embossing powder


