
Happy Canada Day
Posted: July 1, 2017 Filed under: Felicity | Tags: Brusho, Fabriano Watercolour Paper, Penny Black creative dies, Penny Black stamps, WOW embossing powders 8 Comments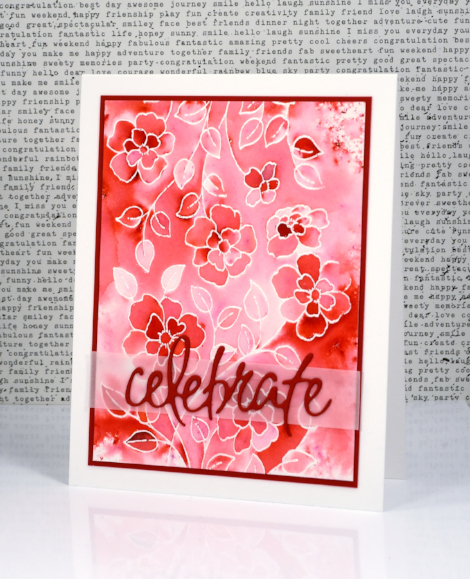
Supplies
Stamps: Felicity (PB)
Dies: Dies: celebrations (PB)
Paper: hot pressed watercolour paper, Neenah solar white and red pepper cardstock, vellum
Inks: versamark (Tsukineko)
Also: white embossing powder, clear wink of stella
Turquoise birthday
Posted: June 19, 2017 Filed under: Felicity | Tags: Brusho, Penny Black creative dies, Penny Black stamps 5 Comments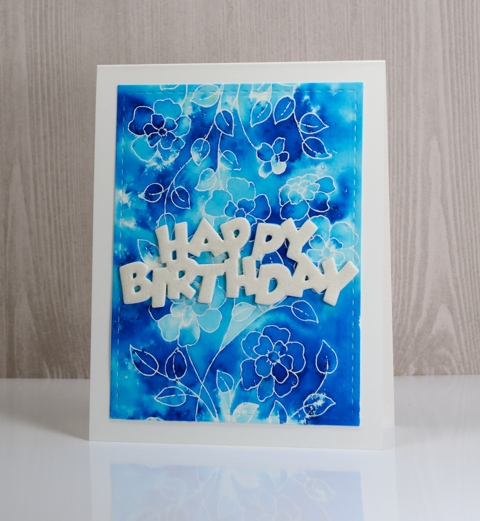
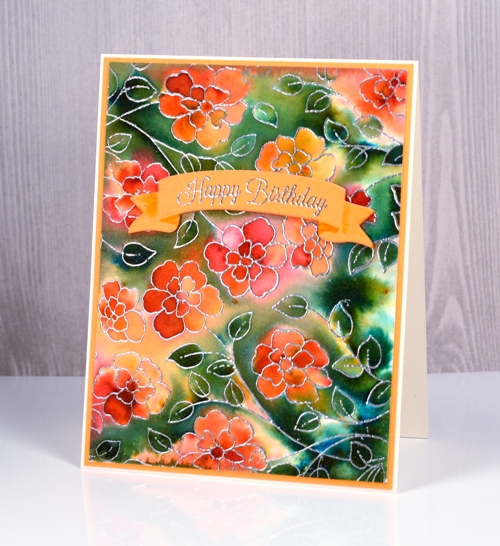
I am back with the same stamp featured in my previous post, ‘Felicity’ from Penny Black. I wanted to show you another look incorporating the emboss resist technique. I embossed the stamp in white powder on hot pressed watercolour paper then chose turquoise brusho powder to add the colour over the top. I sprinkled brusho then spritzed water and tilted my panel to get the colour to move. I alternated between sprinkling and spritzing until there was enough colour on the panel then used a paint brush to fill the large surrounding areas with turquoise paint. I love the way some spaces captured deep colour and others remained almost white. That is the beauty of combining the emboss resist technique with brusho.
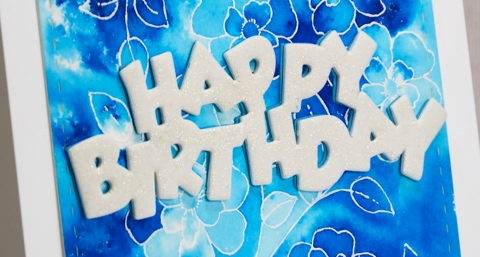
To finish off this card I added a sentiment die cut from foam then coloured it with clear wink of stella to make it sparkle.
I hope you will be inspired to pull out some embossing powder for the emboss resist challenge I am co-hosting with The Foiled Fox.


I’m looking forward to seeing what you come up with.
Supplies
Stamps: Felicity (PB)
Dies: Dies: birthday (PB)
Paper: hot pressed watercolour paper, Neenah solar white cardstock
Inks: versamark (Tsukineko)
Also: white embossing powder, clear wink of stella
Simply Irresistible – A Card Challenge
Posted: June 15, 2017 Filed under: birds and banners, Felicity, Guest design 6 Comments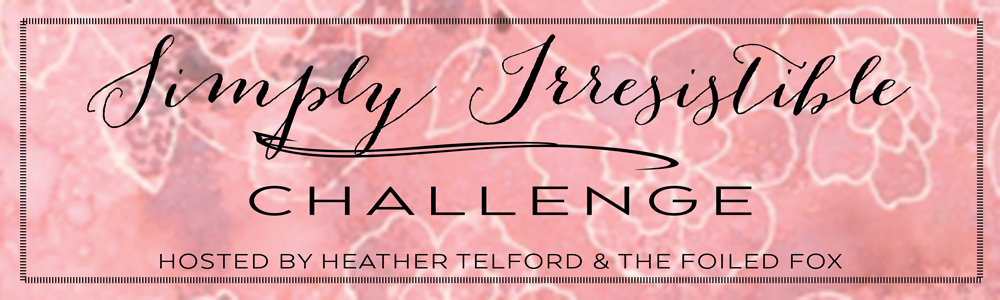
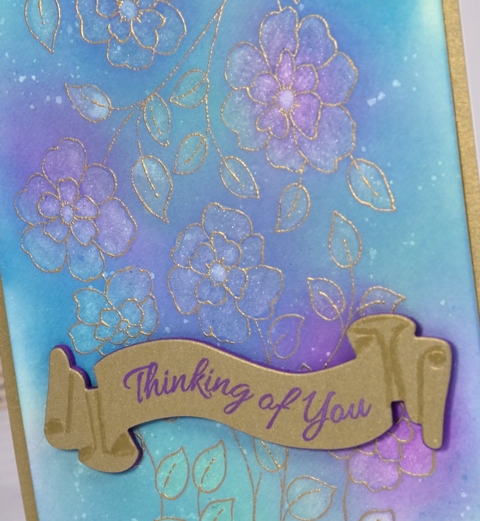
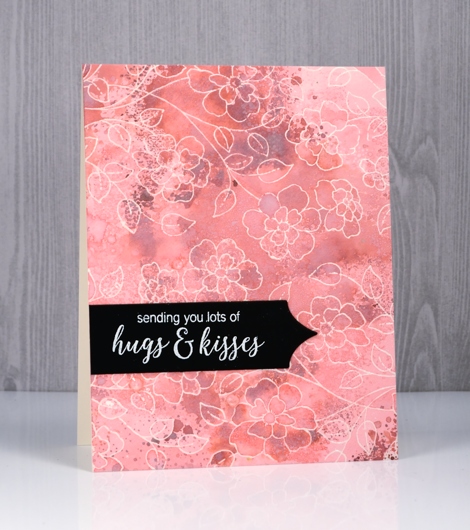
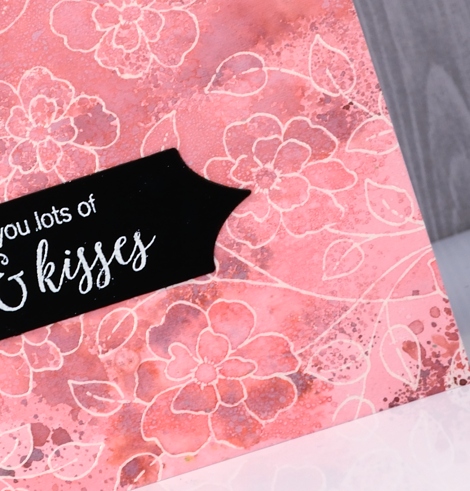
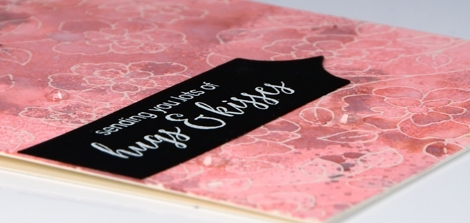
I am very excited to share today’s post; I’ve teamed up with The Foiled Fox to host a challenge. It’s a fun one and there are some generous prizes from The Foiled Fox on offer. As the name hints, the challenge involves the emboss resist method, one of my recent fave techniques. I decided to use the distress oxide inks alongside some gold embossing because I wanted to see how the DiOxes worked with emboss resist.
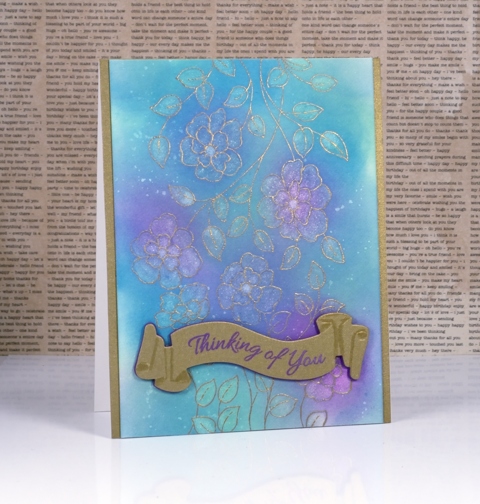
I worked on hot pressed watercolour paper, embossing the Felicity stamp first, then blending DiOx inks on top. The gold embossing resisted the ink and remained shiny. Next I coloured inside all the flowers and leaves with a wink of stella clear marker which added sparkle and oxidized the colour making it all lighter. I splattered some sparkly ink of stella liquid here and there also.
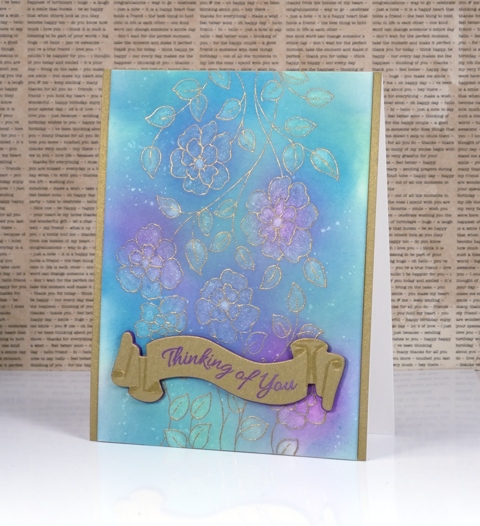
I used gold cardstock to frame the panel and create a die cut banner. I stamped on the banner with wilted violet DiOx ink and was impressed by the sharpness of the impression; I didn’t emboss it, just left it to dry. The banner is popped up on violet foam which just happens to match perfectly. Yay!
Now that you have seen how easy a little emboss resisting is please let the inspiration flow then link your card up on The Foiled Fox blog. The guidelines and link up are on their blog and you have two weeks to participate. I will be popping over there regularly to see what you have dreamed up. I can’t wait. Here’s a short cut if you are ready to post or looking for inspiration Simply Irresistible Link Up

Distress Oxide Trials – one or two colours
Posted: May 5, 2017 Filed under: Blips, Felicity, Shades, Triple Banner | Tags: distress oxide inks, Penny Black creative dies, Penny Black stamps, WOW embossing powders 15 Comments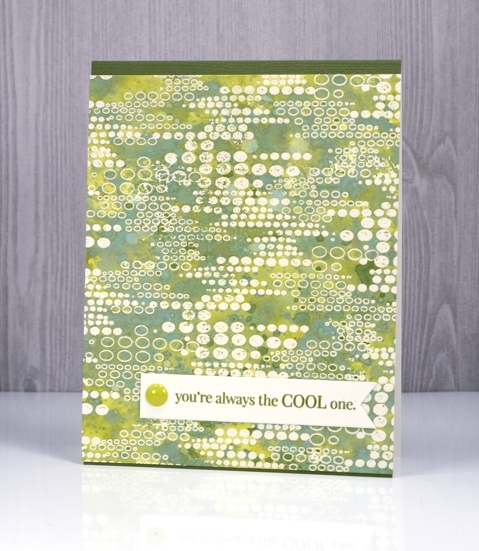
As I’ve been reading your comments about distress oxide inks I have noticed some of you are not sure you want them so have held off or only bought one or two to try. I decided to see what I could do with just one or two colours. I’ve been having so much fun with about half the colours I haven’t even opened them all yet and sadly spiced marmalade is currently hiding somewhere in my messy busy and productive workroom. All that to say, if you only have one or two colours, do some experimenting with them anyway; you might be surprised.
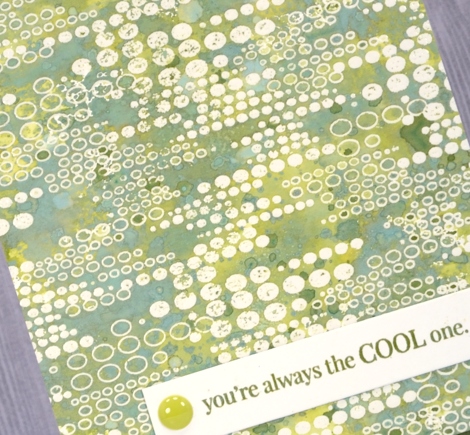
This green themed card is inked with only peeled paint distress oxide ink and yet there is a light and dark teal green, and dark and light olive tones as well. I was pretty impressed. I think the key to this effect is in the layering of colour. I pressed my ink pad on my craft mat, spritzed the ink then swiped my embossed panel through the ink. Colour only partially filled the panel; I dried it then repeated the process over and over. Each layer of ink reacts with the ink already on the paper and the un-inked areas on the paper. I also did some splattering of ink and water and some dabbing of water with a paper towel to lift a bit of colour. Because my panel was embossed I had to be careful not to reheat the embossing too much so I kept the heat tool moving. I love the effect around this ‘blips’ background stamp. A friend of mine used this stamp with great results recently by sprinkling brusho over the embossed image. Seeing her lovely card reminded me I had this stamp tucked away.
My second card uses only two distress oxide inks, worn lipstick and fired brick. I was hoping to do cards in just one colour but I wasn’t getting the same variety of colours from worn lipstick. My guess is that I spoiled my chances by covering the whole panel with my first layer of diluted ink rather than just part of the panel. I did manage to build up some different pinks over the top of the first layer but the differences were not as dramatic as shown on the green above. I will try again and use the same partial inking technique over and over and see what happens.
I did still manage to get some nice colour trapped inside the embossing creating light and dark petals and leaves. To provide just a bit more contrast I swiped it through some fired brick diluted ink a few times. When I press my ink on my craft mat then spritz it lightly it forms little beads of ink. Swiping through them spreads colour across the panel but pressing the paper down on top picks up little dots of ink, another cool effect I think.
I finished both cards with embossed sentiment banners and a few embellishments.
I have a growing list of suggestions from readers to try next week. Thanks for all your encouragement, tips and questions.
Supplies
Stamps: Felicity, Blips, Amazing!, Special Thoughts (PB)
Dies: Triple Banner, Shades
Paper: hot pressed watercolour paper, Neenah natural white and epic black cardstock
Inks: versamark (Tsukineko) Distress oxide peeled paint, worn lipstick, fired brick (Ranger)
Also: WOW clear embossing powder, Studio Katia sparkling crystals, Simple stories enamel dots
Felicity
Posted: April 19, 2017 Filed under: birds and banners, Felicity | Tags: Brusho, Penny Black creative dies, Penny Black stamps, WOW embossing powders 17 Comments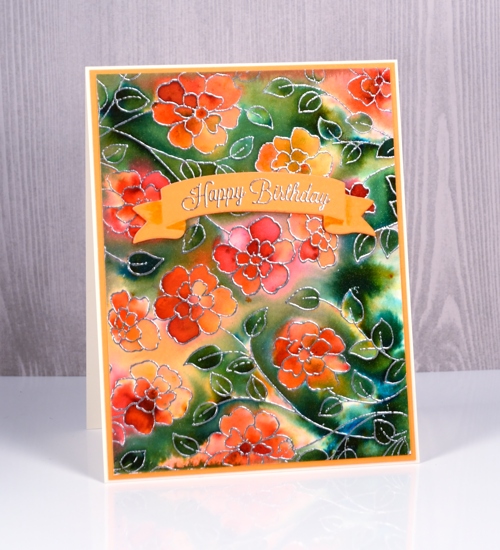
Today’s card looks like it was created with a background stamp, which is practically the case, but not quite. I used the new slapstick cling stamp, ‘Felicity’ and stamped it twice to more than fill a card front. The stamp is actually longer than my average card but a bit narrower. The organic arrangement of the flowers made it easy to stamp it twice and make it look like one big image. I stamped in versamark ink then embossed in silver powder on hot pressed watercolour paper. I taped it down then spritzed all over the panel with water. It wasn’t soaking wet but it was wet enough that the brusho I sprinkled on next started reacting straight away. I picked up some more brusho colours the other day to expand my collection and three out of four on this card are new to me. I sprinkled orange, sandstone and rose red over the flowers, spritzed again, tilted the panel to move the water and waited to see if I needed more. I did this a few times then switched over to sprinkling the olive green brusho over the rest of the panel. The olive green was more intense and the leaves on the panel are small so some areas got very dark, very quickly. I used a folded paper towel to remove liquid and colour where there was too much. I also tilted the panel so colour would flow down towards the closest embossed barrier which makes for nice dark contrasting areas next to some of the silver embossing.
I let the panel dry naturally then trimmed it and matted with orange cardstock. I cut a curved banner from the new set ‘birds & banners‘ and embossed one of the co-ordinating stamps from the ‘banner sentiments‘ set in silver. The die cut banner looks folded so I used a marker to add a little shadow to the areas which appear to be behind the main section. I cut the same banner from orange fun foam so I could pop my sentiment up on the floral panel.

When I looked up the name of this new stamp, I was delighted to see it is called ‘Felicity’. I have a dear cousin called Felicity who I haven’t seen in many long years but I have fond memories of. I am going to try hard to actually send a ‘felicity’ stamped card to her, maybe this one.
Supplies
Stamps: Felicity, banner sentiments (PB)
Dies: birds and banners (PB)
Inks: versamark
Papers: hot pressed watercolour
Paints: orange, sandstone, rose red, olive green brusho
Added extras: Zing silver embossing powder


