
A baby girl
Posted: August 12, 2014 Filed under: Heart Swatches, Love Expressions 4 Comments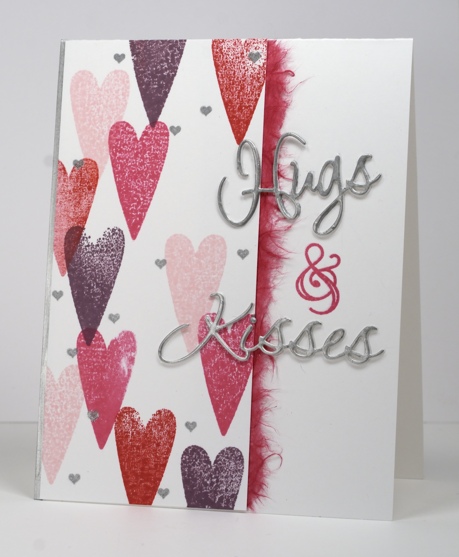
We interrupt this week of Christmas cards for a brand new baby girl. My brother and his wife had a baby girl very early this morning so I incorporated some of the ideas and techniques from the Stretch your Stamps 2 class into a card for them. There is a lot which isn’t really me in this card. For starters I never make baby cards; I’m not sure why not. When I need a baby card I usually pull out a pastel or floral card from my stash. Secondly, I rarely use graphic stamps. Unlike the clever and creative Ardyth I don’t reach for those bold geometric stamps. The other feature which is strange for me is the two panels with a white background; its not that I don’t like white space, I do, it is more that I tend to like colour on my panel and white space on my card base. Having said all that I don’t dislike this card at all; it’s just a little out of character for me. I like the silvery bits, the random arrangement of hearts and the two layered die cuts.
When I sat down to make this card I had a scrap of cardstock beside my main panel to test the pinks and reds as I stamped so I could decide which ones to use. My main panel was lined up with perfectly straight rows of hearts, each row a different colour. When I finished the rows I looked at my scrap and liked the random arrangement of hearts way better than the rows so I started again and made the panel you see here. As I stamped the hearts I occasionally stamped off or wiped off a little ink so they would all look a little distressed. The big heart is from “Heart Swatches” and the tiny heart was cut from a row of five in the “From the Heart” set.
I ran the silver sharpie down the left hand edge of the card base and put a ragged piece of mulberry paper under the right hand side of the panel. The die cuts are coloured with the sharpie. I know this probably looks more like a Valentine’s card to many of you but I am sending hugs for my brother and sister-in-law and kisses for the top of my sweet little niece’s head. Who knows when I will see them all as they are on the other side of the world!
We will return to promised Christmas programming soon!
Supplies:
Stamps: Heart Swatches, From the Heart, Life’s Journals (PB)
Creative Dies: Love Expressions (PB)
Inks: Memento Angel Pink, Rosebud, Love Letter, Sweet Plum and Encore Silver (Imagine Crafts Tsukineko) Silver Sharpie
Paper: Neenah Solar White 110lb card stock, Pink Mulberry paper
May Arts Creative Collaboration
Posted: March 14, 2014 Filed under: Chat Bubbles, Hollyhocks, Love Expressions, Poppy Pattern, Promise Me, Tagged | Tags: Fabriano Watercolour Paper, May Arts ribbon, Penny Black creative dies, Penny Black stamps, Ranger Distress stains, Tsukineko Memento inks 15 Comments
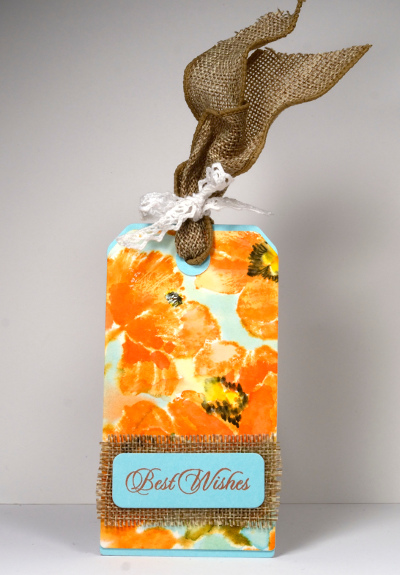
Penny Black and May Arts have been collaborating all week and today is my turn to show how easy it is to pair ribbons with stamping. I decided to make a few tags but if you are looking for more ideas check out both the Penny Black blog and the May Arts blog for all sorts of creative projects. (Instead of listing the supplies at the end of the post I have linked to them in the descriptions)
On both the tulip tag above and the poppy tag below I stamped Memento inks onto wet watercolour paper causing the colours to bleed and blend. When the paper dried a little I added foreground tulips or in the case of the poppies centre details and a blue distress stain background. As watercolour paper is rarely pure white I dyed the white cotton lace ribbon from May Arts in tea to give it a natural off white colour. The tulip tag features luxurious velvet ribbon from May Arts tied with a bow of crochet trim ribbon . The stamps are Promise Me and Special Wishes.
I used a different crochet trim ribbon to tie the versatile Faux Burlap Wired Ribbon on the poppy tag. I left the wire in the edges of the ribbon at the top of the tag so I could shape wavy edges then cut a little mat for my sentiment out of the burlap. The stamps used are Poppy Pattern and Special Wishes.
To create the Hollyhocks tag below I stamped, coloured the tiny tag and dyed the crochet trim with Victorian Velvet distress stain. I used the Hollyhocks stamp as my main image, a little bit of a sentiment from the Eloquence set on the tiny tag and the Hugs diecut from the Love Expressions set. I cut both the tiny tag and the lower rectangle using dies from the Chat Bubbles set. All large tags were cut using the large tag die from the Tagged set


