
Bethlehem Mask
Posted: December 4, 2024 Filed under: Bethlehem skyline, Echidna Studios, Finetec paints, gel press, gelli plate | Tags: Echidna Studios, Finetec artist mica watercolour paint, gel press, gel printing 4 Comments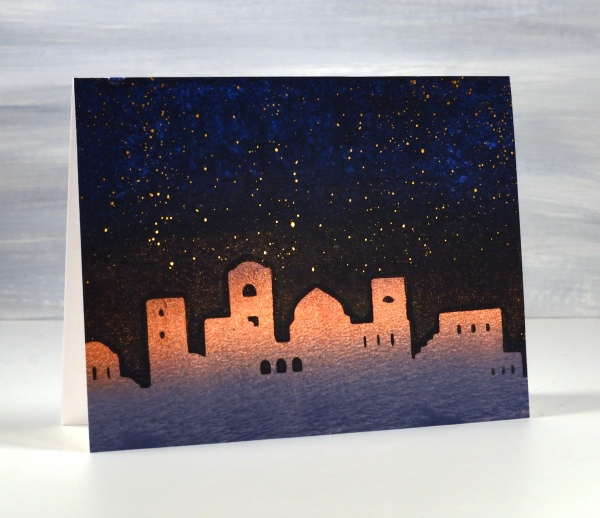
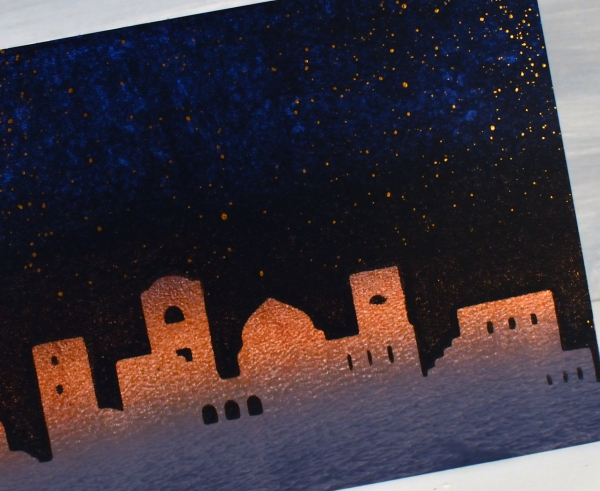
It’s been quite a while since the gel plates have been out of their tins but I was able to do a few prints recently to turn into Christmas cards. I cut a stencil using the Bethlehem Skyline digital cut file from Echidna Studios. To create the scene above I gel printed a blended grey, copper and blue panel. Next I brayered black onto the plate then lay the Bethlehem mask (cut on the Cricut) on the black before pressing the three coloured panel down on the plate. Once I had put the card together I splattered bronze watercolour paint in the sky as stars.
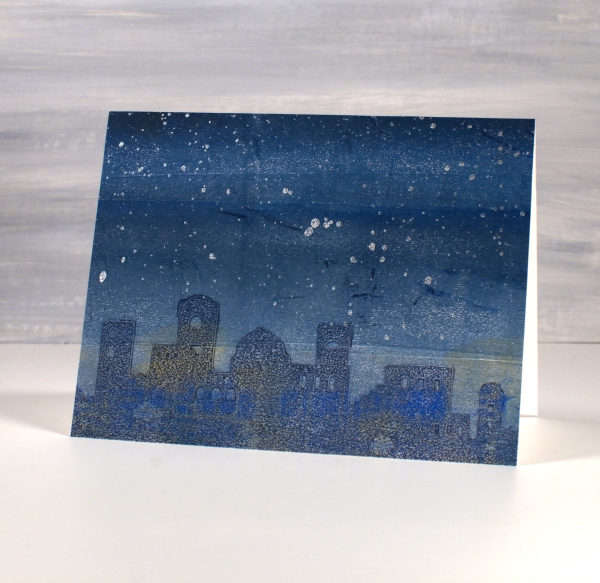
The panel below is less distinct as I pressed the mask into a layer of Paynes grey paint on the gel plate, removed all paint around the mask then lifted it to reveal a shadowy Bethlehem. Once it was dry I brayered blue and gold paints over the top before pulling the print. Once again I added metallic paint splatter to sky, this time lunar silver.
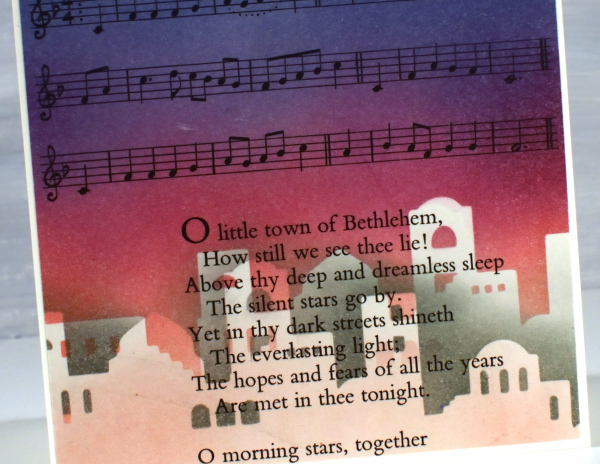
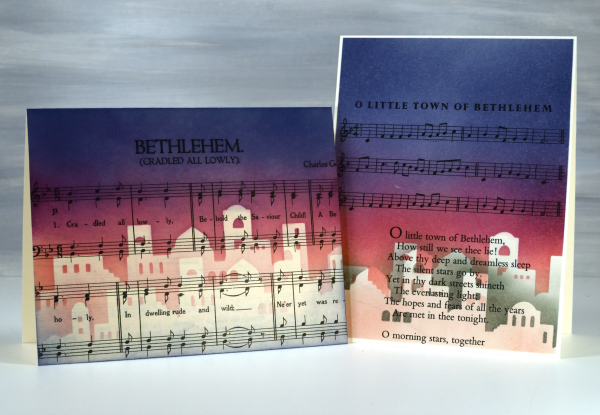
In a similar style to the carol and stencil cards I shared last week I used the Bethlehem mask cut from Matte Dura-lar to blend a scene on two carol panels cut from vintage carol books.

I blended pale peony over the top edge of the mask then switched to seedless preserves, then to chipped sapphire at the top of the panel. To add depth to the buildings I lifted the mask and positioned it below the first silhouette blended with either pink or grey ink
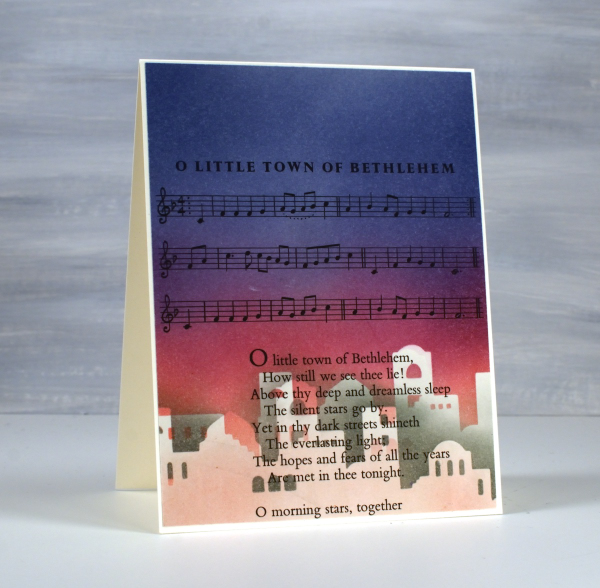
Once again no need for sentiments on the front but I will stamp a message inside.
To see more cards made with this digital set click here. The set includes two versions of the silhouette plus a outline image for printing. Today’s post features affiliate links to The Foiled Fox. If you buy through these links I receive a small commission at no extra cost to you.
Bethlehem Skyline
Posted: November 30, 2023 Filed under: Bethlehem skyline, cricut, Echidna Studios, Penny Black, Silent Night | Tags: cricut, Echidna Studios, Minc, Penny Black stamps, sennelier watercolours 9 Comments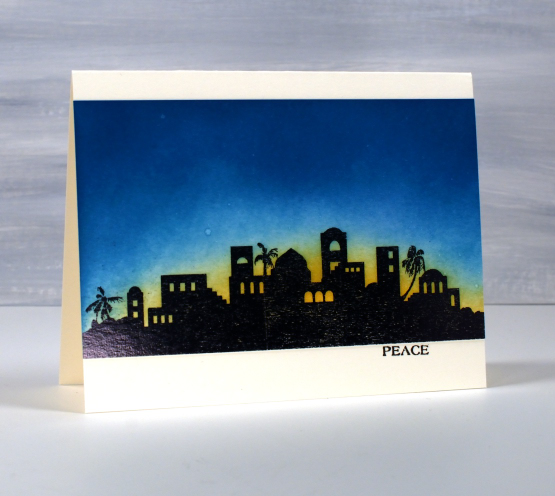
Today’s post is another long one full of photos. I hope you enjoy seeing the different styles and techniques applied to the new Echidna Studios digital set ‘Bethlehem Skyline‘. I requested this image and I think my daughter did a beautiful job with her design. The set includes a black silhouette and an outline image featured further down this blog post.
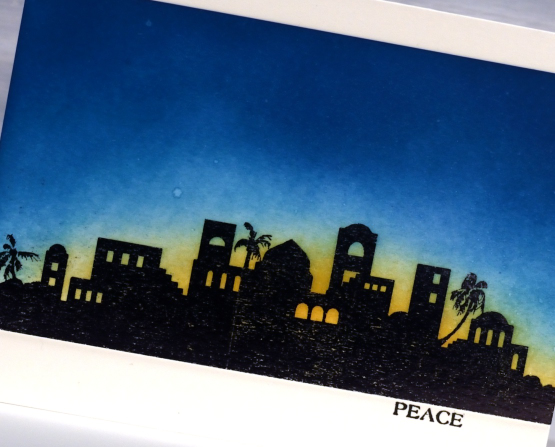
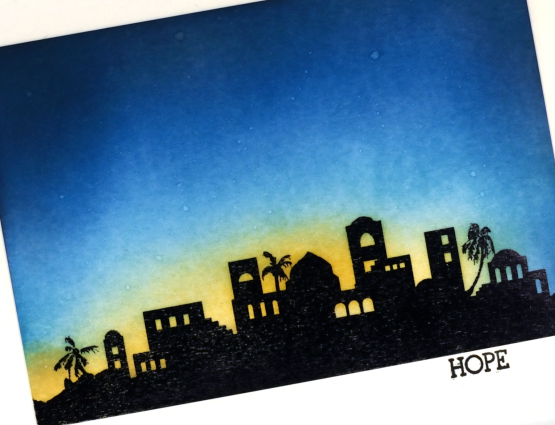
To create these first two cards I printed the silhouette image on white cardstock then foiled over the top with black foil. Using blending brushes I blended first scattered straw distress ink then broken china, and finally uncharted mariner for the deep blue sky. I wanted the colours to blend into each other but I didn’t want too much green where the blue and yellow met so I went carefully in that area.
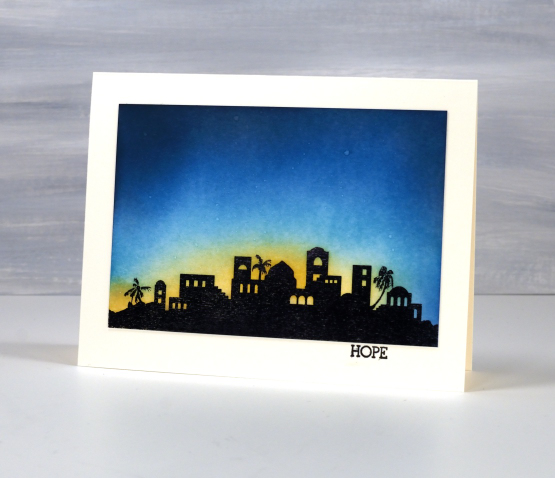
The sky was dark but I wanted a bit darker so blended just a bit of black soot ink around the edges and top of the panel. You might have noticed the image is the same but a different size in each card; that’s the beauty of a scalable digital image. To add stars to the blended sky I spritzed a fine spray of water on the panel and then dabbed it dry with a paper towel. The stars are subtle but they are there. The words Hope and Peace are once again from the PB ‘holiday snippets’ set.
The next style of card features a cut out of the Bethlehem skyline once again using the digital svg file but cut from black cardstock with the cricut. After cutting the silhouette a couple of times we realised the trees were too small for a card sized cut out so added a tree-less image to the set.
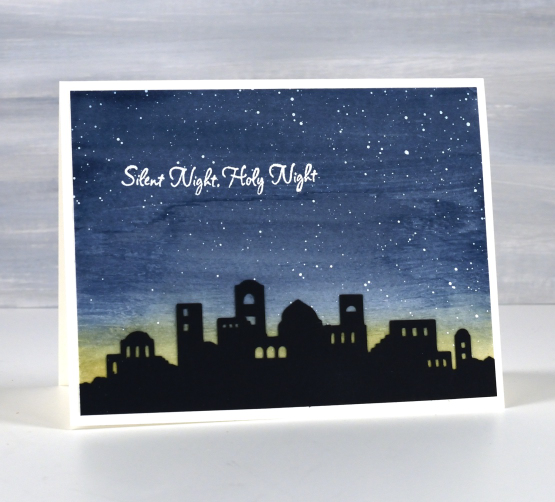
I painted a blue and yellow sky with Sennelier watercolour paints then, once dry splattered white acrylic ink over the blue area. When that was dry I attached the black silhouette and embossed a sentiment from the PB set, ‘silent night’.

When cutting the silhouette from black cardstock I also cut a larger one which I have wrapped around cylindrical glass vase. I put a candle inside the vase and lit it but I am not sure whether the candle is bright enough. I am going to keep experimenting and if I can get a good photo I will share it here on the blog. I think the image would look great cut from vinyl and attached to a wooden panel as a nativity sign. Oh the possibilities!
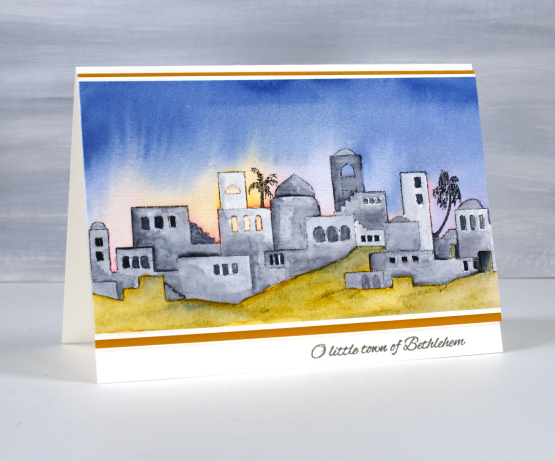
The final card features the other image in the set, an outline of the Bethlehem skyline. I printed it on hot pressed watercolour paper then painted over the buildings with liquid frisket to mask them. The masking made it possible to paint the sky with wet watercolour layers of blue, pink and yellow while preserving the town to paint after the sky dried. To get the soft bleed of pink and yellow into blue I set the panel upside down on the top edge to dry so gravity helped me get the glowing light effect.
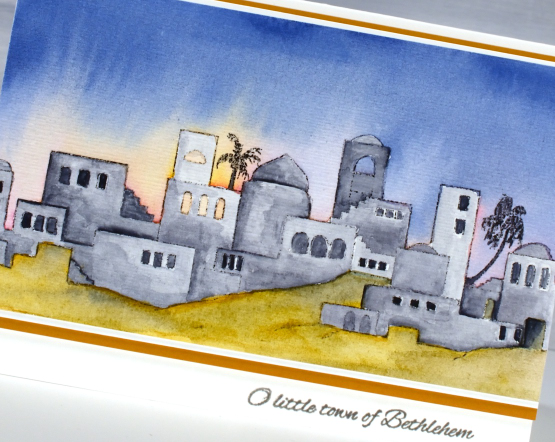
I used a mustard yellow to paint the foreground but it was too bright so I added some of the same blue from the sky to give it some shadow. With both the sky and ground completed I removed the liquid frisket(masking fluid) and painted the buildings with Payne’s grey.

I finished the card with a mat of white then a mat of mustard brown and a little PB sentiment in versafine clair ‘morning mist‘ ink. Thanks for reading this far. I hope you enjoyed my different techniques with this lovely image. I think you’ll be seeing it again; its a new fave!
Today’s post features affiliate links to the following companies. If you buy through these links I receive a small commission at no extra cost to you. The Foiled Fox & Scrap’n’Stamp


