
Parsley, sage & mint
Posted: August 18, 2020 Filed under: Brutus Monroe, gel press, Penny Black | Tags: brutus monroe embossing powder, gel printing, Penny Black stamps 16 Comments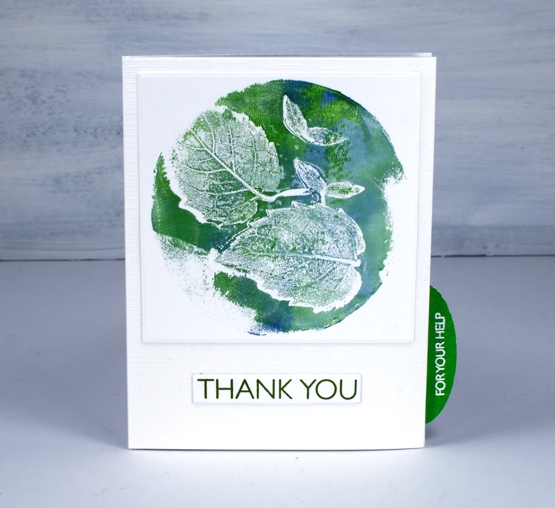
As I hoped I fitted in some gel printing the other day. I picked leaves from my garden and experimented to see which would give me a good print. It also took me some trial and error to get the amount of paint right too.
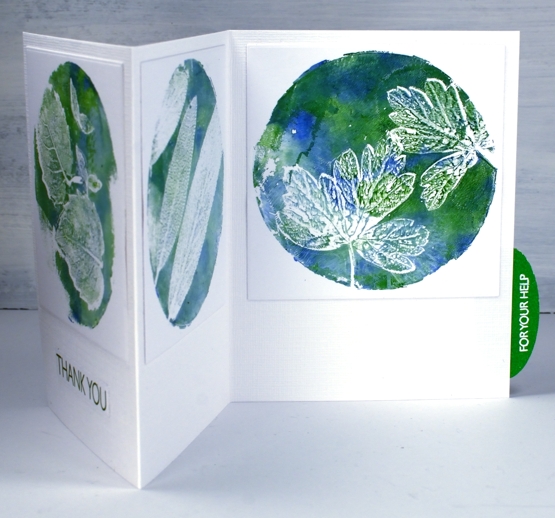
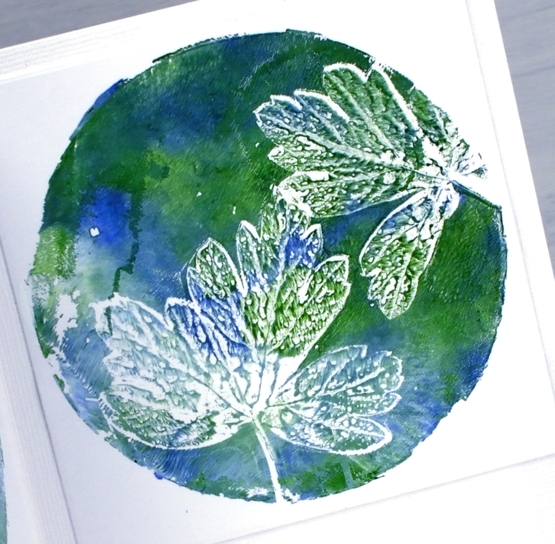
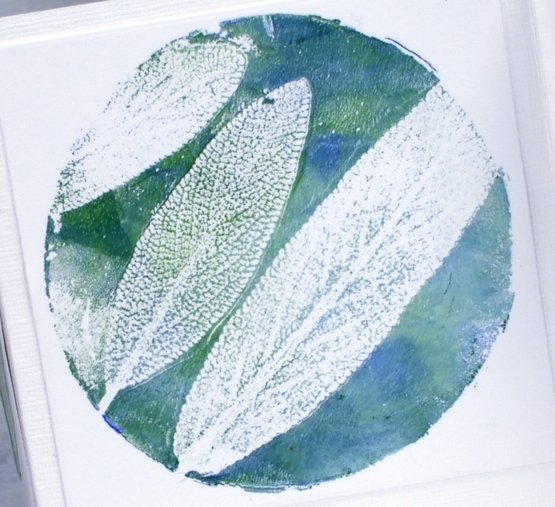
I brayered titanium white, ultamarine blue and hooker’s green onto my circle gel plate then lay down the back of the leaf on the paint. I lay white cardstock over the top and taped one edge of the cardstock to my table before lifting it to see the print. Without untaping the cardstock I removed the leaves and lay the cardstock back down to take another print, that which was left by the leaf.
I know some extra visuals, even a video might be more helpful than a description so I am working towards that goal. Gel printing can be rather hit and miss for me so I haven’t done any filming yet.
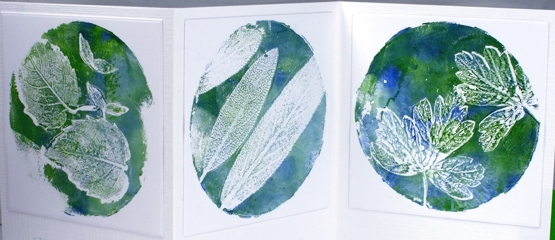
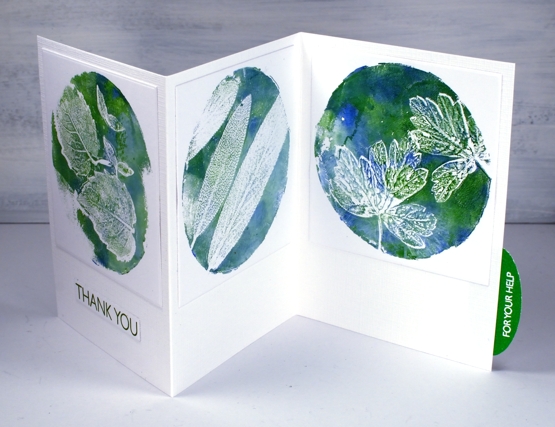
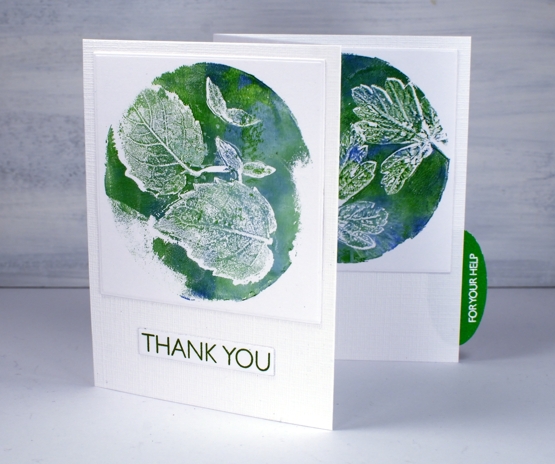
I decided to use all three prints on the one card so cut a piece of snowbound textured cardstock 10⅞ ” x 4¾” and scored it at 3⅝” and 7¼”. I die cut each print using a 3¼” square die and attached them directly to the textured card base. I stamped ‘Thank you’ from PB ‘million thanks’ set on white in peeled paint archival ink then embossed ‘for your help’ from the same set in white on green then cut it out with an oval punch to make a tab on the side of the card.
This card is for my daughter who has put hours or work and loads of enthusiasm into our garden this year. It’s looking good and we have high hopes for the tomatoes, brussel sprouts and cantaloupes still growing!
Join my online class COLOUR CLUES to create card sized works of art!
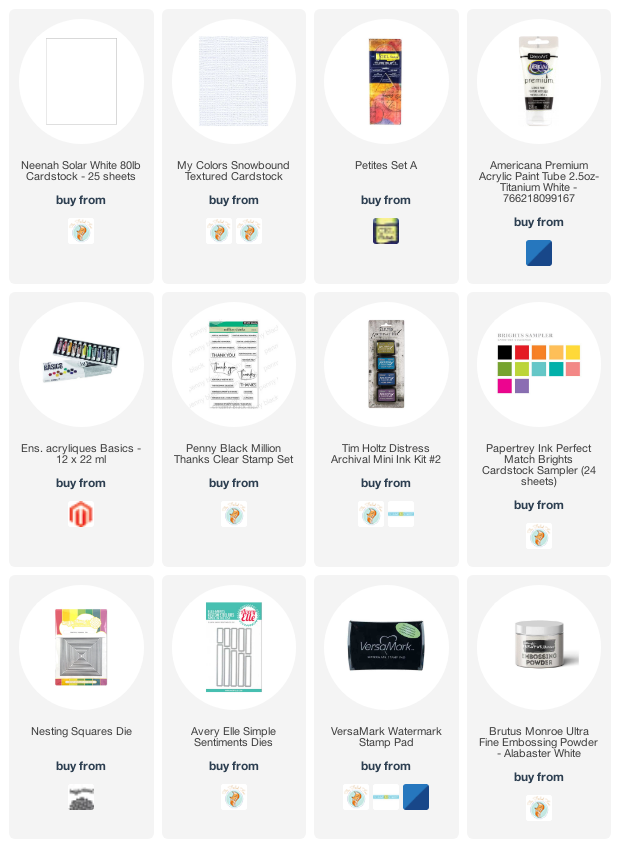
Supplies


What a beautiful card and a lovely way to show your appreciation to your daughter.
Beautiful results with the gelli prints Heather and will give this a try I think as this is a stunning look and love the blue and green and the white leaf shapes stand out brilliantly. I am assuming that the leaves were placed over the white areas, but maybe not. I am not the best when trying to visualize things. x
Ooooo…I LOVE the colours and effect!♥
I just keep reaching for the blue/green combo. Purple will be wondering what’s going on!
very nice cards, lots of unique results and I would use for male cards which I need shortly. The technique you described is unknown and seems complex to me, I look forward to your video
Thank you so much to share with us
It is hard to explain the process so I will try and get a video done soon!
I love this card
That’s a tasty little piece of work!
What grand imagery. I confess I am going to have to CASE this card as it’s perfect to use as a thank you for our neighbour who shared the bounty of their garden. Thsnk you for always sharing with us. You are very generous.
Yay, thank you. I can’t wait to see your version.
Love how the prints turned out.
It is fun to have the gel plates out again.
Gorgeous, Heather! Did you brayer the paints onto the gel plate one at a time in 3 layers? Or all 3 colors on the brayer at one time? Yes, please DO MAKE A VIDEO!!!
Yes, a video would be nice but I appreciate your description. I am a gel plate newbie and haven’t tried putting the paper back down after removing the leaves so I look forward to trying that. Your card is beautiful and a perfect thank you for all her work in the garden.
She, as well as us, will love this card. You are getting excellent results now with your gelli plate.
I also love the accordion fold. I make a booklet like this using the principles I get from my Bible study lectures. I then make copies as gifts to the group. Your idea of the scoring helps me because I am so mathematically challenged.
Tish
[…] week I posted a card featuring gel printed leaves from herbs I grew. I tried to explain my process but a few of you wished for a video so I picked some more […]
Thank you again for sharing this technique, Heather! I loved your results so much and was delighted to have good results myself.