
Falling Snow Video Tutorial
Posted: November 26, 2014 Filed under: Prancers, Stamped Landscapes, Tutorial | Tags: Fabriano Watercolour Paper, Penny Black stamps, Tsukineko Memento inks, Tutorial 16 Comments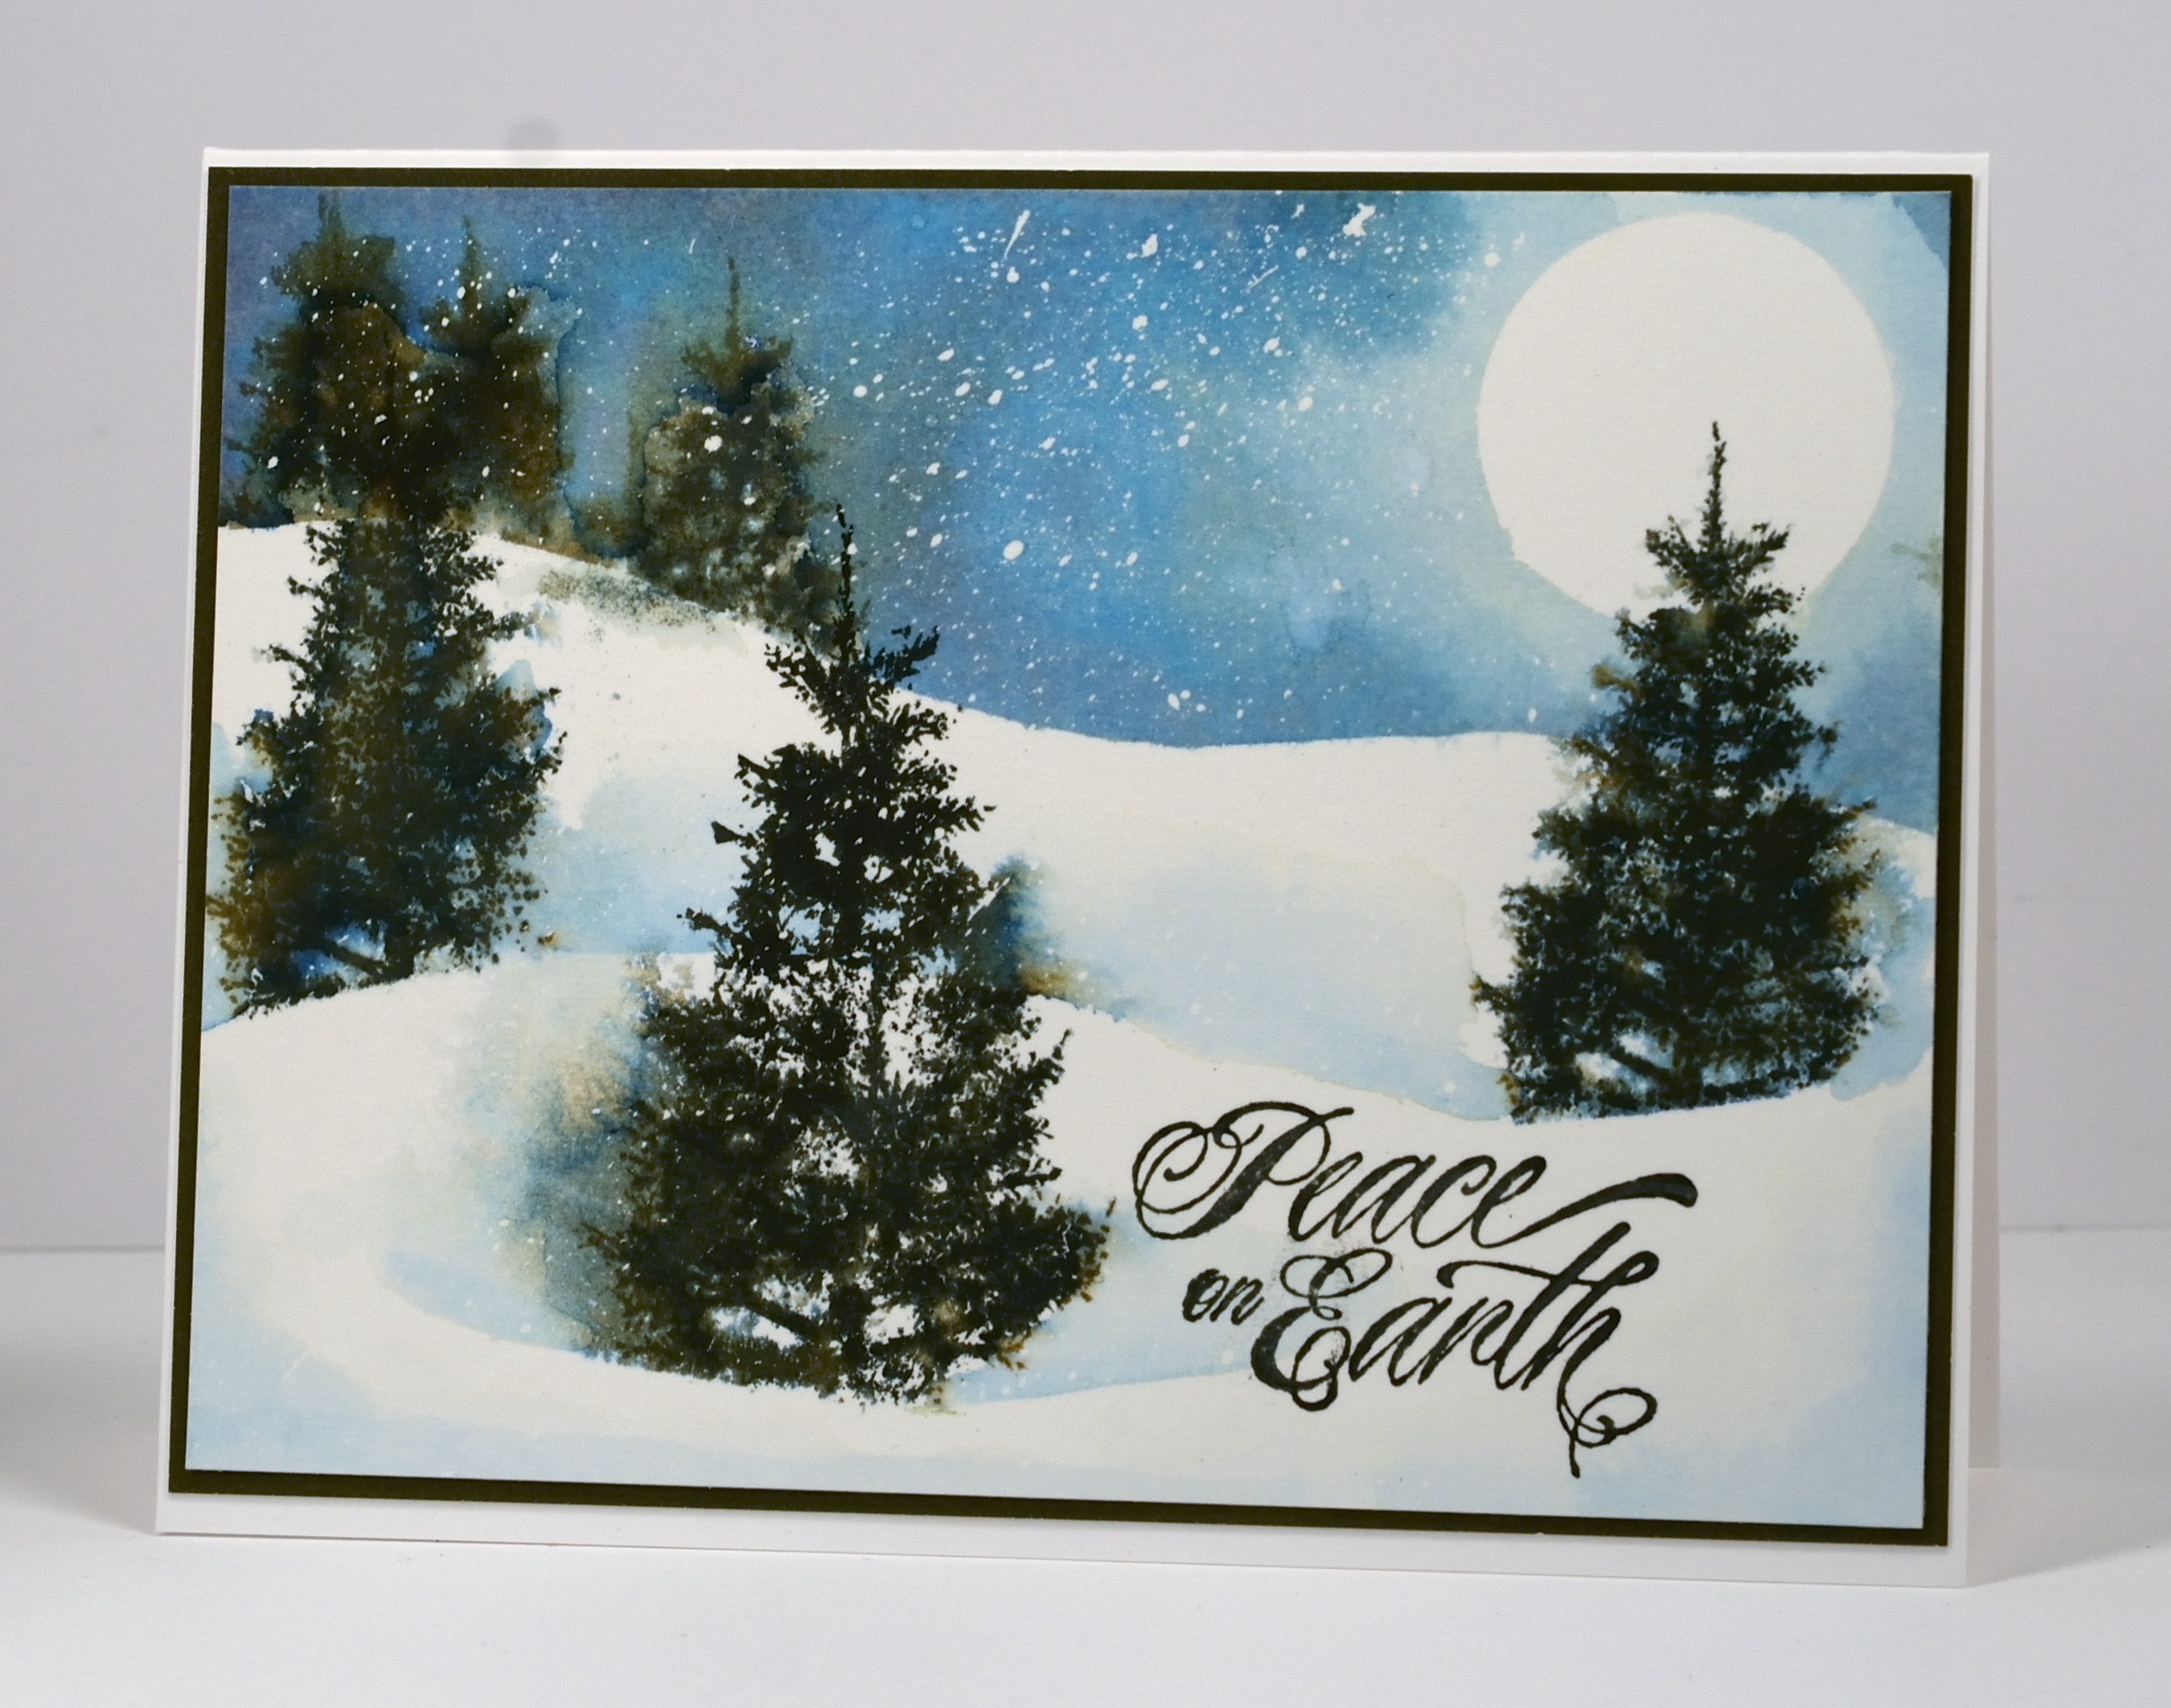
Today’s tutorial is one I created for Splitcoast Stampers. Splitcoast posts a new technique tutorial every Wednesday and in today’s I show how to create the look of falling snow on a watercolour card. I created both a photo and video tutorial for Splitcoast.
The video took me a few attempts so I have four slightly different versions of the card which supports my claim that watercolour techniques never give you the same result twice. The picture above is the first one I created and the one featured in the photo tutorial. It has quite a bit of masking fluid snow in the sky; the one in the video ended up with a lot less. I mention in the video that I have stopped using post-it notes to mask when I do watercolour scenes. I now use frisket film, a reusable, repositionable plastic film which doesn’t disintegrate when it gets wet. It is called Grafix Extra Tack Prepared Frisket Film.
I have another video showing in detail how to apply and remove the masking fluid here.
Supplies:
Stamps: Prancers, Hello Winter(PB)
Inks: Memento Nautical Blue, Bahama Blue, Northern Pine inks (Imagine Craft/Tsukineko)
Cardstock: Fabriano 100% cotton hot pressed watercolour paper, Neenah Solar White 110lb cardstock, Olive Green cardstock
Also: Winsor & Newton masking fluid, Kemper Spatter brush


Heather this is as stunning as ever! Wonderful scene! My Prancer stamps just arrived today! Can’t wait to have a go!
Chrissie x
Just magical! Have followed your blog for ages but never commented before. I love your work. The video was great. Please do more!
Lesley
Heather, it is always a treat when you post a video. You have open the doors for me to try out water coloring. Thank you.
Thank you, Heather. Your video is so easy to follow and is the basis of my next project. I hope it turns out even half as well as yours. Then practice, practice, practice. I appreciate all the time you have taken to demonstrate your techniques.
Merci beaucoup pour ce beau vidéo! Thank you so much for your video. So wonderful!
Your art work is just lovely and I love watching your video explaining just how to go about creating this beautiful scene! Thanks so much!
Thanks for the tutorial it’s very nice to see you working!
thanks so much for the video
Pitchoune
You always make it look so easy! Thank you for that video!!!
Thanks for the video. I love your beautiful work.
Thank you so much for the tutorial – I love your work and learn so much – its really appreciated. Happy Thanksgiving to all the US crafty artists out there from the Emerald Isle.
Enjoyed this tutorial immensely. After seeing you use this brush, I ordered one, and it arrived today. Definitely going to try the ‘flicking’ technique with it, as I don’t seem to manage it very well free hand! (blobs instead of flicks!). Loved the snowy tree scape scene. It’s lovely. TFS & Hugs
Thank you for taking the time to film this video. I love your work and watching you create it. I’m sneaking some time tomorrow to try out my version of this, fingers crossed! Would love to see more videos!
I noticed you were featured on SCS! They made a great choice. Thank you for the excellent tutorial!
Great tutorial. Spatter brush is definitely the way to go. Makes it so easy.
I love this tutorial and have since given it a go and am very pleased with the results. Mine is fine but yours is truly gorgeous and you have made the snow look drifted around the trees, and a great effect with the spattered masking fluid. x