
Moonlit snowfall
Posted: December 11, 2013 Filed under: Berry Tree, Tutorial | Tags: Penny Black stamps, Tsukineko Memento inks, Tutorial 12 Comments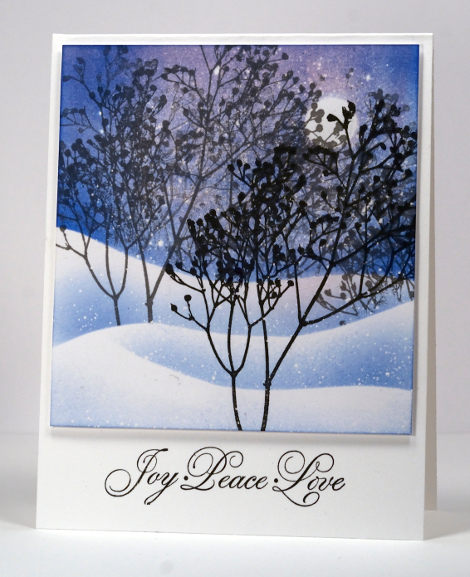
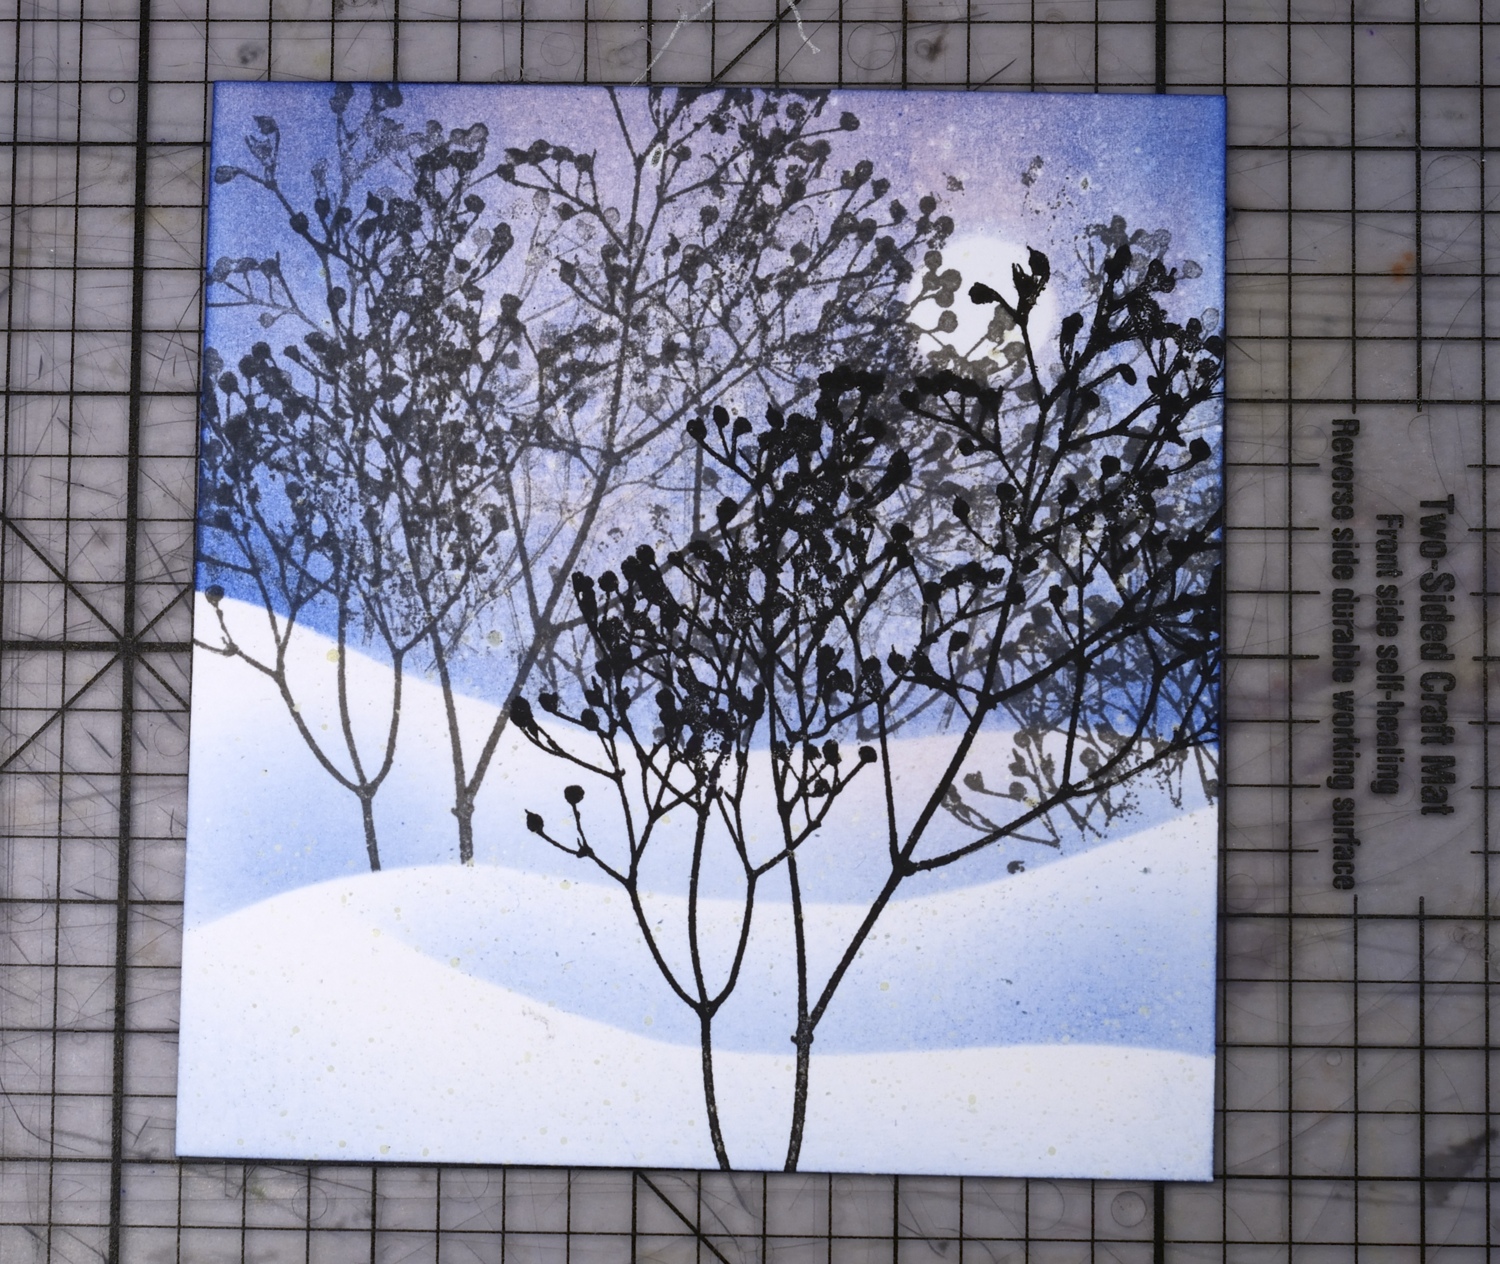
The Winter Wonderland fun continues here and on the Penny Black Blog today with a step by step tutorial.
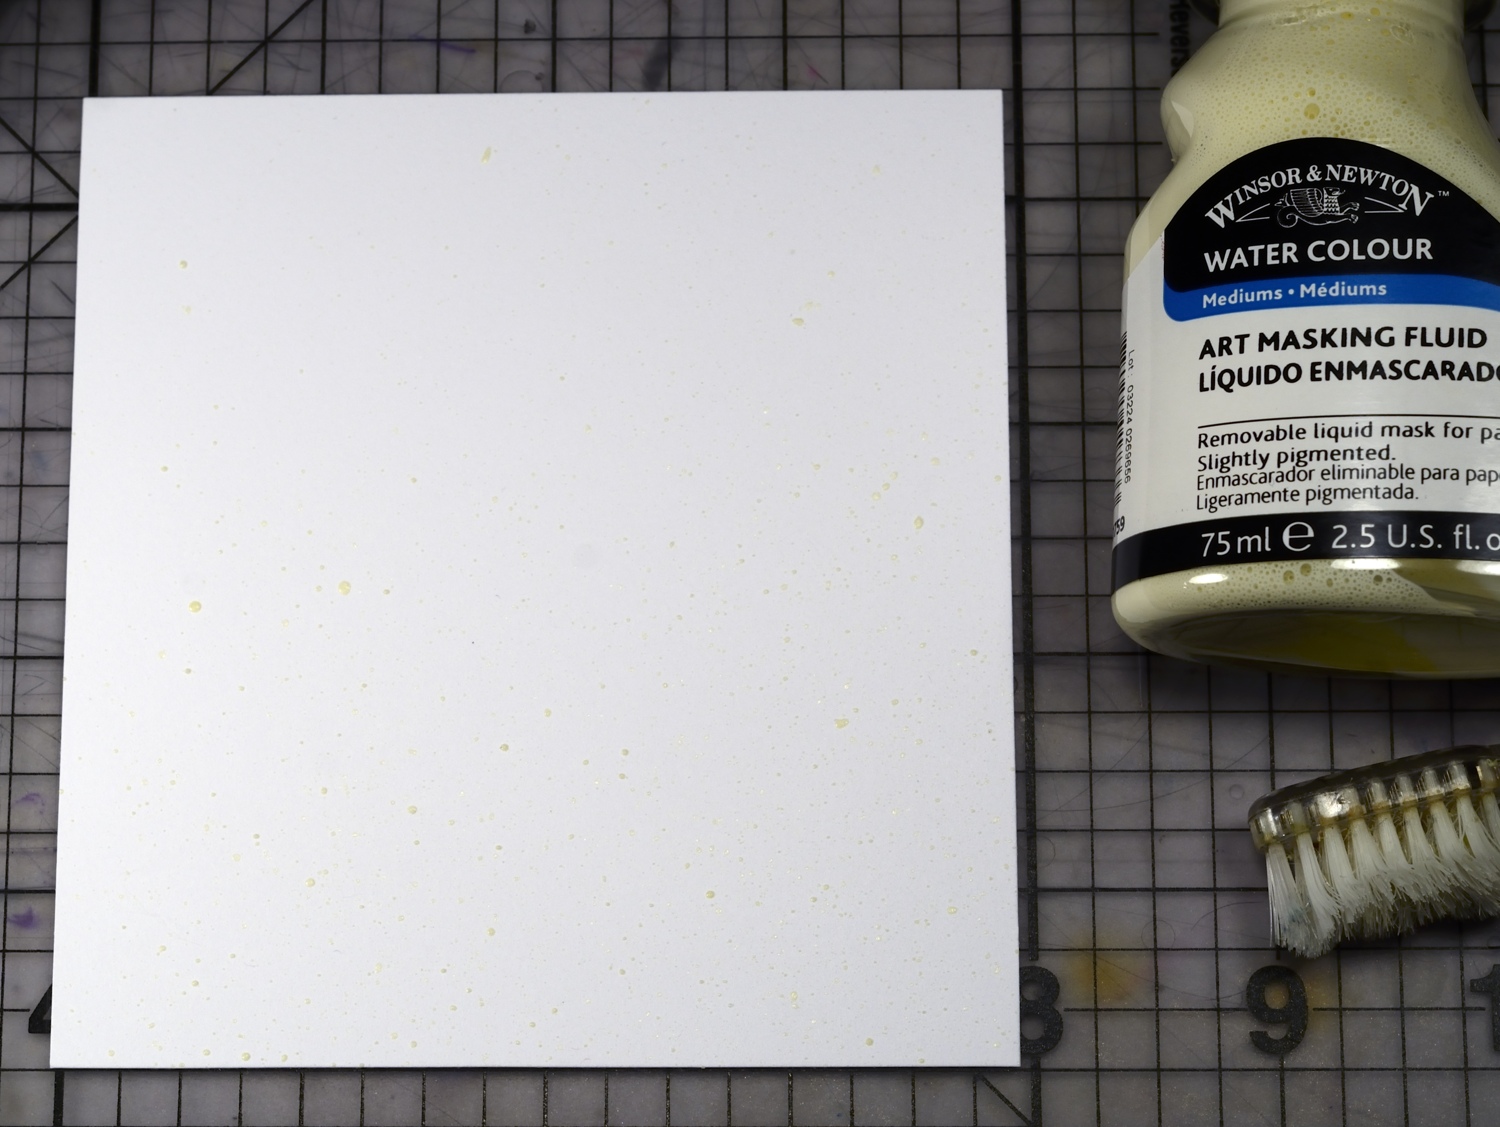
1. With a toothbrush or paint brush flick masking fluid over panel. Leave to dry for at least 20 minutes. I you use a paintbrush dip it in detergent and squeeze the detergent out before dipping the brush in the masking fluid. Wash the brush straight away after you have finished flicking.
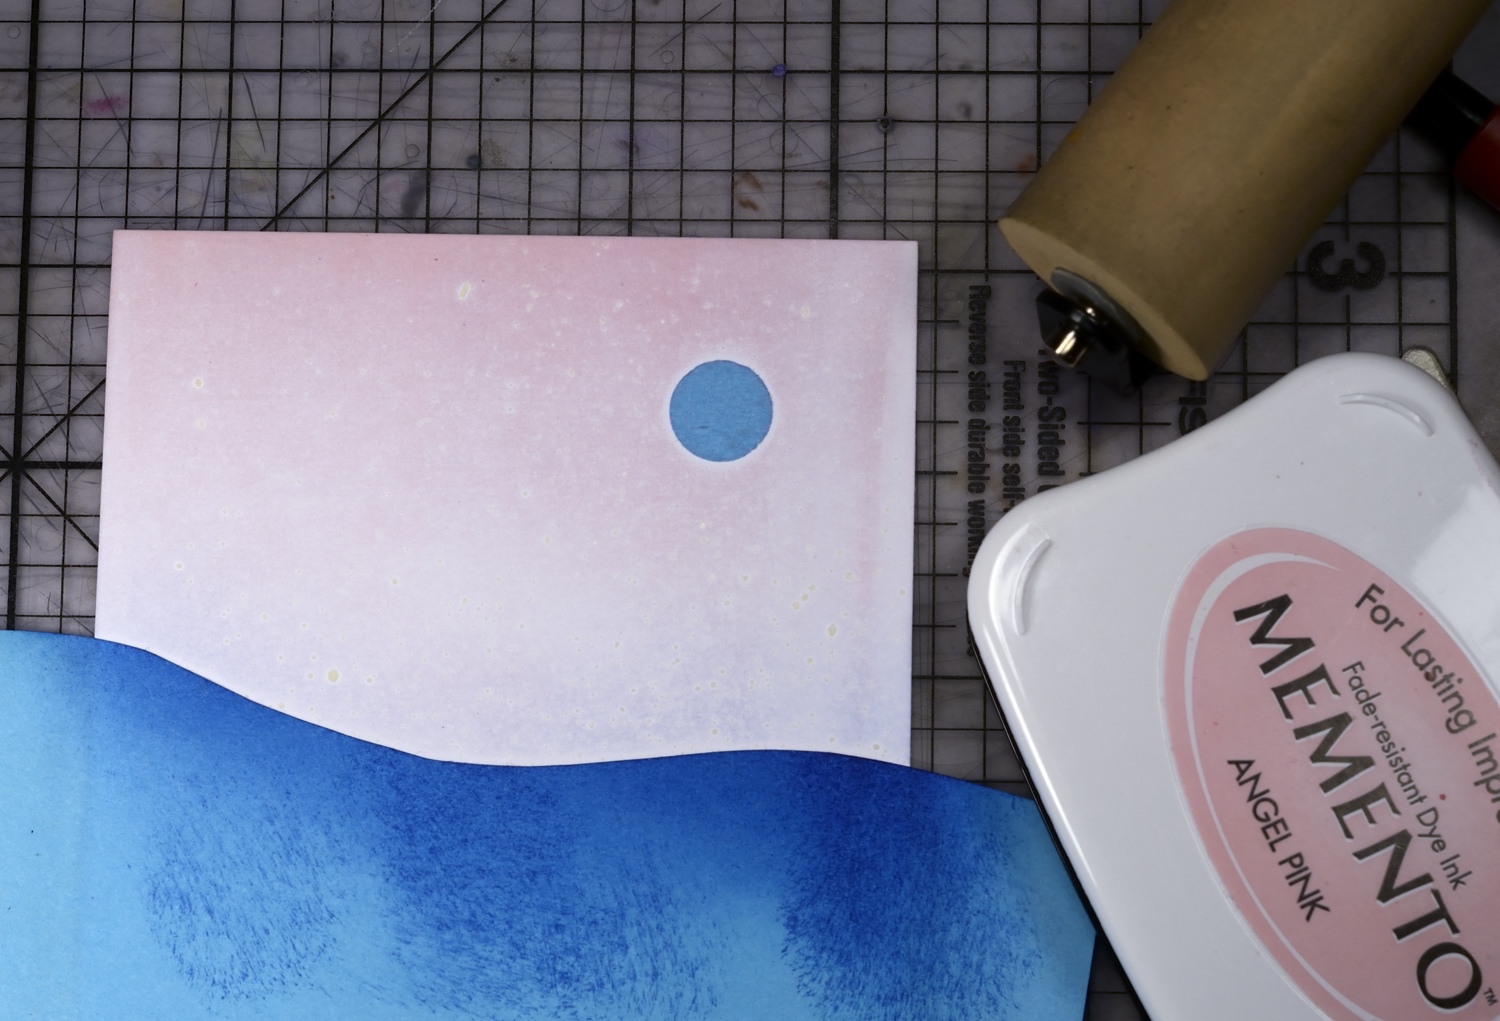
2. Punch a circle from a post-it note or masking paper and position in the sky. Cut a hill shaped mask and position it half way down the panel. Using a rubber brayer apply pink ink to sky area.
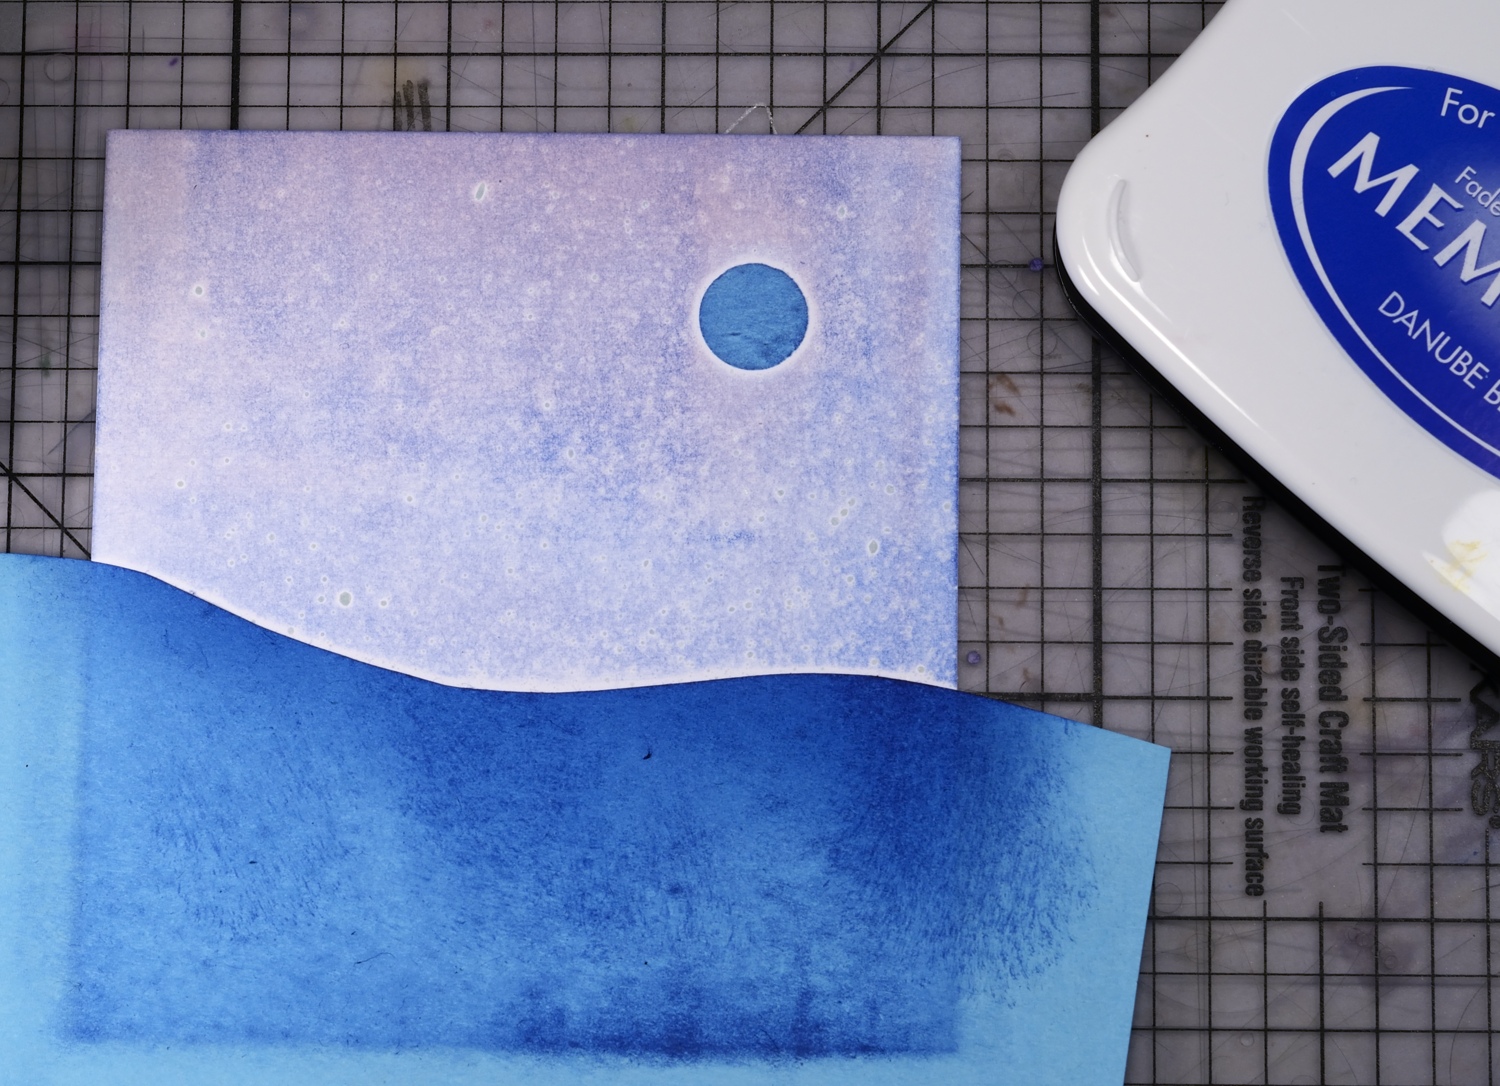
3. Brayer blue ink over the sky area.
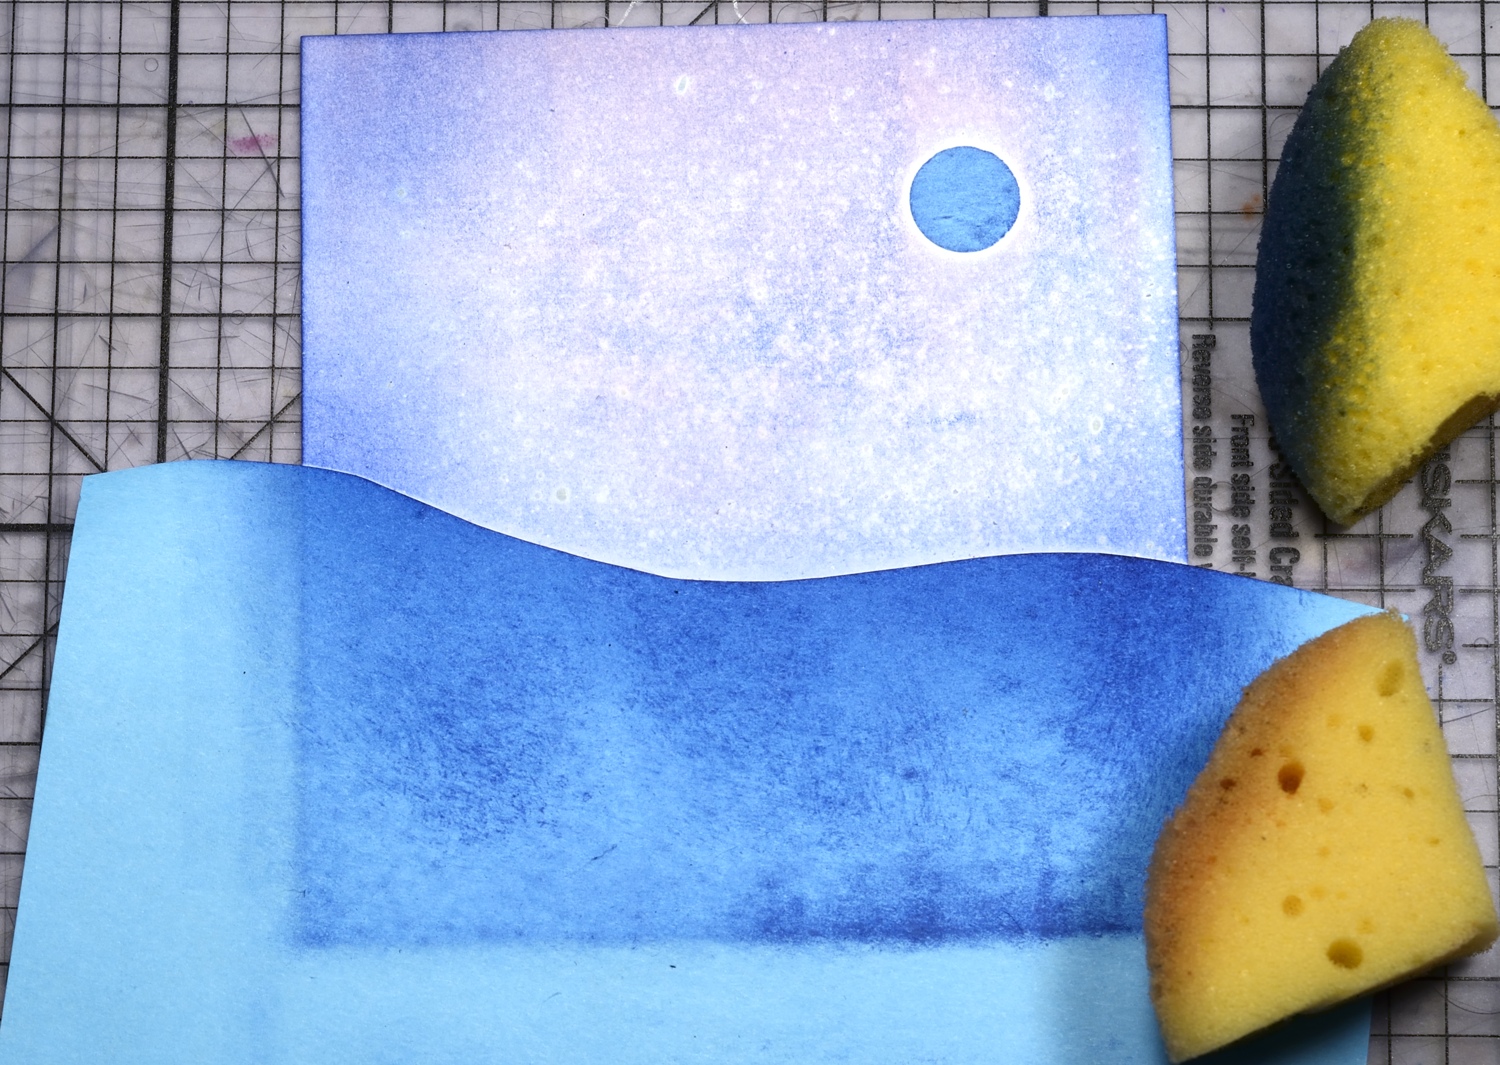
4. Add a little more blue ink around edges with a sponge. Add a little more pink ink to suit your preference.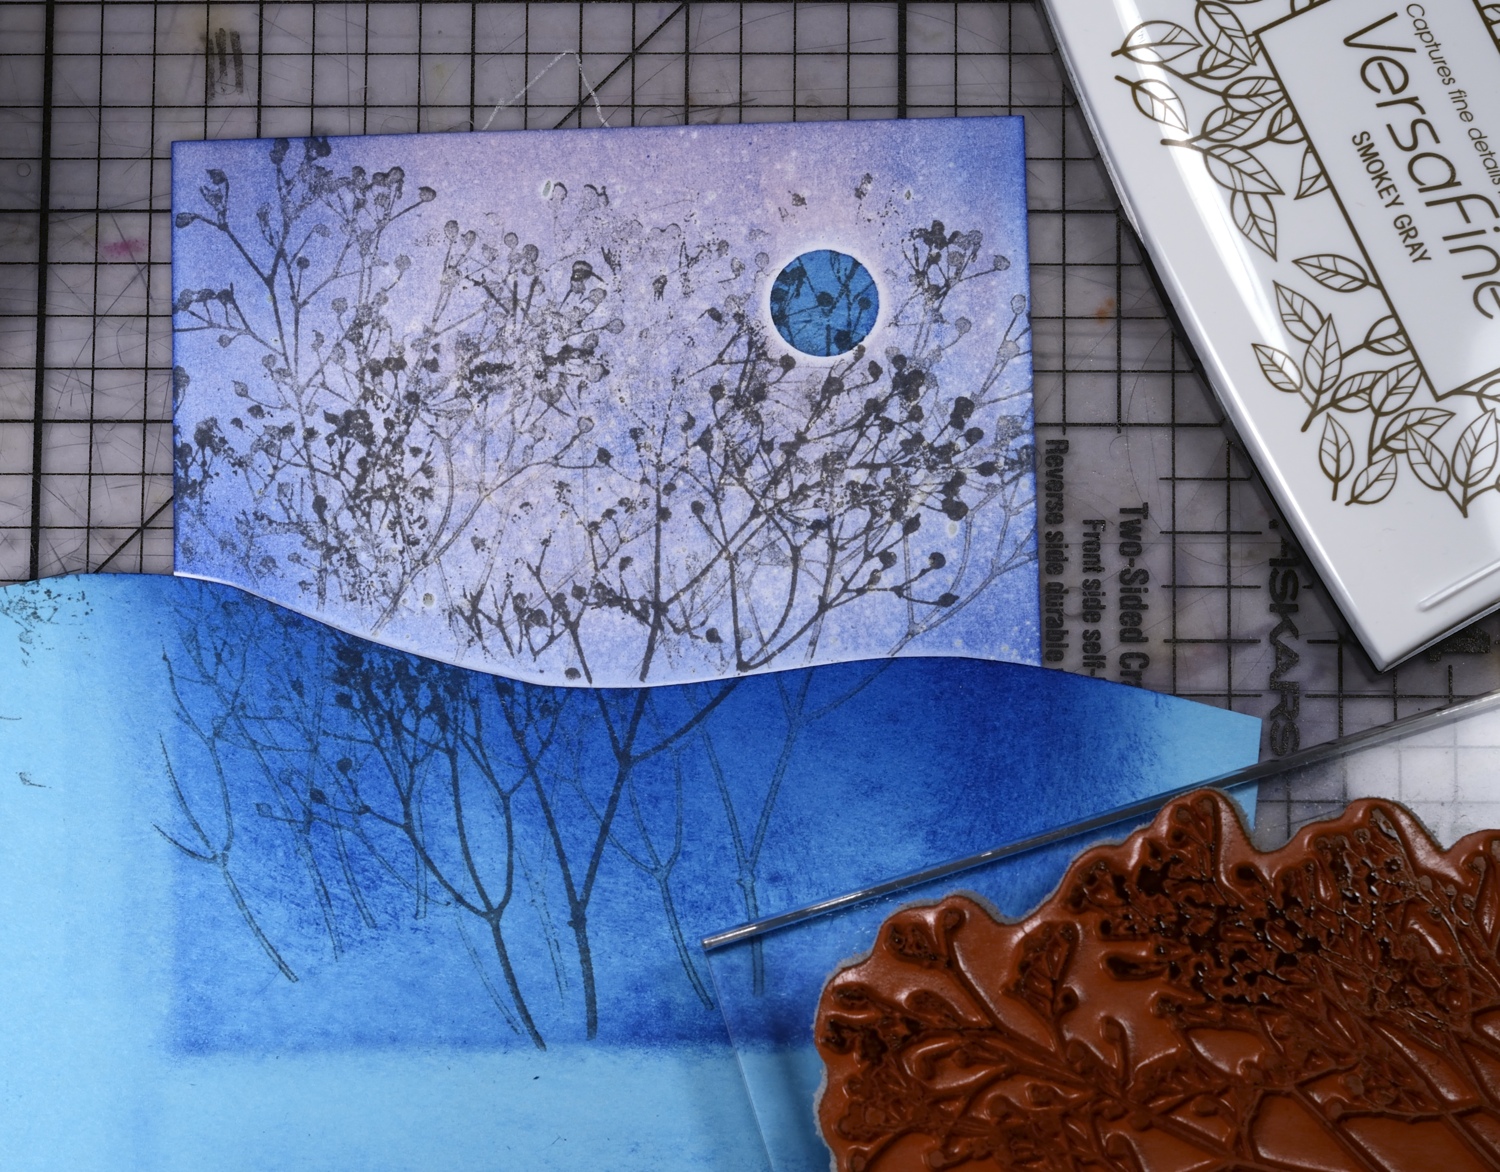
5. Stamp trees randomly with grey ink before moving either mask. These trees are in the background and do not need to be well defined.
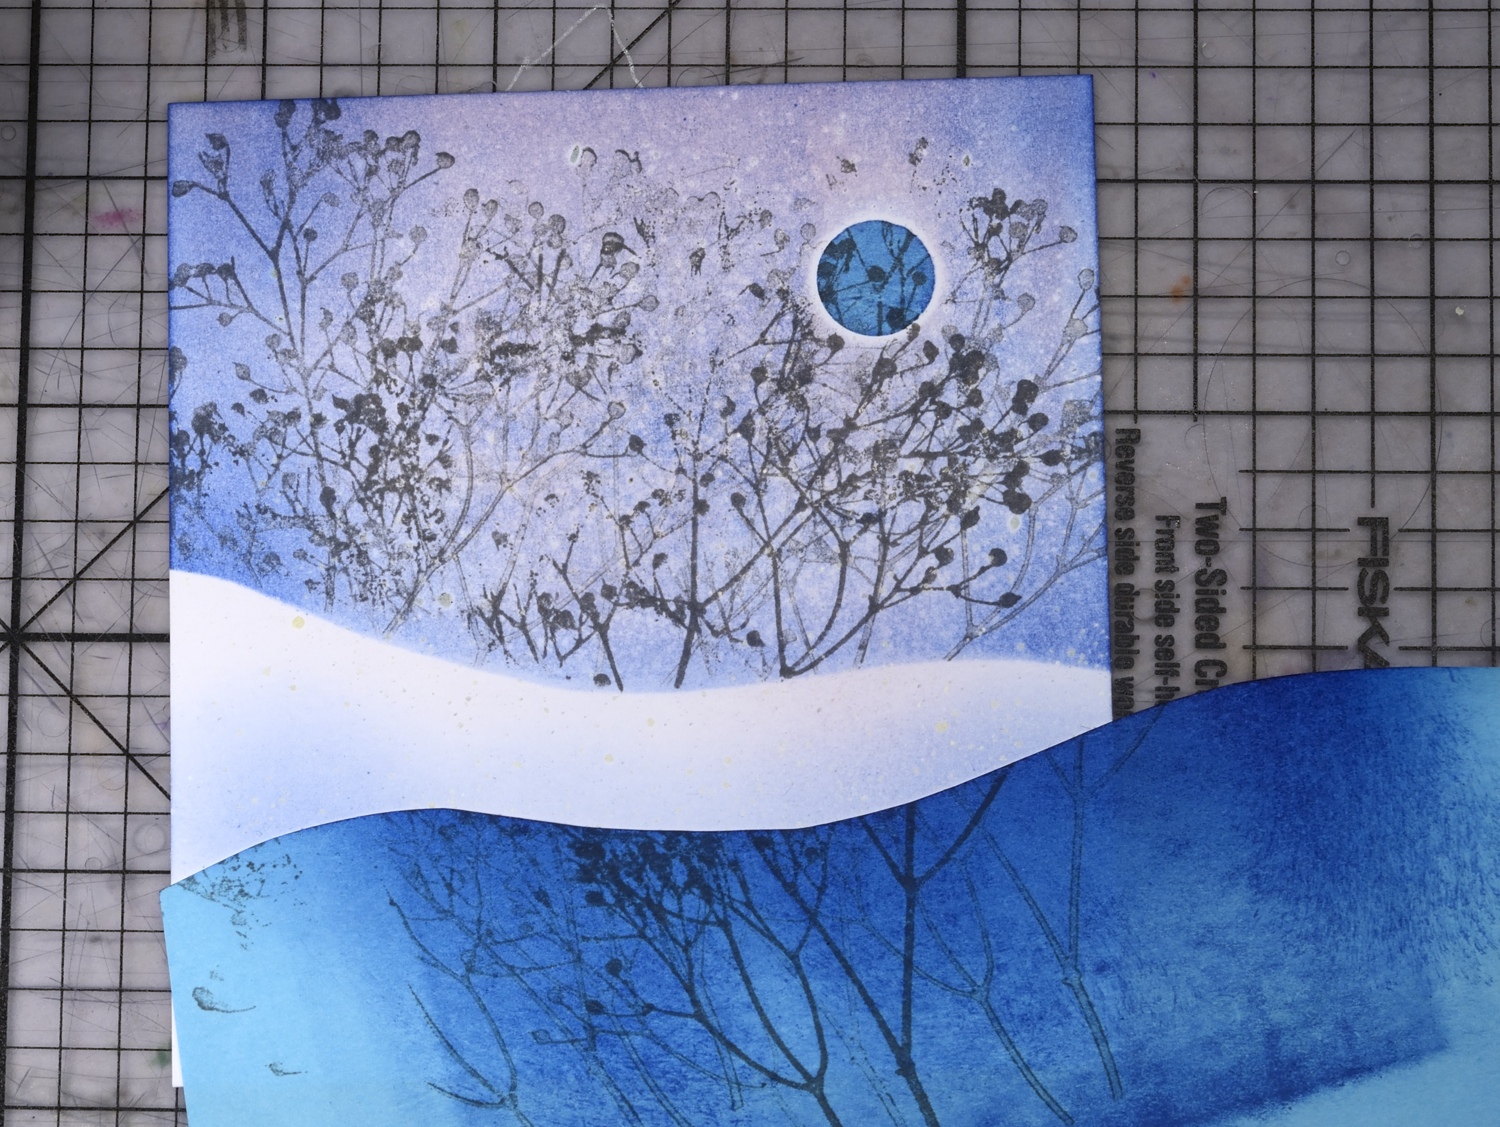
6. At this point remove the circle mask to expose the moon (I forgot to do that in the tutorial photo and had to stamp a couple of twigs in later!) Lower the hill mask and sponge blue ink along the edge and on the exposed snow bank but stop short of the horizon in order to keep it crisp and white. 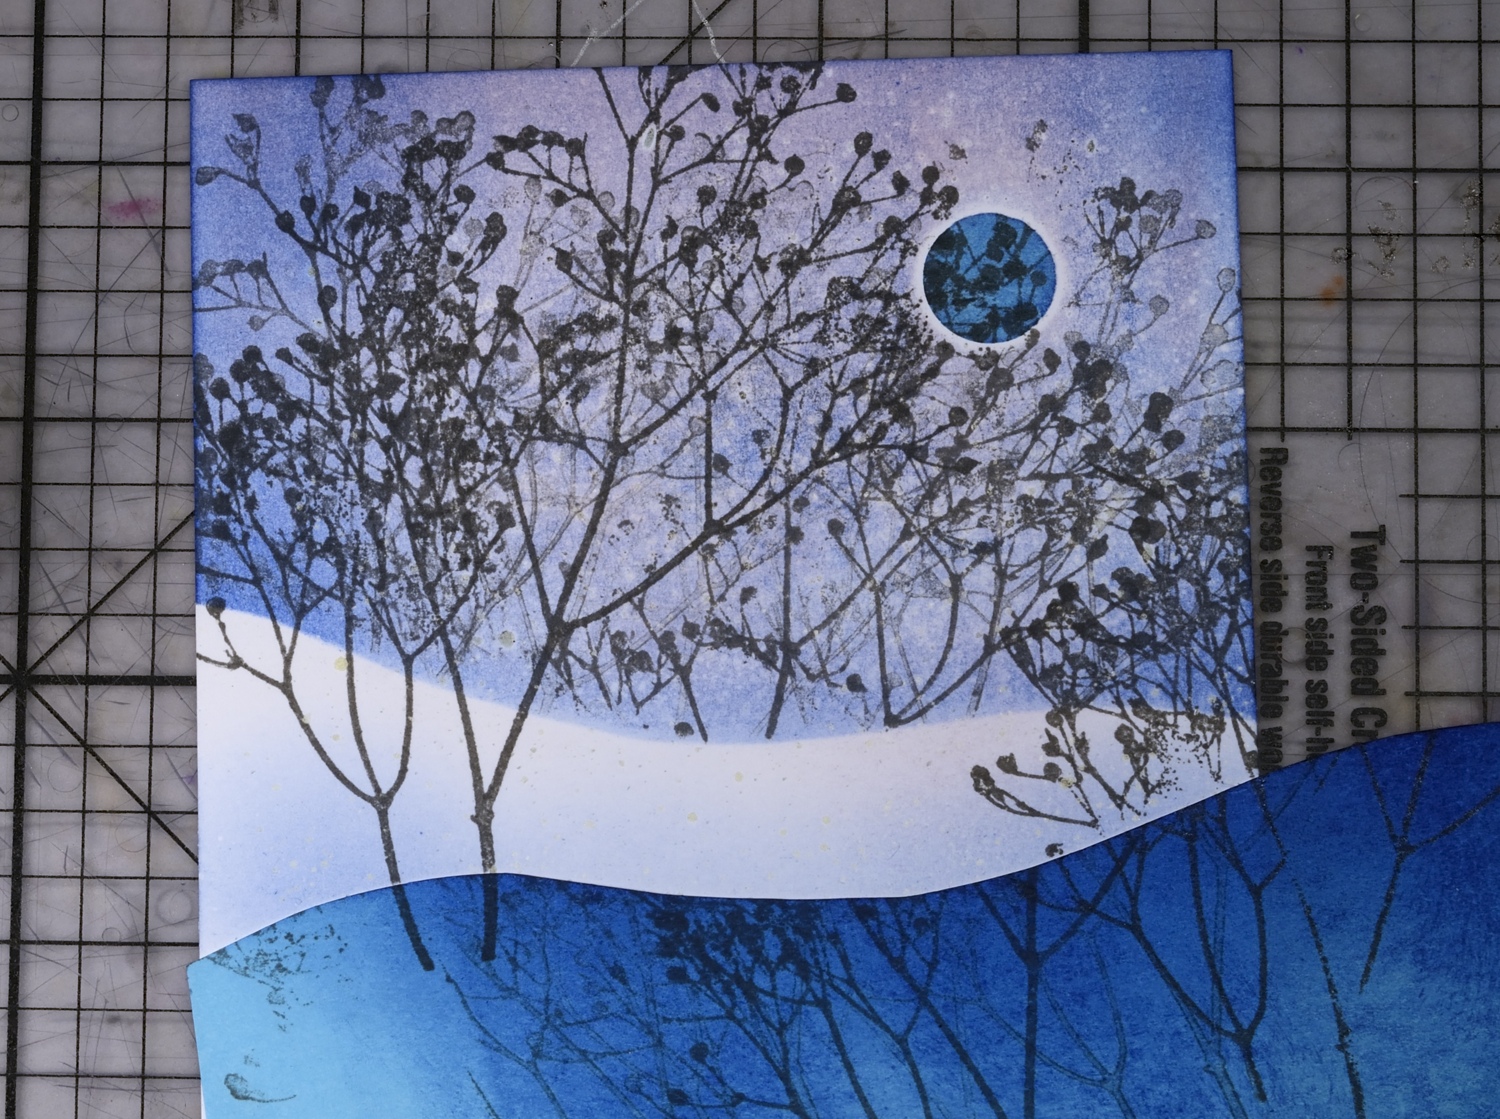
7. Stamp two more trees in grey. (remember the moon mask should have been removed before this point)
Supplies:
Stamps: Berry Tree, A Better World(PB)
Inks: Memento London Fog, Angel Pink, Summer Sky & Versamark (Tsukineko)
Also: Winsor & Newton Masking Fluid
A blossom tree
Posted: May 20, 2013 Filed under: CAS, Tutorial | Tags: Tutorial 15 CommentsI am honoured to be the guest designer at Scrap Rendez-vous today. I have a short tutorial over there describing my masking and sponging technique for this card:

Supplies:
Stamps: Winter Berries, Friendship (PB)
Inks: Memento Rose Bud, Pistachio, Bamboo leaves, Summer Sky (Tsukineko)
Masking Fluid Resist tutorial
Posted: June 13, 2012 Filed under: Breezy, Penny Black, Tutorial | Tags: Tutorial 29 Comments
The card above was created using the Masking Fluid Resist method and the Penny Black stamp Breezy. A tutorial outlining the method is featured on Splitcoast Stampers today. Below is the video version of the tutorial, the first video tutorial I have ever done. I almost didn’t make it as the first few attempts were not good. I persevered and my clever 11 year-old son did all the editing. Masking Fluid resist is a method I use for creating snowy scenes usually, but I couldn’t bring myself to create a snowy card in spring!


