
50th Wedding Anniversary
Posted: February 25, 2011 Filed under: Poppy Patch 6 Comments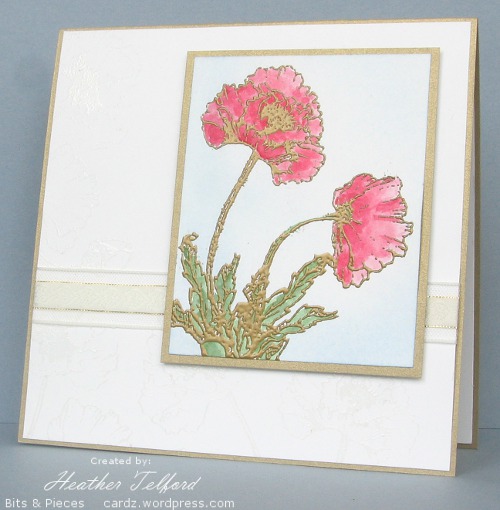
My parents are celebrating their 50th wedding anniversary this weekend in Canberra with family and friends. Sadly my family will not be there but we managed to get a parcel together containing cards and other handmade items. It reached them a few days ago so now I can post the card I made.
It was quite a departure for me to make a card like this after making so many one layer cards lately. I embossed the poppies in gold, coloured with SU ink and an aqua painter, then sponged the pale blue background. It is not really visible (perhaps my new camera might have captured it better??) but I also embossed poppies in white around the left-hand and bottom edge of the large white panel.
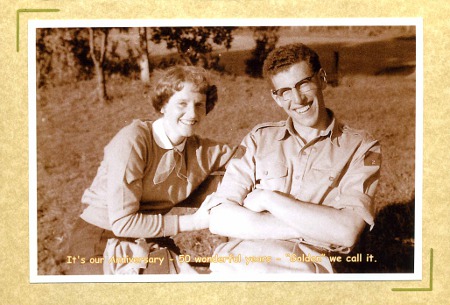
When I was speaking to my mother yesterday she mentioned the card my dad made her. After she described it to me I asked if they could perhaps send me a picture so I could display it on the blog. My dad printed a photo from before they were married, added a sentence on the front and wrote a poem for the inside. I think it is superb.
I got a Nikon camera…
Posted: February 24, 2011 Filed under: Uncategorized 3 Comments
I’d love to take a photograph.
(Name that song!)
It happens to be my birthday and my sweet husband bought me this very camera. I was equally thrilled and astounded. Now that I have a new and way fancier camera, I also have a manual to read.
Stay tuned…
Less is more challenge 3
Posted: February 23, 2011 Filed under: CAS, In Full Bloom 21 Comments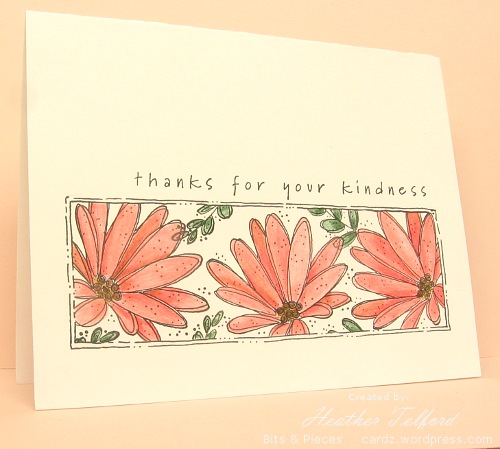
The third challenge from Mandi and Chrissie at the Less is More challenge blog is to make a clean and simple card with a spring theme. We have been having a few spring-like days around here but I am not convinced that winter is finished with us.
I pulled out a stamp set that I rarely use and applied a technique I often use: masking. I masked a rectangle area and stamped the flower and leaf stamps several times always overlapping the mask edges. I then used my new Faber-Castell coloured pencils to colour. After removing the masks I drew double broken borders with a black fine tipped marker and added the sentiment. The card base is white but has taken on a bit of a pink tinge in the photo.
Supplies:
Stamps: In Full Bloom, Simple Sayings
Inks: Basic Black
Cardstock: Flourishes Classic White
Also: Prismacolor premier fine line marker, Faber-Castell Polychromos pencils
OWL 41 It’s Christmas…
Posted: February 21, 2011 Filed under: All That Glitters, CAS, Holiday Sampler 9 Comments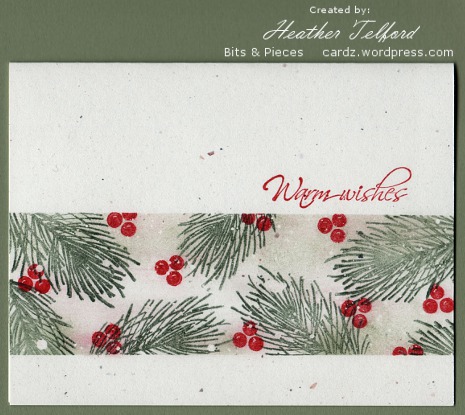
Susan threw out a challenge this week to create a one layer Christmas card on white or cream using only green and red. I am certainly not in Christmas card mode, but it doesn’t hurt to start early. This one was finished before I realized I hadn’t checked if natural flecked cardstock was allowed in the challenge. Natural is indeed permitted so here is my masked and slightly sponged panel card. Before stamping and sponging I flicked masking fluid on the panel. Masking fluid is used by painters to mask areas they want to preserve as white while they are painting the rest of the painting. You paint (or flick) it on and when you’re finished you peel it off to reveal white spaces.
Not too much of a stretch from my usual but I did put the sentiment on top of the panel for a change. Thanks for dropping by.
Supplies:
Stamps: All that Glitters(Flourishes), Hugs and Wishes( SU)
Inks: Mellow Moss, Real Red, Always Artichoke (all SU)
Cardstock: SU Natural white cardstock
Snow Storm
Posted: February 19, 2011 Filed under: Branch Out, CAS, Stamped Landscapes 21 Comments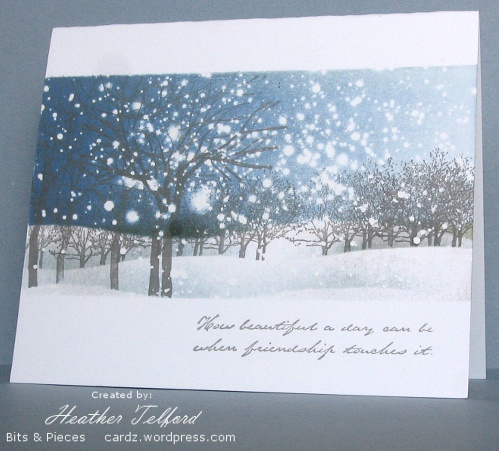
I came home and created this card last Sunday after walking my son down to the park to play hockey on the rink with his buddies. The snow was coming down very steadily and it was beautiful. I decided to try and recreate the scene on a card. I know spring might be showing its face in some places but I think we have a bit of winter to live through yet.
I started with two masks and then flicked masking fluid all over the panel. When the masking fluid was dry I removed a few very large blobs and positioned my horizon mask. Instead of sponging I used my new soft brayer to create the sky. I started at the left and moved toward the right as the ink ran out so I would have the impression of light and darkness. After the sky was done I moved the mask a couple of times adding trees and sponged snow drifts.
It really does look a bit like this during a snow storm; even after 10 years here in Canada, I still think it is a beautiful sight
Supplies:
Stamps: Branch Out, Ageless Adornment & a little tree stamp of unknown origin which really comes in handy at times
Inks: Brocade Blue, Going Gray
Cardstock: Flourishes classic white
Also: Winsor & Newton masking fluid
A new brayer makes all the difference
Posted: February 18, 2011 Filed under: CAS, Thoughts and Prayers 8 Comments
I am sure many of you have visited the new CAS challenge blog Less is More. With so many card makers participating it is a great source of inspiration. One of the cards which caught my eye was this lovely card by Sylvia who lives in Gibralter. I must admit that I was also taken by the fact that the ocean is in the background of the photo as she snaps her cards on the edge of her balcony. How lovely that must be.
Sylvia’s card is so rich in colour and balanced in layout that I really did not change much at all when I made mine. I cut an oval out of a post it note then brayered with summer sun followed by pumpkin pie. I bought a new brayer last weekend as I have long suspected that I did not have the best one for spreading ink on cardstock. The new one is a soft rubber brayer whereas the old one was hard. The difference is quite dramatic. The new one spreads colour more quickly and evenly. I removed the mask and added the tree and sentiment.
Thanks Sylvia for the inspiration.
Supplies:
Stamps: Thoughts and Prayers, Best is yet
Inks: Summer Sun, Pumpkin Pie, Chocolate Chip
Cardstock: Flourishes Classic White
Unusual
Posted: February 14, 2011 Filed under: Rollers 1 Comment
This card is not so unusual in itself, but it is rather unusual for me. For a start it is a valentine card; I rarely make them and even more rarely give them. I don’t remember the last time I gave one. It also uses bling, something you might see on one of my Christmas cards but rarely anywhere else. I don’t dislike it, it just never occurs to me to use it. It is a small card, about 3.5″ square, a size I like but don’t usually do on purpose. So there you have my one and only valentine for this year. I did cook my children heart shape eggs in toast for breakfast this morning !
Several people have asked where I bought the extreme surfer and skateboarder stamps and the pretty tree in my last card. They are Stampin’ Up) As ninety percent of my stamps are from Stampin’ Up I don’t usually note that down. I do put the company in brackets when they are not from SU. Likewise with my inks. I will try to remember to add where the stamps come from in the future.
Thank you for all the lovely comments on my last card.
Supplies
Stamps: Music Notes roller, Short & Sweet
Inks: Going Gray Real Red
Paper: Flourishes Classic White
Also: Red rhinestones
Less is more challenge 2
Posted: February 13, 2011 Filed under: Baroque Motifs, CAS, Thoughts and Prayers 34 Comments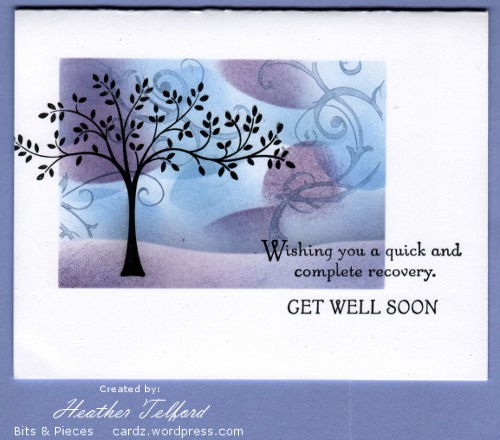
The second Less is More challenge is up and running and it is a one layer challenge featuring a tree or flower theme.
I decided to create a slightly whimsical sponged scene but without snow for a change. I masked off a rectangle and added a horizon mask. After punching half a circle and half an oval out of a post it note I randomly sponged amethyst and eggplant curves into the sky. I stamped a few pale sections of the Baroque Motifs flourish, removed the horizon mask, sponged the ground and stamped the tree and sentiment in black.
Check out the other challenge entries; there is inspiration aplenty!
Supplies:
Stamps: Thoughts and Prayers, Baroque Motives
Inks: Almost Amethyst, Basic Black, Elegant Eggplant
Cardstock: Flourishes Classic White
OLW 40 Two for the show
Posted: February 11, 2011 Filed under: CAS, Extreme Elements, Extreme Surfboard 16 Comments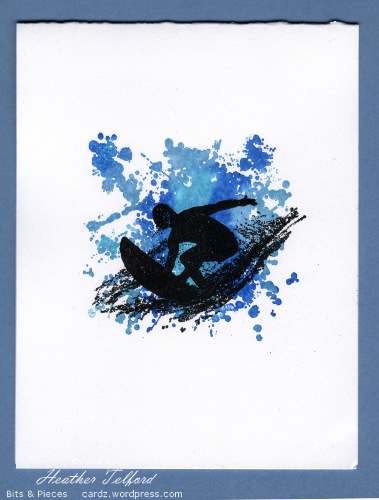
Jennifer at Styles Ink described her current One Layer Wednesday challenge as a bit tricksy. I tend to agree. She was very strict, limiting us to two stamps and neither could be a sentiment. She also limited us to heat embossing or colouring with markers!
I was a bit stumped until I remembered these stamps from the Extreme collection. I coloured directly onto the splat image with markers then misted it before stamping on the card front. The surfer and the skater are both embossed in black.
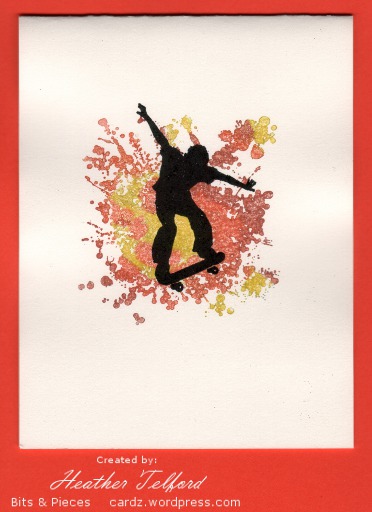
It is always good to have a few boy cards in reserve, the inspiration does not always come when I need it!
Supplies:
Stamps: Extreme Surfboard, Extreme Skateboard, Extreme Elements
Inks: Versamark, Tempting Turquoise, Brilliant Blue, Baja Breeze, Yoyo Yellow, Only Orange, Real Rust.
Cardstock: Flourishes Classic White
Also: Black e.p.
Queen of the sponge takes it to the edge!
Posted: February 10, 2011 Filed under: One of a Kind, Upsy Daisy 6 Comments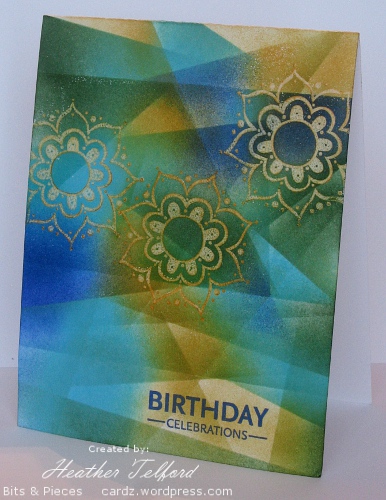
Ardyth left a comment on my last post which made me laugh and prompted the title to this post!
You are the Queen of the Sponge. And I mean that better than it sounds! LOL
After a comment like that it seemed appropriate to post my latest card, a one-layer covered entirely in sponging. This is one of those cards that evolved. I certainly didn’t set out to sponged the entire card front. As I sponged and moved the mask to randomly place more sponging I kept wanting to increase the amount of colour until I had covered the whole card.
The inspiration for this card came from my daughter’s violin teacher. She was wearing a top the other day with these colours and flowers printed in a batik style. I stamped the flowers in versamark and mustard so I could emboss them in clear. I then began to sponge in turquoise, garden green, brilliant blue and mustard. I moved a post-it note around to create criss cross patterns of colour which, now that it is finished, remind me of light coming through stain glass windows.
As this card was quite experimental I am going to play with the technique a little more when I get the chance and see how other colour combinations work. Thanks for stopping by today and thanks for the kind comments you have left me, they are so encouraging.
Supplies:
Stamps: Upsy Daisy, One of a Kind
Inks: Versamark, More Mustard, Tempting Turquoise, Brilliant Blue, Garden Green
Cardstock: Flourishes Classic White











 Heather Telford