
More vintage watercolour
Posted: May 5, 2016 Filed under: butterfly charmer, flourish & butterflies | Tags: Faber-Castell Albrecht Durer Watercolour pencils, Penny Black creative dies, Penny Black stamps, Ranger Distress inks 19 Comments
Thank you for your encouraging response to yesterday’s technique video. Please let me know if you give it a try. I have another card done in the same style today so if you missed the instructions yesterday, check out the tutorial here. The painting on this one was more straightforward as there was no masking. The butterflies are all on one large stamp, ‘Butterfly Charmer‘, and their botanical look makes them perfect for the vintage treatment.

As with yesterday’s card I stamped in vintage photo distress ink; this provides the sepia tone which I want to carry through the whole image as well as the water solubility necessary to blend the ink with the added colour from the watercolour pencils. I chose a blue, a purple and a pink pencil and switched from one to another as I coloured each butterfly.
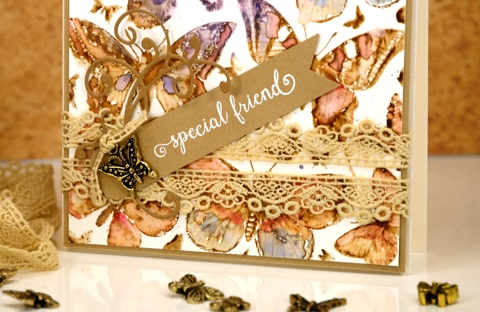
The assembly was more time consuming with this card partly because it had fiddly little lace and charm elements. The main reason putting this card together took a while though was because I didn’t know what I wanted. I glued down some lilac ribbon and added a bow to the butterfly charm only to decide I didn’t like it. Thankfully the ribbon pulled off without ruining the watercolour panel. I did want the lace and the charm so I paired them with an embossed sentiment on a tag plus a little flourish die cut . The whole shebang is matted with the same pale brown as the tag and popped up on a natural coloured card base. I know for some of you this constitutes a fairly simple layout but for me this is high on the fussy-fiddly scale!
Supplies:
Stamps: Butterfly charmer, Happy Snippets (PB)
Dies: flourish & butterflies, a pocketful
Inks: Vintage Photo distress ink (Ranger) Versamark (Tsukineko)
Cardstock: Hot pressed Fabriano watercolour paper, brown cardstock
Also: Albrecht Durer watercolor pencils (Faber-Castell), lace, butterfly charm


