
Moonlit snowfall
Posted: December 11, 2013 Filed under: Berry Tree, Tutorial | Tags: Penny Black stamps, Tsukineko Memento inks, Tutorial 12 Comments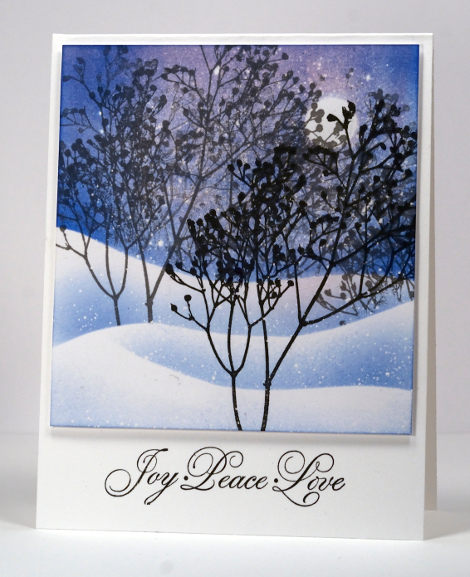
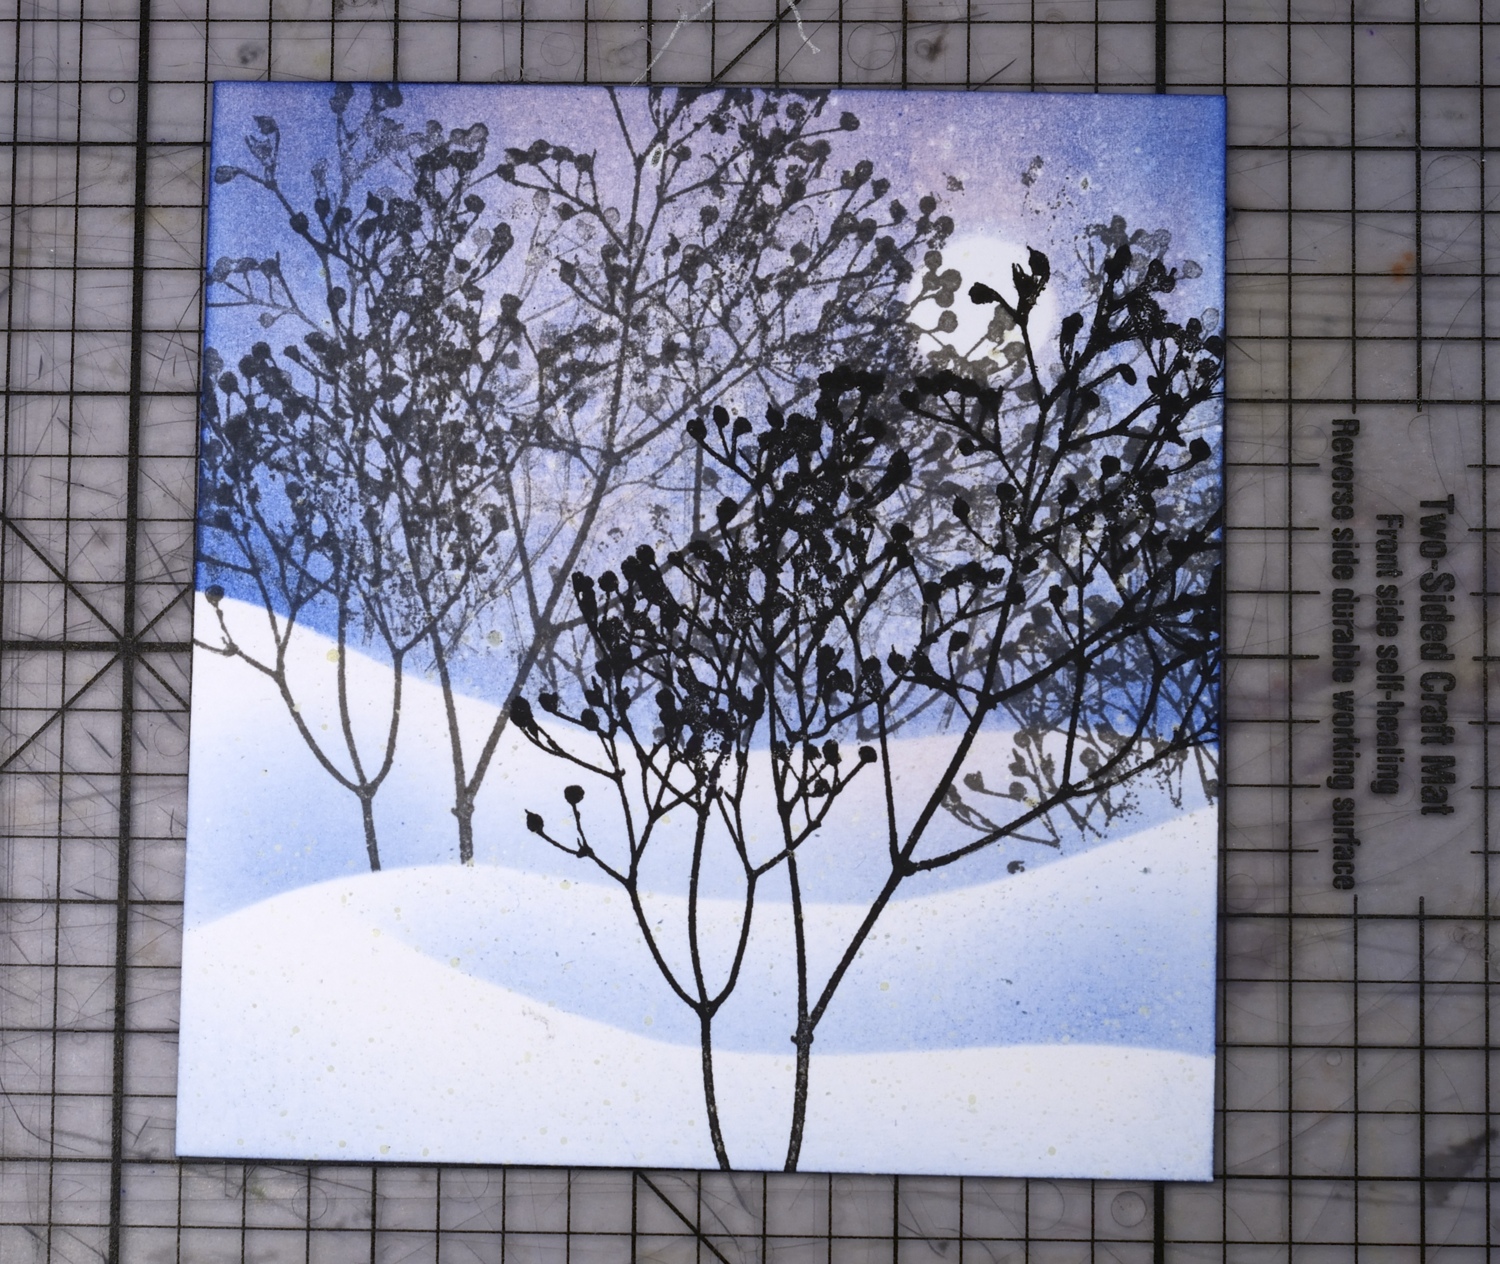
The Winter Wonderland fun continues here and on the Penny Black Blog today with a step by step tutorial.
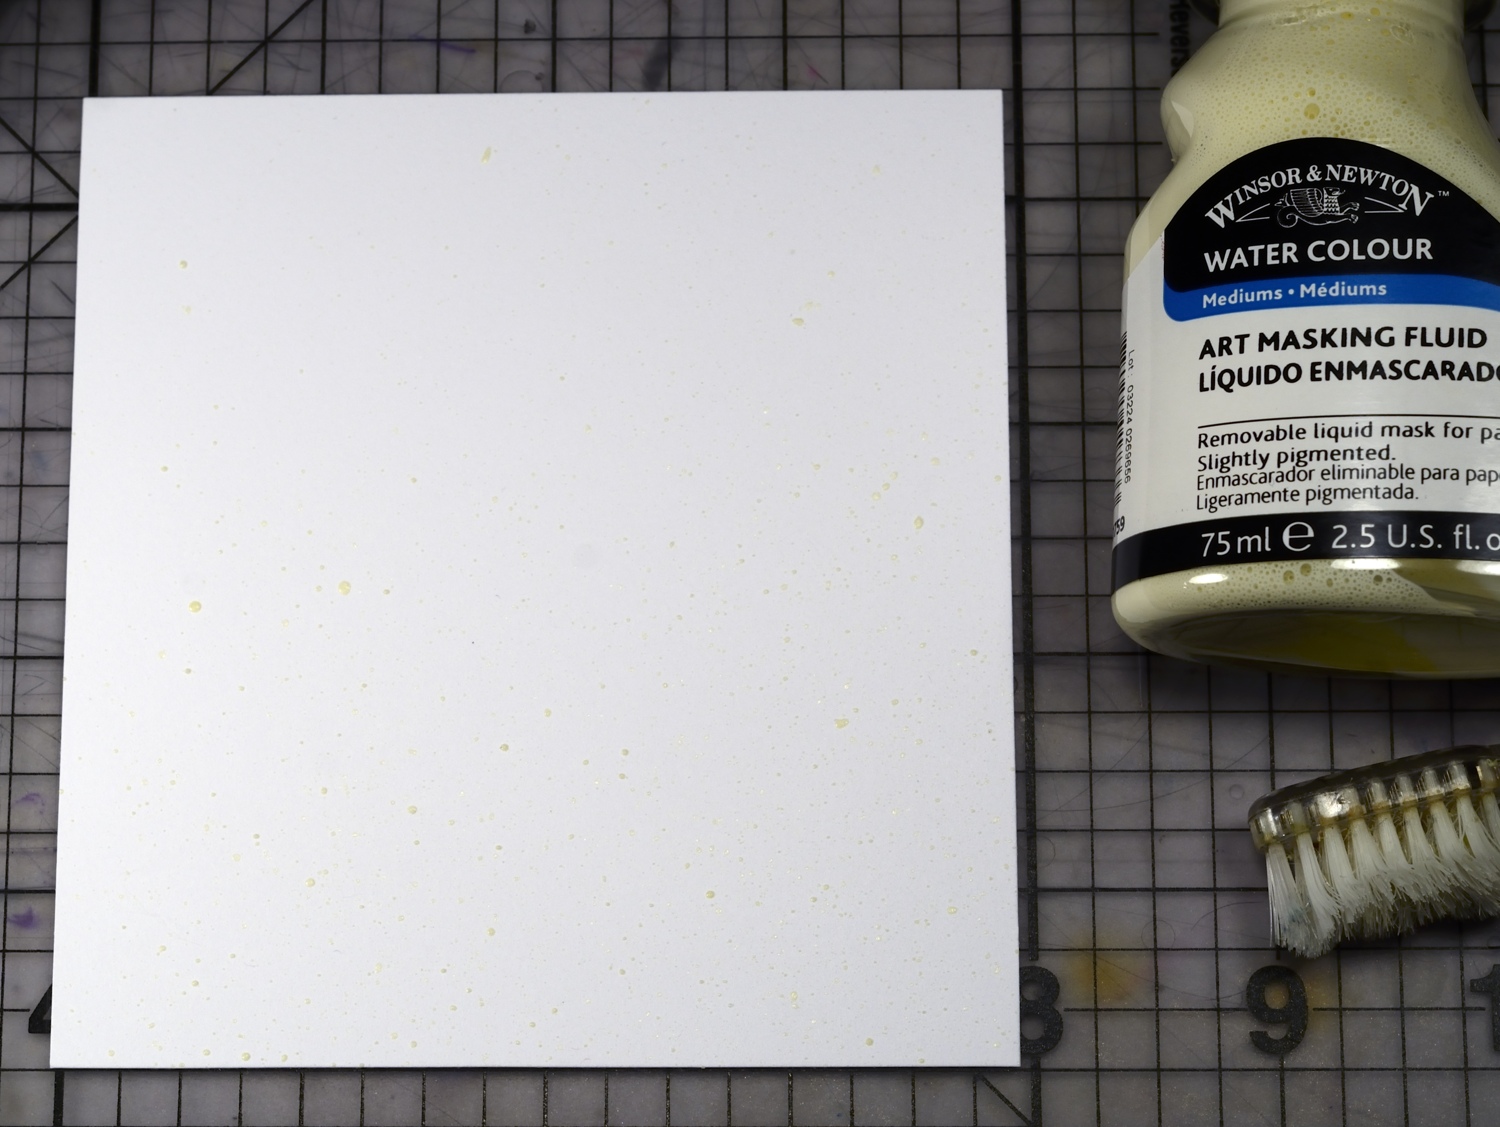
1. With a toothbrush or paint brush flick masking fluid over panel. Leave to dry for at least 20 minutes. I you use a paintbrush dip it in detergent and squeeze the detergent out before dipping the brush in the masking fluid. Wash the brush straight away after you have finished flicking.
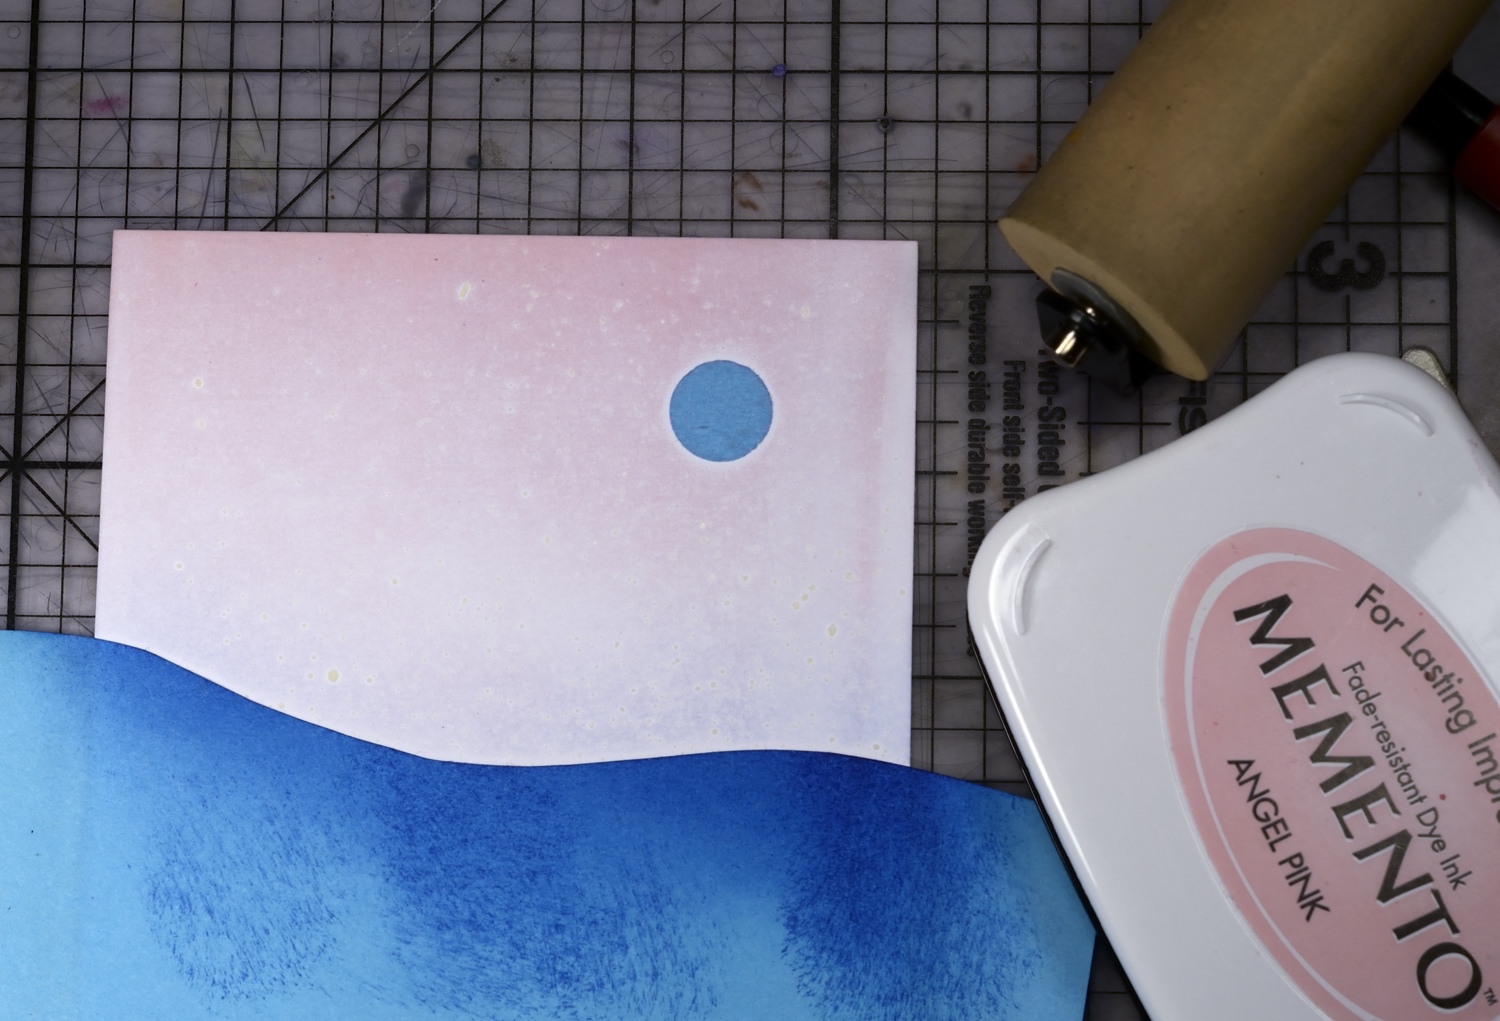
2. Punch a circle from a post-it note or masking paper and position in the sky. Cut a hill shaped mask and position it half way down the panel. Using a rubber brayer apply pink ink to sky area.
3. Brayer blue ink over the sky area.
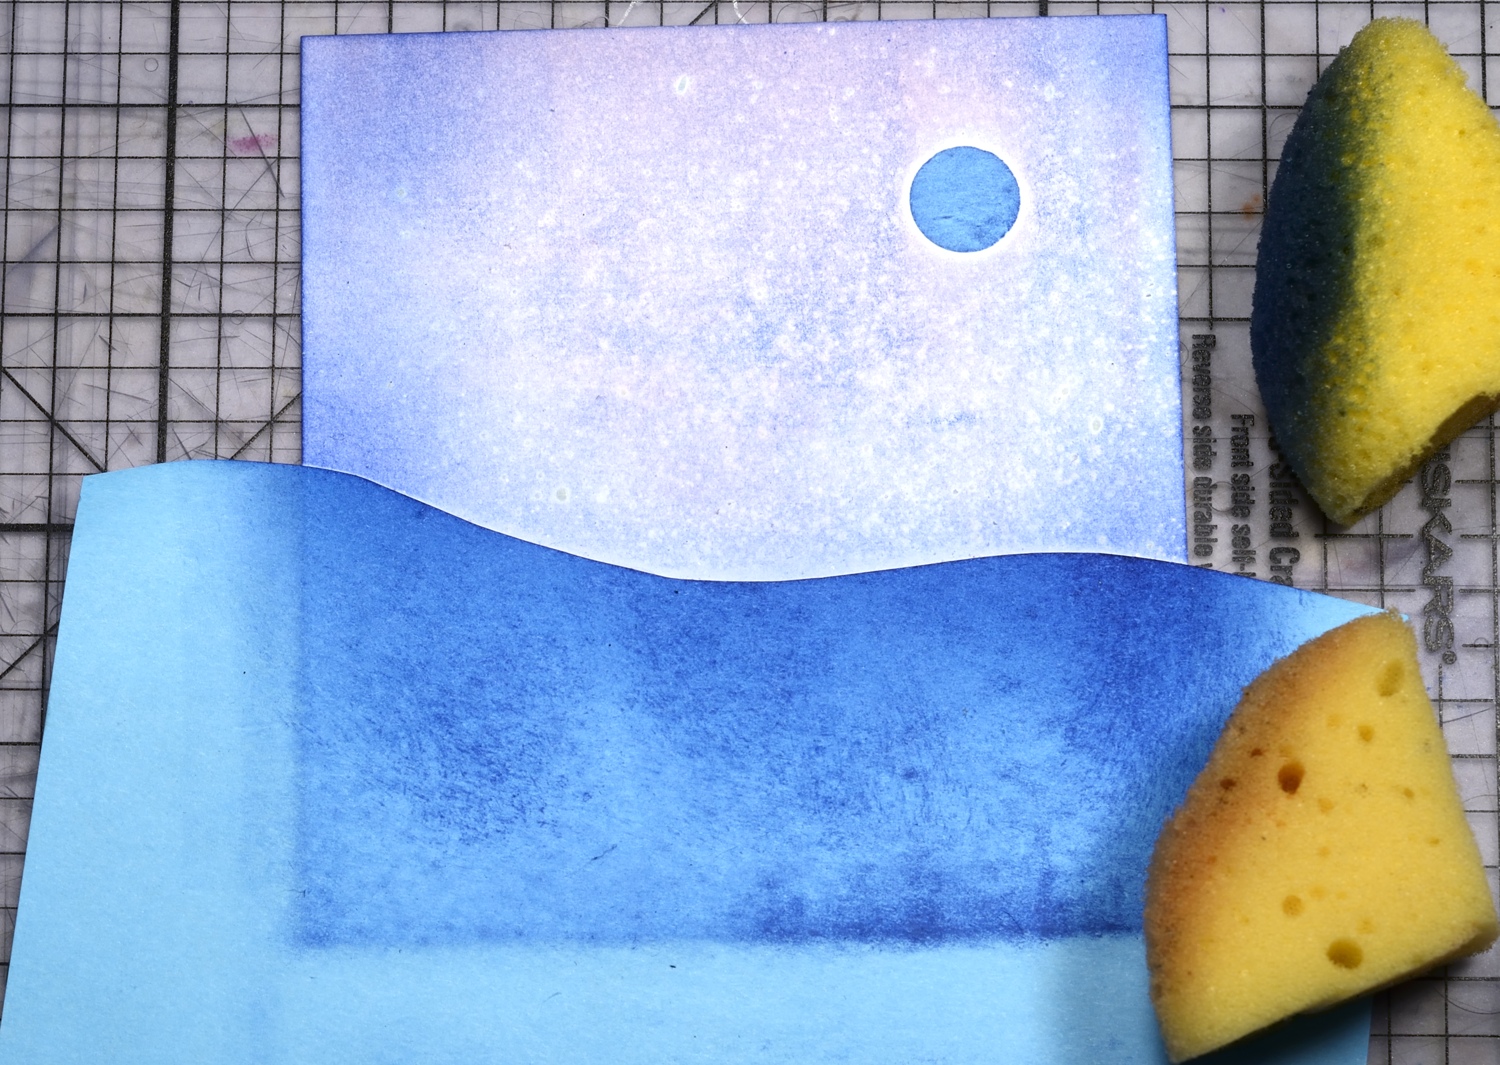
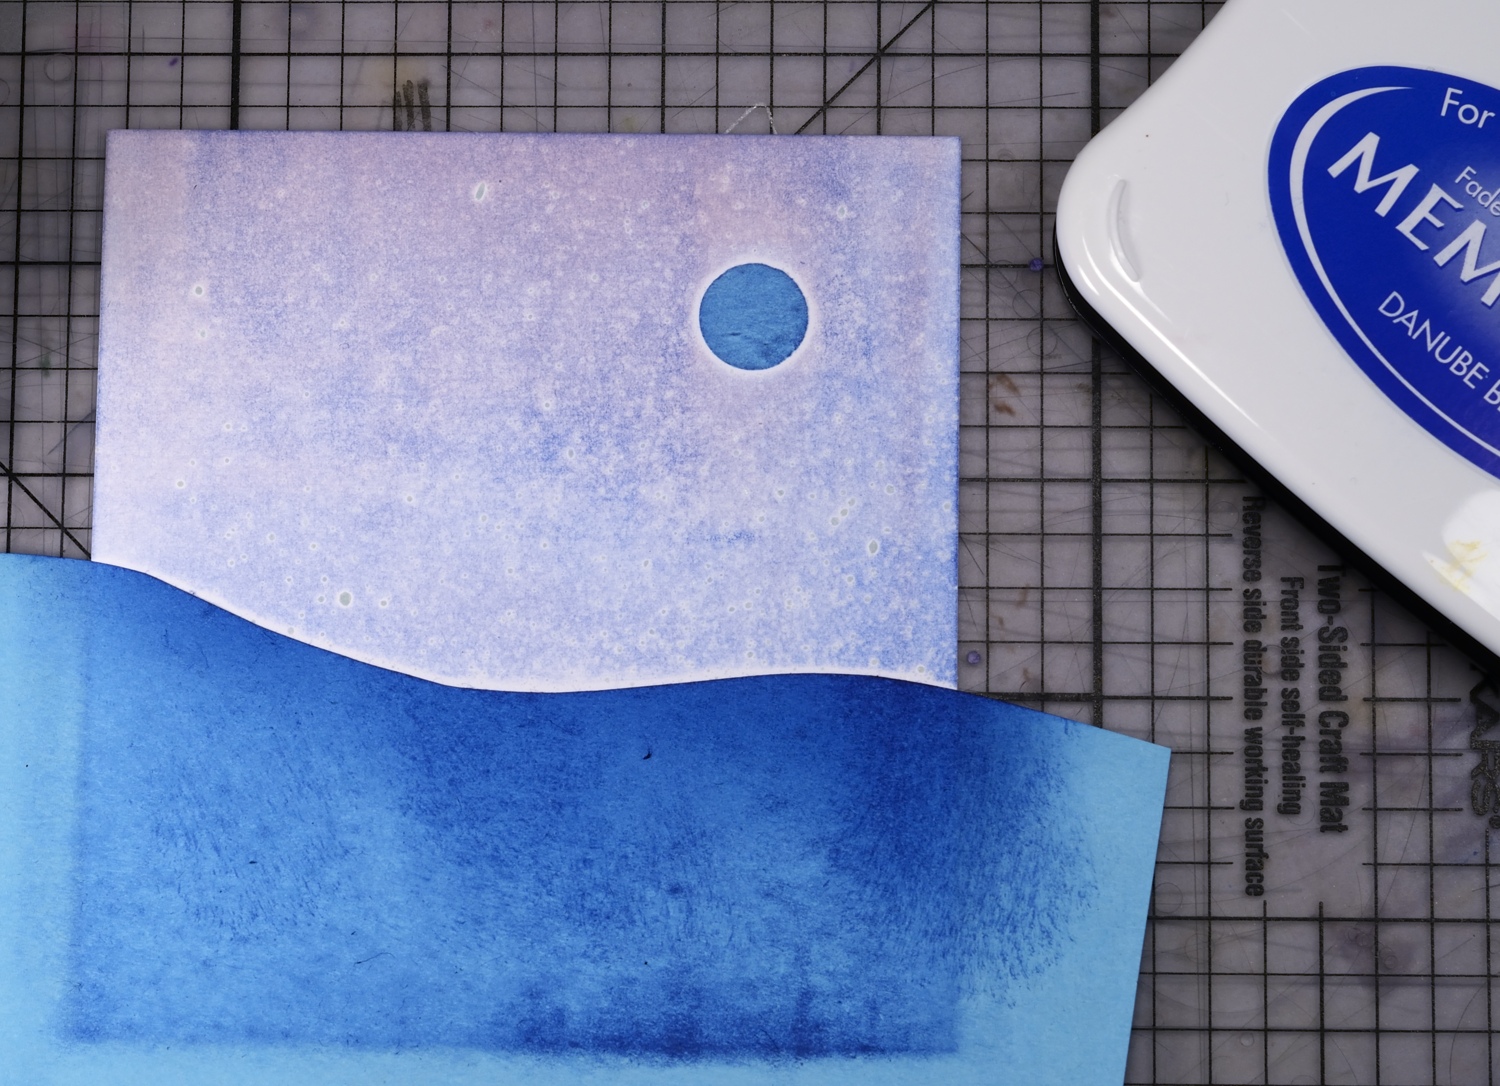
4. Add a little more blue ink around edges with a sponge. Add a little more pink ink to suit your preference.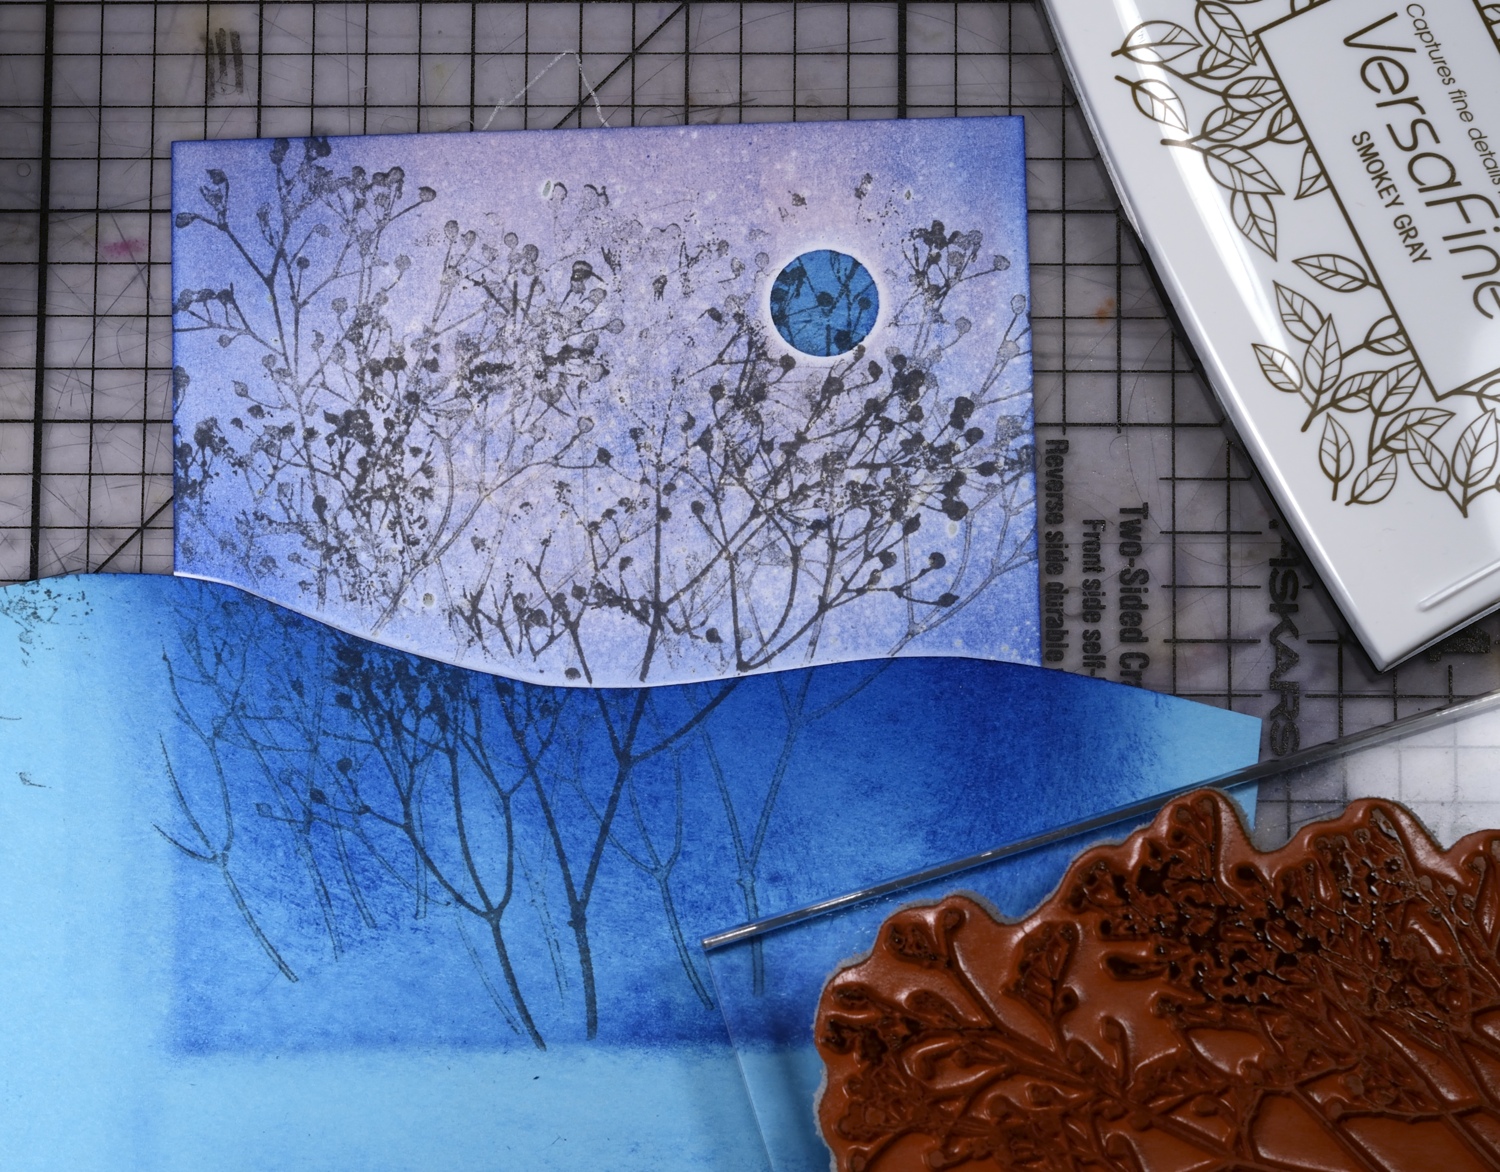
5. Stamp trees randomly with grey ink before moving either mask. These trees are in the background and do not need to be well defined.
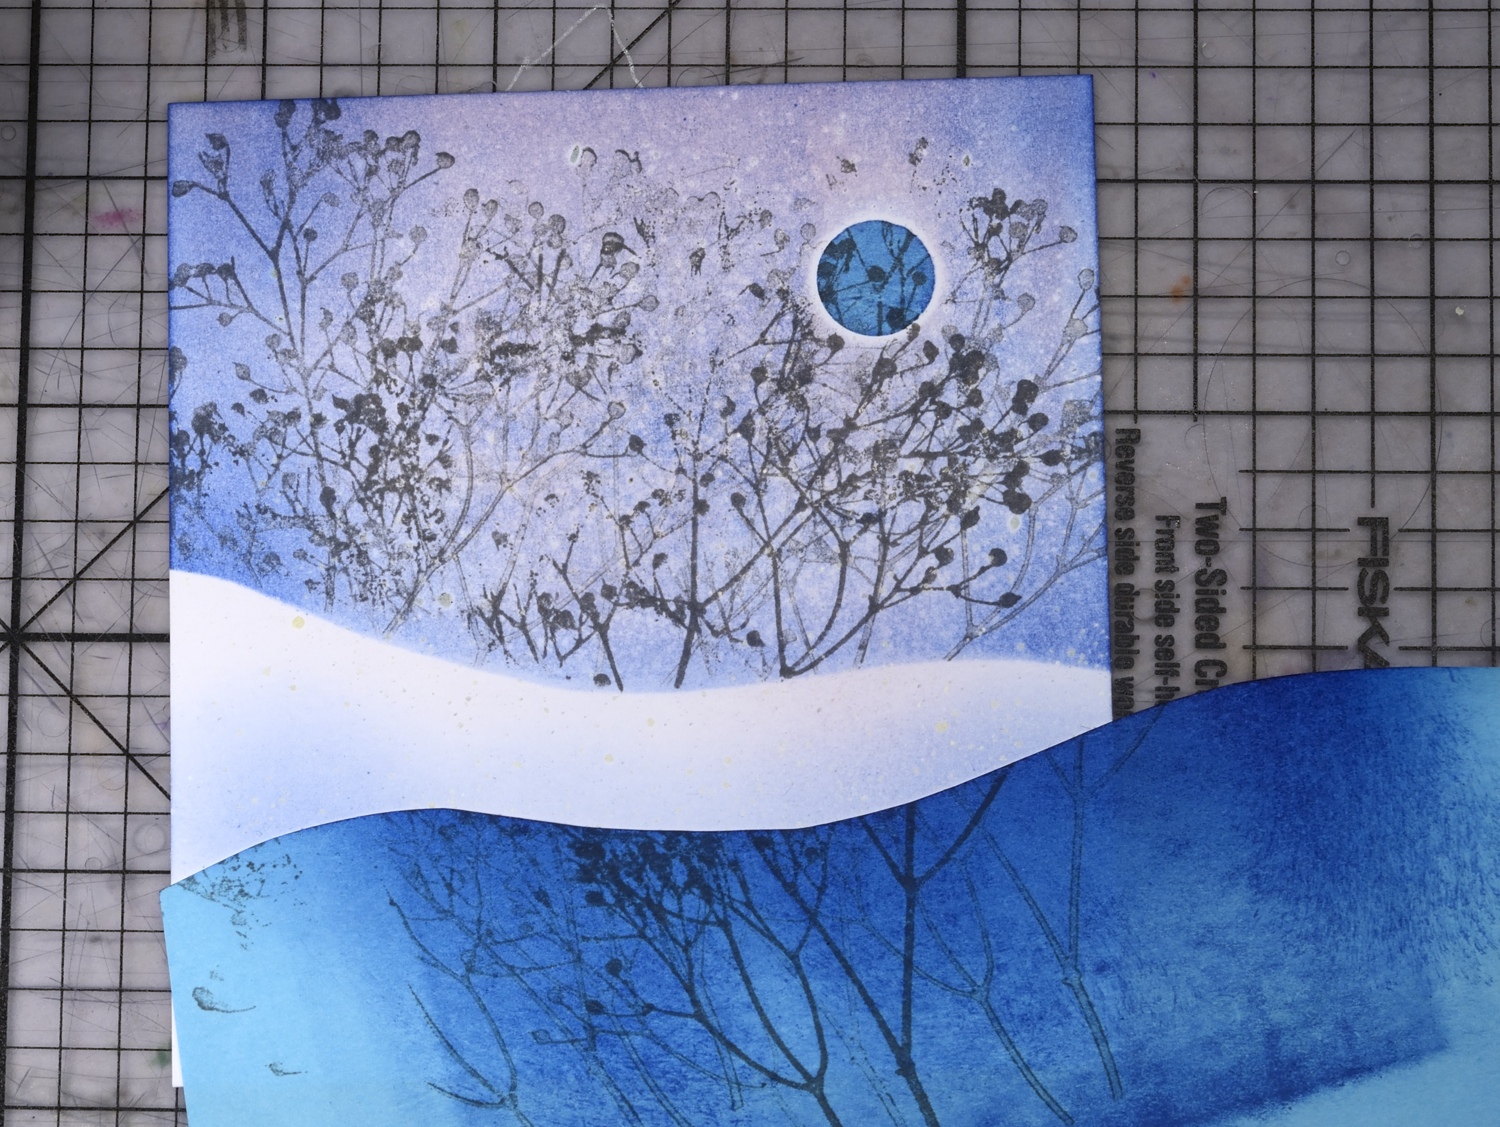
6. At this point remove the circle mask to expose the moon (I forgot to do that in the tutorial photo and had to stamp a couple of twigs in later!) Lower the hill mask and sponge blue ink along the edge and on the exposed snow bank but stop short of the horizon in order to keep it crisp and white. 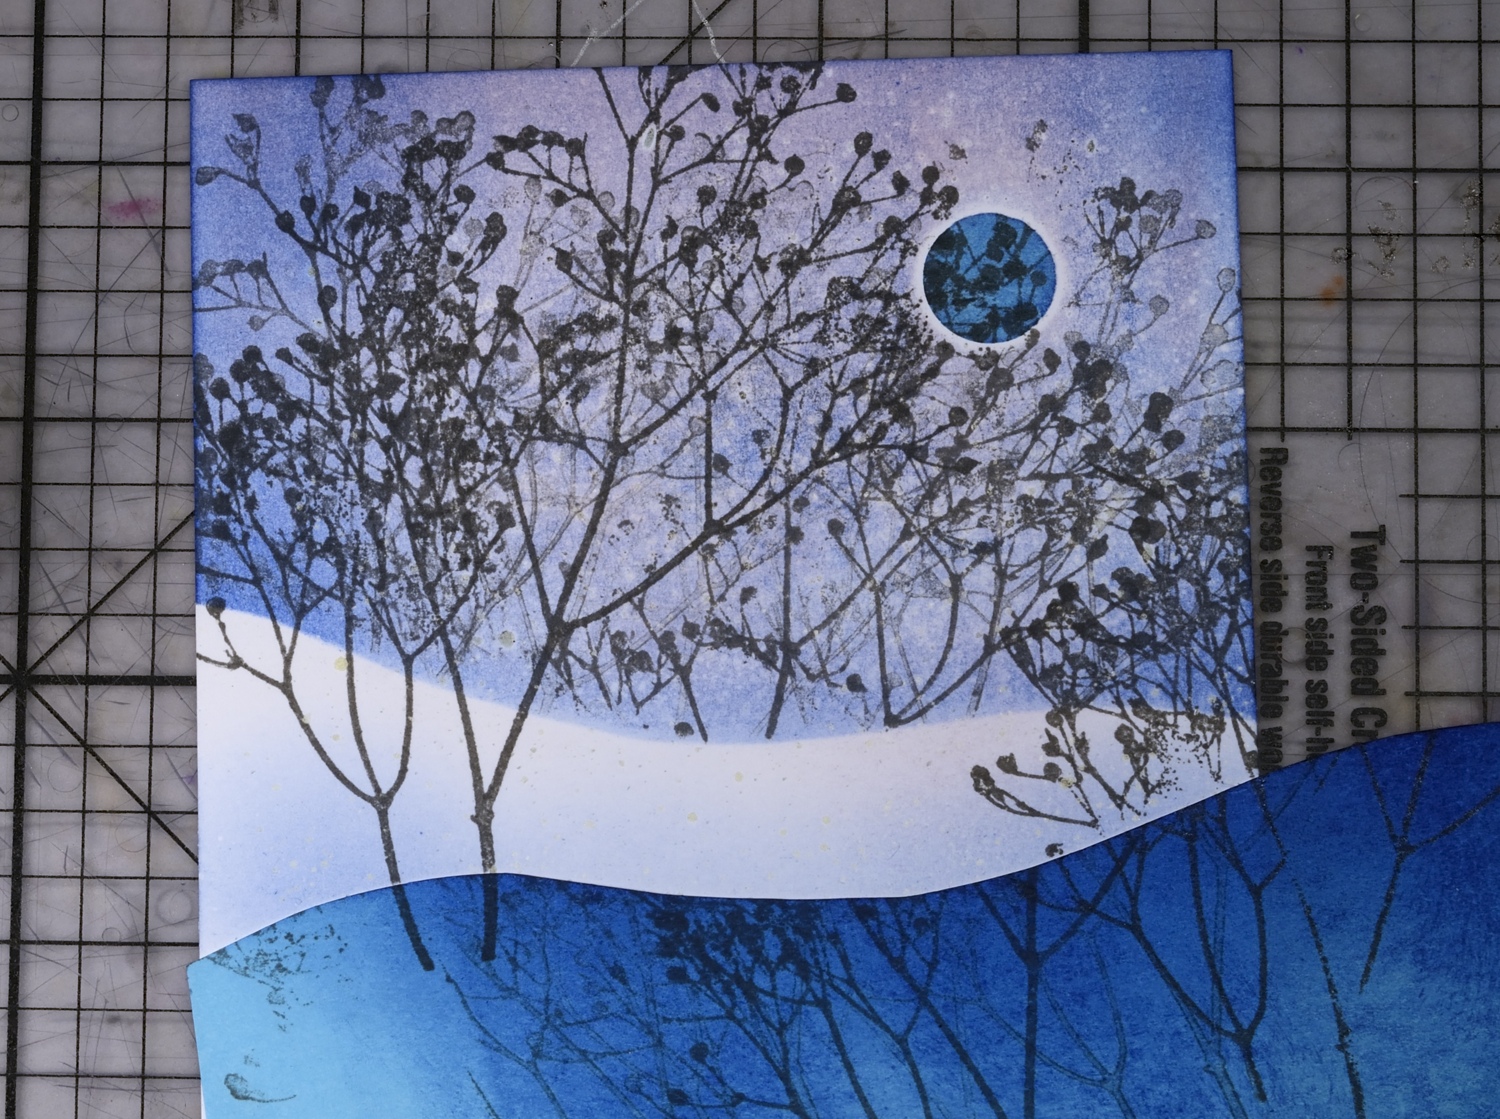
7. Stamp two more trees in grey. (remember the moon mask should have been removed before this point)
Supplies:
Stamps: Berry Tree, A Better World(PB)
Inks: Memento London Fog, Angel Pink, Summer Sky & Versamark (Tsukineko)
Also: Winsor & Newton Masking Fluid


Awesome designed, love that winter dream creation very much.
Hugs Anja
Absolutely stunning.
Thanks for another wonderful tutorial, have a great week,
Most beautiful card ever!!! Thanks for sharing the instructions
Love it!!!
Date: Wed, 11 Dec 2013 08:04:18 +0000 To: [email protected]
Just beautiful. How did you get the falling snow effect on the lower hills at the end . .? Niall the pictures they were above ,but not below
The falling snow effect is created by the masking fluid I flicked onto the panel before I started creating the scene. After all the stamping and sponging is completed I rub off the masking fluid to reveal the little white dots or ‘falling snow’.
Thank you, thank you, thank you, another wonderful scene with detailed instructions. Hope I have time to try this.
Thank You, Thank You for this step by step tutorial, I will give this a try. Thanks again, Love it
Another beautiful card, Heather! Thank you very much for the tutorial. I look forward to trying your process. 🙂
So very pretty. And thanks for the tip about detergent + paintbrush… I’ll do that when I start using my *next* paintbrush. 😉
Thank you for answering my question on masking fluid. Embarrassingly I lost it on my I-phone but found it on your blog and safely saved the tutorial. Thanks again.