
Butterflies Die Photo Tutorial
Posted: May 26, 2015 Filed under: Butterflies, Tutorial, Watercolour | Tags: Kuretake Gansai Tambi watercolour paints, Penny Black creative dies, Tutorial 9 Comments
There are three new dies in the new Sunshine and Smiles. release all set in rectangular frames, which makes them a nice choice for the inlaid die technique. I used the Butterflies die to create the card above. Below is a photo tutorial with instructions below each photo describing my process.
Spritz or paint water onto a piece of cold pressed watercolour paper then add watercolour paint ( I used Kuretake Gansai Tambi on Fabriano cold pressed) in three or four colours. Let it blend, tilt the paper, move it around with a paintbrush if it is not going where you want it to. Let it dry.
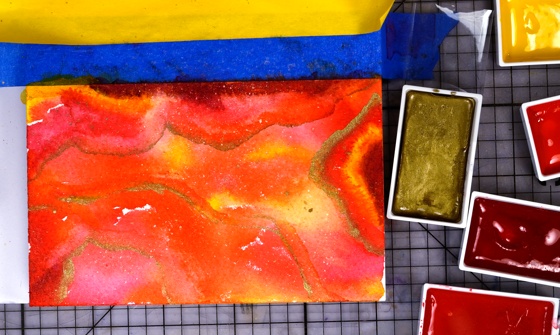
Add more paint to deepen the colours which will have dried paler than when you painted them. Add some metallic gold paint and some splatters. Let panel dry, then trim to desired size.
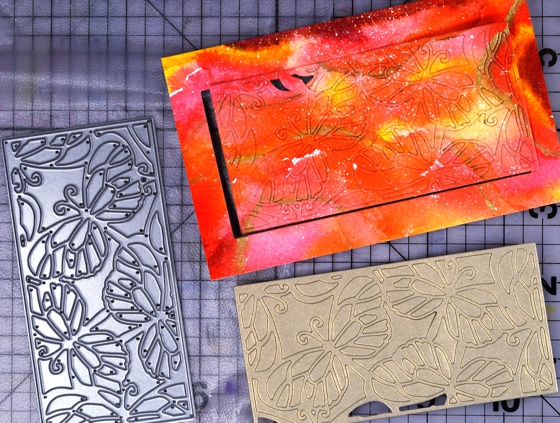
With the ‘Butterflies’ die cut a panel from your watercoloured piece and from a piece of metallic gold cardstock. Press both panels onto some ‘Cling film-Press & Seal’ to keep all the pieces together. I know it looks like I already lost some pieces but don’t worry they were there somewhere!

Attach a piece of double sided adhesive sheet (I used ‘stick it’) to a piece of cardstock larger than your die-cut panel.
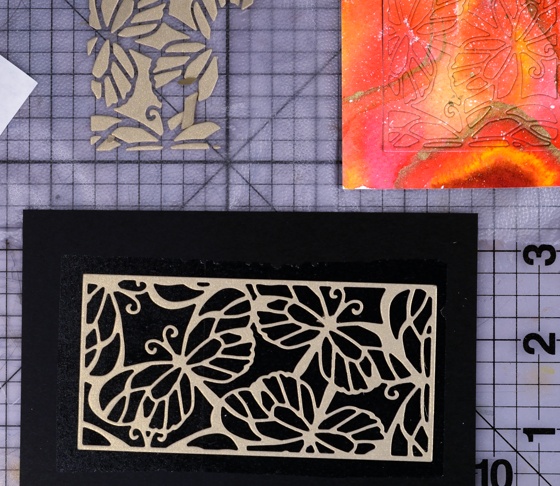
Remove the liner paper from the adhesive and press the gold ‘frame’ part of the butterflies die onto the adhesive covered cardstock.

Transfer the ‘inside’ pieces from the die-cut watercoloured panel into the gold frame pressing each one firmly onto the adhesive backing.
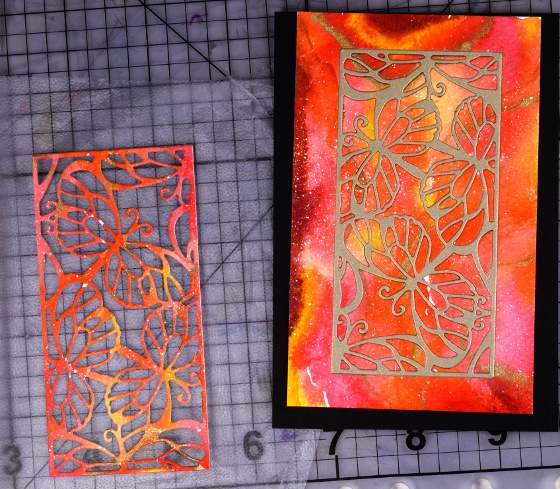
Attach the remaining border piece of watercoloured cardstock around the inlaid die-cut panel. Trim excess cardstock from the completed inlaid die cut panel. Mat with gold card then attach to co-ordinating card base.
Supplies
Creative Dies: Butterflies (PB)
Cardstock: Fabriano 100% cotton hot pressed watercolour paper, Pink and gold cardstock
Also: Kuretake Gansai Tambi watercolour paints, Stick it adhesive sheet


Too technical for me
Wonderful card – and worth all that painstaking work putting those tiny pieces in place 🙂 Elizabeth xx
Stunning card! Thanks for the tutorial and the press and seal tip, I put it on the grocery list today.
This is so bright and summery Heather and thank you for the step by step instructions and the PB Butterflies die cut panel is very pretty. x
great press and seal tip!
Beautiful card – but a lot of work!! Would it have the same effect to paint the bottom layer like you did and then cut the butterflies from a piece of gold paper and mount on top??
The card took a lot of work and you created a beautiful piece.
Lovely card, love the beautiful background.
Beautiful! Love the vibrant colours.