
Background stamp tutorial
Posted: February 25, 2013 Filed under: Background Stamps, CAS, Glory of Modesty, Penny Black, Tutorial 38 Comments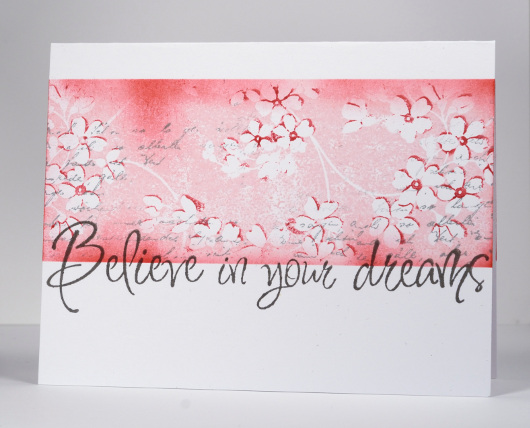
After creating a one layer card with the background stamp Glory of Modesty or GOM for short, I decided to use the same technique and let you in on one step I didn’t mention when I explained my process the first time. It is not a complex step at all, simply one which is easier to show than explain with words.
When I posted the card below my friend, Lindsey from Bashful Blogging commented that “the flowers really do seem on a slightly higher plane despite it being one layer”. I have created another card and a tutorial showing how to get your flowers to appear to be on a “higher plane”.

I used the same stamp because this technique works beautifully with this stamp but I changed my colour scheme and the size of the image panel.
Supplies:
Stamps: Glory of Modesty, Edge to Edge, Letter Background(PB)
Inks: Memento Angel Pink, Love Letter, London Fog & Versafine Smokey Grey (Tsukineko)


I love this Heather.
Rene from OZ xo
Thanks for the tutorial, Heather! I was wondering how you did this – so clever! I have to try this out – hope you don’t mind! Cornelia
Thanks for this wonderful tutorial! I think I’ve found a new background stamp to add to my wish list, and I’ve certainly learned a new technique today from your fantastic video!
Very beautiful and enjoyed your tutorial. Will try that technique as soon as I get the stamp.
Thanks for the tutorial. Edna
I love this technique (and great tutorial) with the Glory of Modesty stamp. This card and the one in blue are both stunning. Thanks for the inspiration!!
Briliant – thanks for the tutorial. I’m going to try it.
Thank you for the tutorial Heather, you’re wonderful! xo, Marian
Thanks very much for sharing this technique, Heather. It really does add depth to the card.
Love your cards,Heather.I wonder whether you could indicate the size of the cards you use. Sometimes my designs look “lost” and I think it’s because I use the wrong size of cards.
Wonderful – clear and simple, just the way I like it – much appreciated. Great to see another colourway, too. x
A wonderful card and a fabulous tutorial! Thank you so much. I really love the background stamp – its on my wish list!
Une superbe carte, et merci pour le tuto !
Lovely card! TFS the technique via video. I have inked a bkgrd stamp, then selectively inked parts of it with a one (or more) other colors, for a great look. I have, however, only inked the additional color(s) on the part of the image that was solid. Inking only the edges of the hollow image will be tricky but worth it to achieve the wonderful look that you have created. Thanks again! 🙂
Great video. Thanks so much for sharing with us.
You are the master. You create such feeling with your art.
Your card is absolutely beautiful. Thanks so much for the tutorial and sharing how you achieve the dimension. Looks wonderful. Thanks!
What a brilliant technique Heather and demo’ed so clearly! I’m off to have a go at this:)
Val x
Thank you so much for the tutorial. It’s a beautiful card. You make it look so easy! Best part – you get my creative juices flowing.
Such a pretty card! And thank you for the super video…I learn so much more from a video! Thanks for taking the time to make it! It’s a great technique! btw I discovered why I’m not getting good results from my memento inkpads….I have 3 ‘dewdrop’ sized ones and one regular size. The dewdrops are great for stamping but are not as ‘juicy’ as the regular sized one…..therein lies my excuse…I mean reason!
Very lovely card, loved your video to show how you did that. Your cards always amaze me and making a card look like more than one layer without adding layers is terrific, especially for those cards we mail.
A brilliant tutorial, Heather! Thank you. I will definitely be giving this a go. Off to look at my background stamps!
Thx for the tute – your cards are always so beautiful and your tutes easy to follow.
Great tutorial! Love the effect you get. Thx so much for sharing.
Many thanks for your tuto… I have now to find this kind of stamp here in France !
So wonderful Heather.
lovely greet
Marja
Beautiful card! Thanks for sharing your technique!
Why thanks, Heather! I thought I was being obtuse in my description. 😉 The video makes things so clear. Thank you for sharing your technique.
Brillaint and great demo on the video, thanks for sharing Heather..:):)
[…] To see how I create that little extra dimension in my flowers check out my tutorial here. […]
Such a simple technique but so effective and beautiful. Thanks for the tutorial.
Stunning! I greatly appreciate your creations and videos…love your style!
Oh my! Such a beautiful technique, thanks so much for sharing! I can not wait to try it!!!!!!
Wow, I was led here by a link from the blog of Darlene Devries and am so happy to see this technique! Anxious to give it a try. TFS!!
[…] closely without adding a layer. I used a technique I have used before and explain in a tutorial here. Before stamping the background stamp on the card base I masked a narrow margin on each edge as […]
How clever and how simple! Thanks for sharing this technique, it seems like a nice way to really adds dimension without a lot of extra work. Your card is beautiful, as always!
Thanks Heather. What a dramatic effect!
Superb card.
Chrissie
What a great technique! Thanks for the tutorial. I like the simplicity of your designs.
Very cool! Thank you for the video.