
Masking Fluid & Christmas Baubles
Posted: December 20, 2012 Filed under: Background Stamps, CAS, Collage cards, Hanging Treasures, Penny Black 14 Comments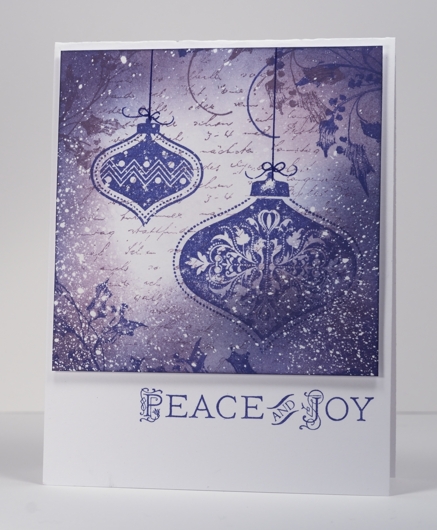
Look no trees in this card!
I used the same technique as I used for the Snow Storm Collage card over a base of flicked masking fluid. Several readers have looked for masking fluid with varied success. The one I am using is Winsor & Newton masking fluid for watercolour painting.
Edited to add: Several readers have shared that the masking fluid is available at Hobby Lobby, Michaels, Dick Blick, Jerry’s Artorama, I have bought it at both Michaels and Wallacks art supply. One thing to look for when you buy is that it is for watercolour painting, another is that it is not permanent. I prefer to have a little colour in it so I can see where it is, so I would not go for the colourless one. Mine ends up looking a creamy colour but I have used one that is bright orange also.
That’s all for today; thank you for visiting and thank you for all the encouragement, I love reading your comments.
Supplies:
Stamps: Letter Background , Hanging Treasures,Winter Scroll (Penny Black)
Inks: Sweet plum, Paris Dusk (Tsukineko)
Also: Winsor & Newton Masking Fluid
OLW 119 Silver & Blue
Posted: December 19, 2012 Filed under: Background Stamps, Butterfly Symphony, CAS, OLW 9 Comments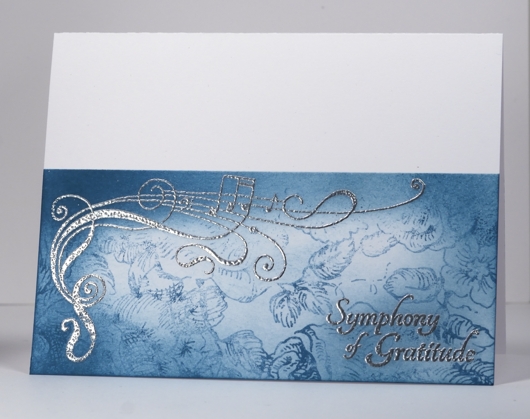
For my challenge you could easily stay in the snow/snowflakes pattern set this month by Susan and Cheryl. I am challenging you to use silver and blue in your one layer card. I think when I planned this I intended to work with snowflakes but as I am having a little snowstorm obsession on the blog at present I decided to have one day off and use silver and blue for a different theme.
I have masked just under half the card base and stamped the music flourish and sentiment in versamark before embossing in silver powder. I then added the blue background stamp and sponging. The stamps are from the new Penny Black Valentine catalog and are in keeping with the gratitude theme happening on the PB blog this week.
OLW119 Rules
1. A one-layer card is defined as a single layer of card stock. No other layers allowed.
2. Make a one-layer card using Silver and Blue as the key colours.
3. Post your cards online and link to them using the InLinkz button at the end of this post. If you link to your blog, be sure to link to the specific post, not just your blog’s main page.
4. Have fun!
Supplies
Stamps: Butterfly Symphony, Bed of Roses (PB)
Ink: Memento Teal Zeal & Versamark (Tsukineko)
Also: Silver embossing powder

Masking Fluid & Brayered Sky
Posted: December 18, 2012 Filed under: CAS, Penny Black, Stamped Landscapes, Winter Ledge 7 Comments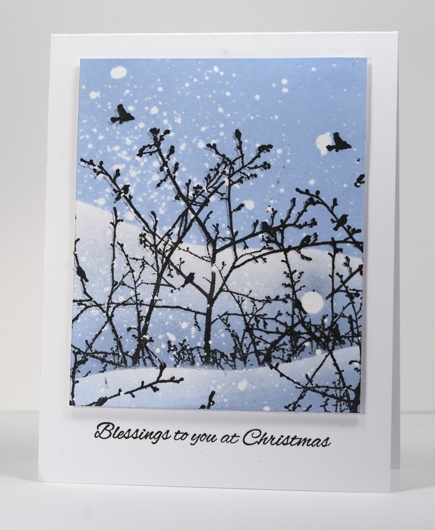
Following on from the tutorial I posted yesterday, today’s card features masking fluid to create falling snow but with a brayered sky instead of a sponged sky. With a brayer it is easier to create a uniform colour and coverage than it is with sponging. Usually I want variety and gradation in the sky but I also like to apply the ink with a brayer and create the kind of sky which I occasionally see, bright and beautiful on a winter’s day.
I used two hill masks to create this scene and used sponges on the snow banks where I gradation in the blue shadow. I stamped the winter ledge stamp once before removing the lower mask and then again over the corners of the panel. The masking fluid was applied in the same way as shown in yesterday’s tutorial.
We are expecting 5-10cm of snow tonight so perhaps I will see a scene like this sometime soon.
Supplies:
Stamps: Winter Ledge, Silent Night (PB)
Inks: Memento Summer Sky, Versafine Onyx Black, Versamark(Tsukineko)
Also: Winsor & Newton masking fluid
Snowy Scene Tutorial
Posted: December 17, 2012 Filed under: Before the Snow, Stamped Landscapes, Tutorial 40 Comments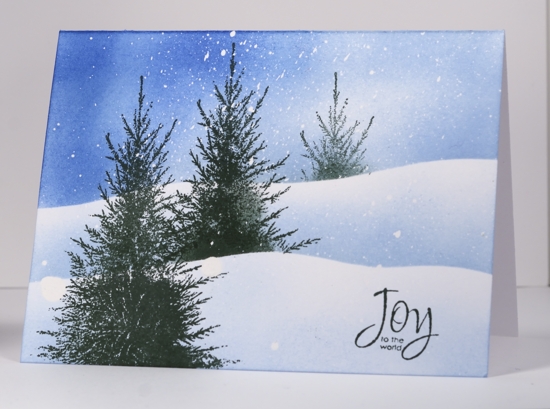
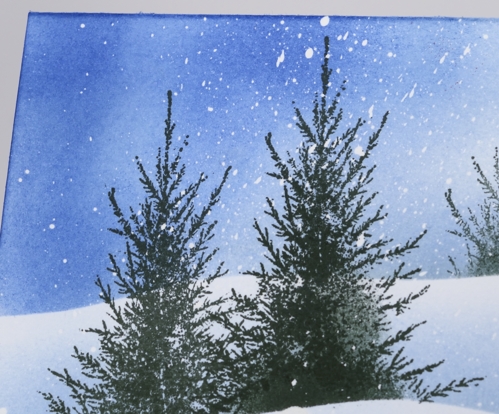
So here is a new tutorial! Thanks for waiting patiently for it. I guess I really should do more so the whole process becomes embedded in my brain! I apologize for the length of this one; you can fast forward if you like; it seems to go on and on! I hope it is helpful particularly in showing the masking fluid technique. I have made quite a few masking fluid resist cards lately as I love the falling snow effect which I will post them on the blog during the week ahead.
Below is a a close-up of the white flecks left on the card after the masking fluid is removed.
Supplies:
Stamps: Before the Snow, A Wish for Peace (PB)
Inks: Memento Summer Sky, Danube Blue, Northern Pine (Tsukineko)
Also: Winsor & Newton masking fluid
Snowstorm collage
Posted: December 13, 2012 Filed under: Background Stamps, Before the Snow, Collage cards, Penny Black, Stamped Landscapes 22 Comments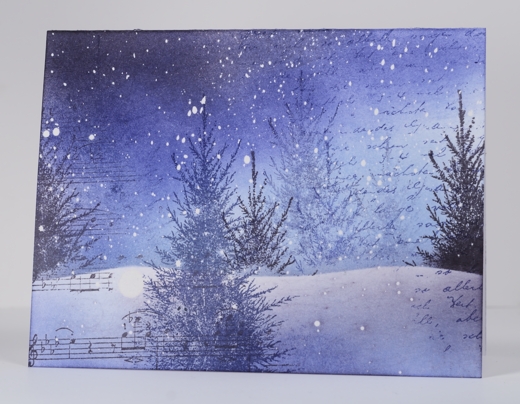
After making a small panel collage the other day I picked up another card base which I had covered in flecks of masking fluid and made a snowstorm collage. Other than the addition of masking fluid I used the same technique described in my collage tutorial: two background stamps and a feature image (often I use a small additional image as well, but for this one I used the tree multiple times)
I created the collage in the following order over the masking fluid:
- stamp part of letter background in Paris Dusk ink after stamping it on scrap paper first
- stamp part of music background in Elderberry ink
- position hill mask and stamp “Before the Snow” trees in blue and elderberry ink
- sponge sky in blues and elderberry
- remove mask, sponge the snow around the bottom of card and stamp foreground tree in blue.
- remove masking fluid
Supplies:
Stamps: Letter Background, Music Background, Before the Snow (PB)
Inks: Memento Summer Sky, Elderberry, Paris Dusk (Tsukineko)
Also: Winsor & Newton Masking Fluid
Hearts abound
Posted: December 13, 2012 Filed under: CAS, Daisy Heart, Love Flourish, Penny Black 6 Comments
Love is in the Air on the Penny Black blog again this week so drop in to see the stamps from the new Valentine’s Catalog. I played around with two heart stamps and shades of pink.
When I started sponging over the embossed heart so it could be seen I had every intention of keeping a neutral colour scheme of ivory, white and tan but that little heart inside the heart just cried out to be coloured pink and the rest is obvious-pink came to stay. I still like the softness of the colour scheme.
Are you shocked to see those tiny half pearls? Me too!
Supplies:
Stamps: Love Flourish, Gratitude (PB)
Inks: Memento Desert Sand & Angel Pink, Versamark, Tsukineko)
Also: White embossing powder, pink half pearls and a wee ivory ribbon

To create this pink heart I masked a rectangle with post it notes and embossed the heart in the centre with clear e.p. I added pinks with a brayer, memento Angel Pink at the top and Rosebud at the bottom and in the centres of the daisies with a marker. I inked the sentiment stamp in the two pinks to mimic the brayered background.
Supplies:
Stamps: 4291K Daisy Heart, Thinking of You(PB)
Inks: Memento Angel Pink, Rose Bud & Versamark (Tsukineko)
Also: Clear e.p.
Snowflake collage
Posted: December 12, 2012 Filed under: All is Bright, CAS, Collage cards, Penny Black 11 Comments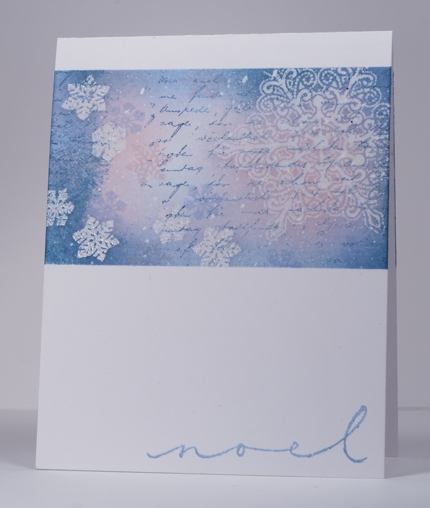
Cheryl is hosting the One Layer Wednesday challenge this week and her theme is Snowflakes. A nice thick layer of snow would be welcome here because we have a treacherous layer of ice that needs to be covered up.
I realized yesterday that I hadn’t created any Christmas cards using my collage technique so I played around and made a few. I had a few card bases with masking fluid already flicked onto them so when I decided to make a collage Christmas card I picked up one of the bases complete with ready made snow. The post-it masks were place before I flicked masking fluid on and then remained there while I created the collage. The order for the collage was:
- stamp letter background in teal zeal
- stamp snowflakes in versamark and emboss in clear powder
- sponge in blues and pink
- stamp extra snowflakes in blue and pink
- remove masks and masking fluid
Have a great day, keep warm and stamp some snowflakes if you get the chance.
Supplies:
Stamps: All is Bright, Noel, Hello Winter , Letter Background(PB)
Inks: Memento Summer Sky, Teal Zeal, Angel Pink, Versamark(Tsukineko)
Also: Clear e.p., Masking Fluid
OLW 117 Snow
Posted: December 9, 2012 Filed under: CAS, OLW, Penny Black, Winter Berries 19 Comments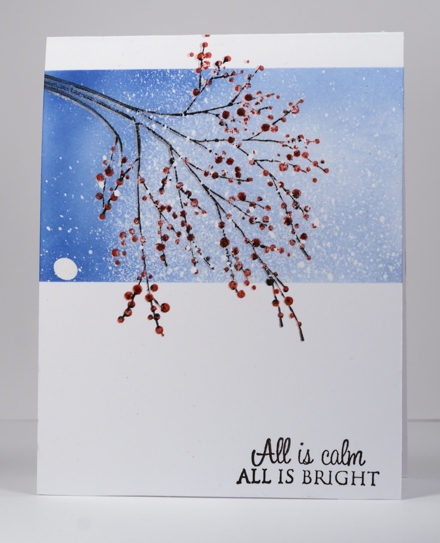
Susan’s challenge for One Layer Wednesday this week is to create snow on your card. My card uses my favourite method for making snow: masking fluid. I masked either side of the panel and then flicked the masking fluid onto the panel with a toothbrush. After it had dried I removed the masks and stamped the Winter Berries stamp as an overhanging branch rather than a tree. I inked it with black and red markers, stamped it once, then inked it with versamark and stamped it again before embossing with clear. For some reason a lot of the embossing powder stuck around the branches resulting in more snow than I expected from the flicked masking fluid. Not to worry; I have a berry branch in a snow storm. I replaced the masks and sponged the sky in two shades of Memento inks. I realize this is a layout and technique I have done several times before, but making it with a different stamp adds another card to my Christmas card stack.
Supplies:
Stamps: Winter Berries, All is Bright (PB)
Inks: Memento Summer Sky, Danube Blue, Lady Bug, Rhubarb Stalk,Tuxedo Black, Versamark(Tsukineko)
Also: clear embossing powder
Bethlehem hills
Posted: December 4, 2012 Filed under: CAS, Penny Black, Silent Night 8 Comments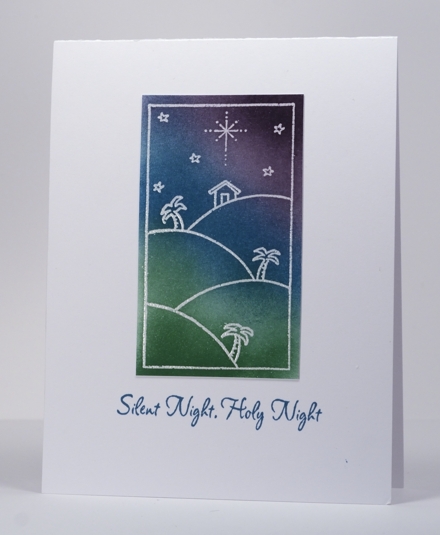
After I made my first card with this stamp and took over an hour to colour it with pencils I knew I had to come up with another technique if I was going to make this card multiple times. So, believe it or not, I decided to try sponging the scene.After stamping in versamark and embossing in clear on a separate piece of cardstock, I masked around the border and then chose three colours for sponging the scene. I wish I had masked the card base and stamped the outline image directly onto it because then I could participate in Karen’s One Layer Wednesday Challenge to create a scene. I love creating stamped scenes so I am sad to not have played along this week.
Love is in the air on the Penny Black blog this week and next so drop in and see the Valentine’s new releases and enter to win one of the new stamps.
Supplies:
Stamps: Silent Night (PB)
Inks: Memento Cottage Ivy, Teal Zeal, Elderberry, Versamark, Tsukineko)
Also: Clear embossing powder
Winter Magic window
Posted: December 1, 2012 Filed under: CAS, Christmas Park, Penny Black, Stamped Landscapes 19 Comments
A few weeks back I made a snowscape with the ‘Christmas Park’ stamp used above. My first attempt didn’t entirely please me so I covered up the lower part by putting it behind a window panel. Next time you have a bit of a stamping mishap consider trying the window save.
I did a count today to work out how many Christmas cards I still need to make. Many! I had forgotten this one so now it is one less.
How is your pile growing? Or have you finished already?
Supplies:
Stamps: Christmas Park, Winter Magic(PB)
Inks: Memento Summer Sky, Danube Blue, Paris Dusk, Versafine Onyx Black, Versamark(Tsukineko)
Also: Clear embossing powder


