
Autumn Daisies
Posted: September 29, 2008 Filed under: Pocket Silhouettes, Uncategorized, Upsy Daisy 1 Comment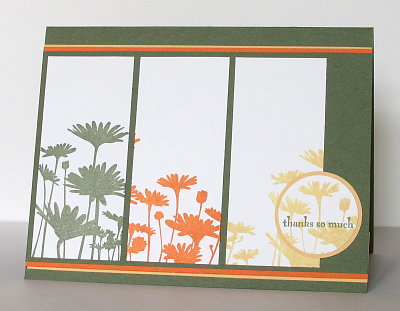
I haven’t participated in Beate’s weekend sketch challenge for months so when I saw the sketch this weekend featuring three panels I decided it was time. I have been working on Christmas cards today but wanted to stamp these daisies once more at least before it’s all Christmas cards and gifts.
I cut my three pieces and tried to stamp the left, then centre then right side of the stamp so they would roughly line up. I could have used the stamp-a-ma-jig to be absolutely accurate but I didn’t!
Supplies:
Stamps: Pocket Silhouettes, Upsy Daisy
Inks: Artichoke, Pumpkin Pie, So Saffron
Cardstock: Whisper White, Artichoke, Pumpkin Pie, So Saffron
Also: Circle Punches
Grass trio
Posted: September 27, 2008 Filed under: Designer Paper, Pocket Silhouettes, Upsy Daisy Leave a comment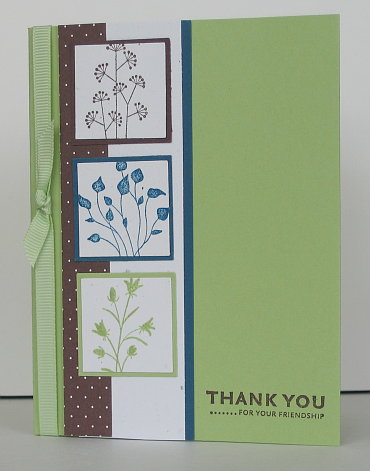
I needed a ‘make and take’ last week and decided to use Pocket Silhouettes and the square punches. You can see from my colours that I’m not quite ready to let go of summer yet but I have to accept that autumn has arrived. I am noticing the colours emerging every where I go now. The leaves will be falling in our yard for the next month or two; we have big trees! Last year we just managed to get all the leaves up before the first snow fall which didn’t disappear until spring. But that’s enough about snow.
I stamped the sentiment first so I would know I had enough room and then layered a Not quite Navy strip, a Confetti White strip and a strip of Bella Rose designer paper. I stamped the three images and then punched out the part of the design I wanted and matted it. Finally a strip of ribbon with a smaller piece knotted on to it.
Supplies:
Stamps: Pocket Silhouettes, Upsy Daisy
Inks: Certainly Celery, Not quite Navy, Chocolate Chip
Cardstock: Confetti White, Certainly Celery, Not quite Navy,, Chocolate Chip, Bella Rose designer paper
Also: Celery grosgrain ribbon
Grassy silhouettes
Posted: September 23, 2008 Filed under: Designer Paper, Pocket Silhouettes 1 Comment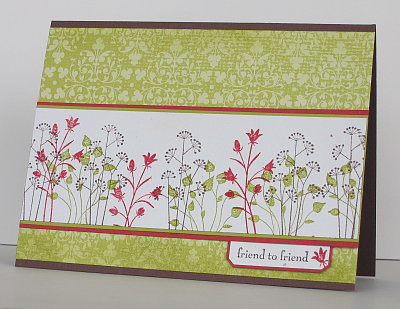
More of the designer paper from the Bella Rose set and more silhouettes also! This is what the side of the road often looks like as you drive out of town during summer. There is plenty of Queen Anne’s Lace, plus pretty wildflowers and grasses whose names I don’t know. My first attempt used all four silhouette stamps from the Pocket Silhouette set but the grassy roadside lost some definition so one type of grass was eradicated! If only it was that easy to get rid of unwanted plants in my garden.
Supplies:
Stamps: Pocket Silhouettes
Inks: Riding Hood Red, Old Olive, Chocolate Chip
Cardstock: Confetti White, Riding Hood Red, Kiwi Kiss, Chocolate Chip, Bella Rose designer paper
Eastern inspiration
Posted: September 17, 2008 Filed under: Eastern Influences 2 Comments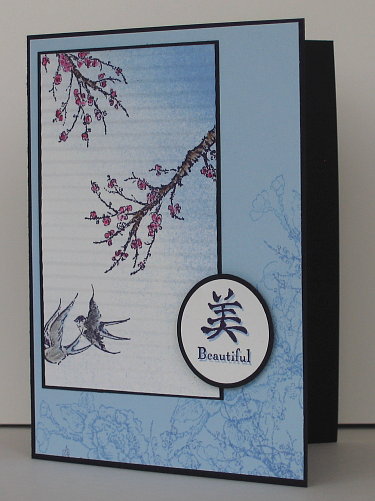
That’s right, another card inspired by my visit to China this summer. It is hard to believe that I was actually in China two months ago, but I have hundreds of photos, some lovely silk items and some wonderful memories to prove it. Several of those memories centre around the beautiful paintings and embroideries I saw as well as the intricate designs on all the historic palaces and temples we visited.
Many of the embroideries, fabrics and paintings feature blossoms, similiar to this stamp from the new Eastern Influences set. When I was making this card by son aged 7, was sitting on the floor beside my craft table going through my paper recycling box and picking pieces out to put through my paper crimper. He put them through multiple times at different angles creating all sorts of effects. His creativity inspired the painted blind effect on my card, crimping the image gave it just the texture I needed to complete the card.
I started by stamping the branches and birds in Basic Black and then using watercolour pencils to colour them. I sponged in Bashful Blue and stamped the rose blossom in the same ink on the corner several times. To create the shadowed “Beautiful” character and word I used the stamp-a-ma-gig with Blue then Black.
Supplies:
Stamps: Eastern Influences
Inks: Bashful Blue, Basic Black
Cardstock: Basic Black, Whisper White, Bashful Blue
Also: Watercolour pencils, crimper
Floral Birthday
Posted: September 14, 2008 Filed under: Designer Paper 1 Comment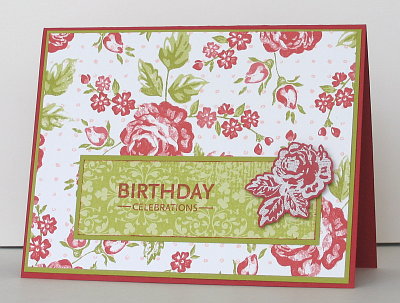
The third of the Bella Rose d.p. cards I made last weekend reminds me of a Laura Ashley bedspread, roses and pink polka dots on a crisp white background would be lovely in a bedroom. Perhaps the bedskirt could be in the green floral print. I think one of the reasons I am enjoying using designer paper so much is because it is like sewing, but I can achieve a finished product in much less time than it takes to complete a sewing project.
I did not do much more here than cut rectangles and mattes. I did pull the edges of the green designer paper piece across the Riding Hood Red stamp pad to get a very thin border of red. The rose and leaves are rub-ons, from the new Château Bella rub-ons raised on stampin’ dimensionals.
Supplies:
Stamps: Upsy Daisy
Inks: Riding Hood Red
Cardstock: Riding Hood Red, Kiwi Kiss, Bella Rose designer paper
Also: Château Bella rub-ons
Red Daisies
Posted: September 11, 2008 Filed under: Upsy Daisy 3 Comments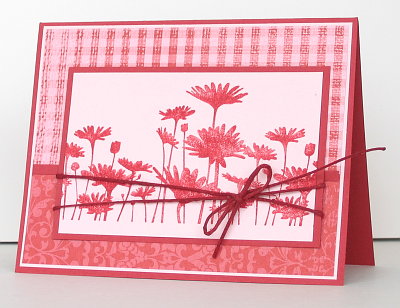
As I’ve said often, designer paper can make the card. The only other elements here are one stamp and a piece of hemp twine! When I was trying out my new stamps and papers both my daughters were away on a violin retreat. They are my critics and advisors when they are here, but my son was happy to give me his opinion which was a thumbs up for this one. My poor neglected garden has several patches of bright and cheery blackeyed Susans at the moment so I picked some and brought them inside today. I might try using this stamp with yellow and black as well.
Supplies:
Stamps: Upsy Daisy
Inks: Riding Hood Red
Cardstock: Riding Hood Red, Pirouette Pink, Bella Rose designer paper
Also: Red Hemp twine
New colours, new papers
Posted: September 9, 2008 Filed under: Designer Paper, Eastern Influences 1 Comment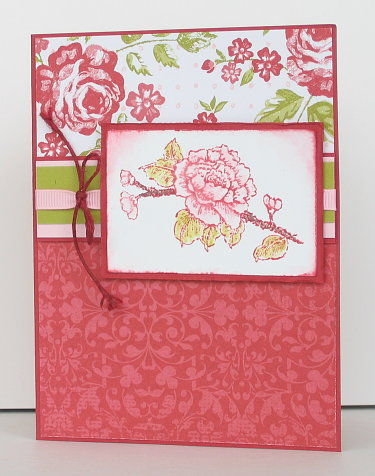
I cracked open the new “In Colours” from Stampin Up on the weekend and a beautiful new set of designer paper that features three of the new colours. I had great fun working with Riding Hood Red, I think it will be my main colour for Christmas designs this year, Kiwi Kiss and Pirouette Pink. When the designer paper already has beautiful combinations and patterns all over it, it is not that hard to make a pretty card. I will posting some of my creations using the Bella Rose paper over the next few days.
For this card I divided the card up using a “wall with chair rail” type arrangement. Perhaps there is a name for this style among card makers, I don’t know. I’m using the rule of thirds, two thirds at the bottom, one at the top. The rose I used as my focus is not the one which perfectly co-ordinates with this paper, but I think it works pretty well. I stamped it in Riding Hood Red classic ink, which is not waterproof and then used a brush with water to draw some of the ink into the petals. I then painted the branches and leaves using Choc Chip and Old Olive ink. To create an antique look I wiped each side of the white paper across the Red stamp pad and then pulled some of that ink in with a brush and water. Using my fingernail as a distressing tool I gave the edge of the red matte an antique look also. Red hemp twine just happens to be a little darker that the Riding Hood Red, which is great.
Thanks for dropping in.
Supplies:
Stamps: Eastern Influence
Inks: Riding Hood Red, Old Olive, Chocolate Chip
Cardstock: Riding Hood Red, Kiwi Kiss, Pirouette Pink, Whisper White, Bella Rose designer paper
Also: Red Hemp twine
An old favourite
Posted: September 8, 2008 Filed under: Terrific Tulips 2 Comments
This week’s stamp simply challenge is part of Sharon’s 1 Year Blog Anniversary. The challenge itself is being hosted by one of her design team, Dee, at her blog Stampin cuz I Love 2. Dee is a talented 2 and 3 step stamper so that is the challenge to make a card using 2 or 3 step stamping. When I looked through my sets I discovered I don’t have any current 2 step sets, so I looked on another shelf and pulled out the first 2 step stamping set I bought, Terrific Tulips.
I decided to recreate one of my early designs with this set, but as the original card is long gone I was going from memory. I think my original was prettier but I still like the three panel effect in this card. It was a simple card to make, after the stamping I added a bit of organza ribbon such as might be found on a fresh bunch of tulips for a friend.
Supplies:
Stamps: Terrific Tulips, Pocket Silhouettes
Inks: Always Artichoke, Pumpkin Pie, Apricot Appeal
Cardstock: Confetti white, Mellow Moss
Also: Olive and celery organza ribbon
Silhouetted seascape
Posted: September 6, 2008 Filed under: Nature Silhouettes, Pocket Silhouettes 5 Comments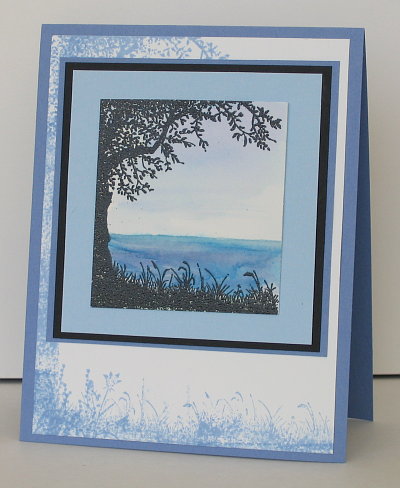
I bought Nature Silhouettes for this tree, I love silhouettes of trees. I remember when I was in highschool art doing a pen and ink drawing of an old gnarled tree. It was a silhouette which had branches twisted and entwined all over the place; it was quite time consuming. I think I still have it in a folio somewhere. When I saw this set in the catalogue I knew I would have fun with the tree but doubted that I would use the deer and wolf much. You never know, the deer might turn up on some of my Christmas designs.
To make this card I stamped with versamark on watercolour paper and embossed with black e.p. I painted on the watercolour sky and sea with a small brush dipped in water before picking up some ink off the lid of the stamp pad. (When the stamp pad is closed if you squeeze lid against the ink pad you get a small amount of ink that you can dip a brush or blender pen in)
The background tree is made using the same stamp but I inked it selectively in order to make a larger tree. First I inked the top branches of the tree with a bit of the trunk and stamped that in the corner of the white background piece. Then I inked the base of the trunk with the grass next to it and stamped that at the bottom of the white piece. To lengthen the trunk I just inked the trunk and stamped it in between, then did the same thing again. It is not neatly done, but the mattes cover a lot of it anyway. To fill out the grass at the base I used a few stamps from Pocket Silhouettes.
Supplies:
Stamps: Nature Silhouettes, Pocket Silhouettes
Inks: Versamark, Bashful Blue, Not quite Navy, Brocade Blue, Almost Amethyst
Cardstock: Brocade Blue, Basic Black, Bashful Blue, Whisper White, Watercolour paper
Also: black e.p.
Fresh Grasses
Posted: September 5, 2008 Filed under: Designer Paper, Pocket Silhouettes Leave a comment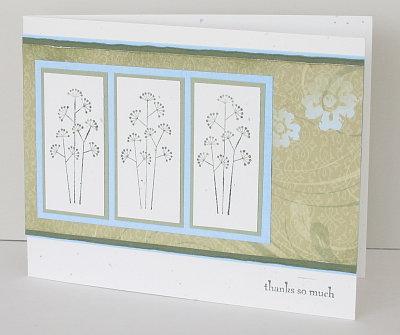
This is a very simple design, I don’t really have time for any thing but simple at present (although I do have a watercoloured card to post which took a little more time to make). As you can see the stamping for this card is limited to the three panels with a grass stalk in them and the little sentiment on the bottom. The designer paper dictated the colours for the mattes, I wasn’t originally thinking of bashful blue with the greens but I really like the way it pops. I ran my fingernail along the edges of the mattes to for a little more texture and added a bit of sponging to the designer paper. That’s all there was to it.
Supplies:
Stamps: Pocket Silhouettes
Inks: Mellow Moss, Always Artichoke
Cardstock: Confetti White, Le Jardin Designer paper, Almost Artichoke, Bashful Blue, Mellow Moss













