
Blog Hop with Scrapbook Adhesives
Posted: September 23, 2014 Filed under: A Pocket Full, Background Stamps | Tags: Penny Black creative dies, Penny Black stamps, Ranger Distress stains 11 Comments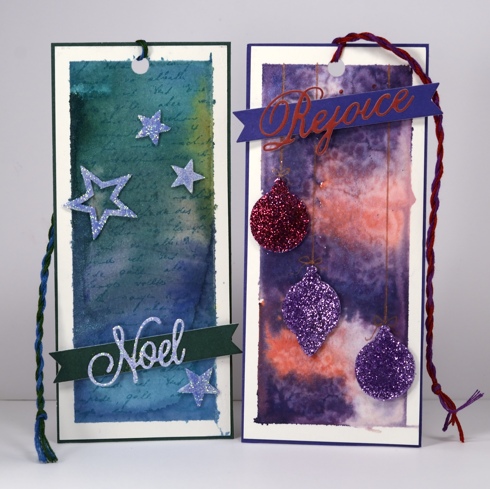
Yes, that is glitter you see on my blog! The PB design team is blog hopping with the Scrapbook Adhesives design team this week so I stepped a little outside my comfort zone and opened up the glitter. I had to go and find the glitter first; it used to live in my craft stash but it had migrated to my daughter’s nail polish stash where it definitely gets more attention.
I created my backgrounds first by taping some watercolour paper to a firm surface and blending distress stains onto the panels. The blue one was spritzed with pearl-ex powder spray to create a pretty sheen and the purple one was sprinkled with salt for some texture.
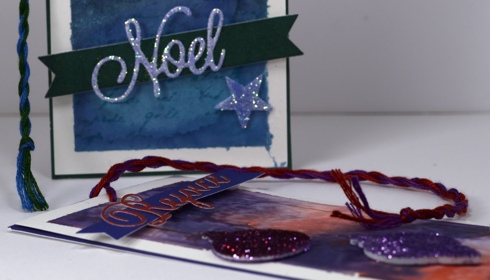
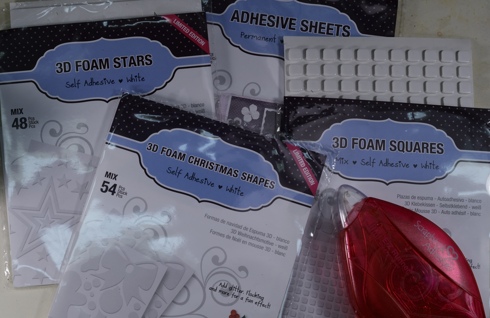
To create the glittery elements I used both 3D Foam Stars and 3D Foam Christmas Shapes. I peeled the shapes, which have adhesive on both sides, off the backing sheets and dipped one side in glitter then pressed the other side onto the watercolour panels. To create the sparkly “Noel” I cut the word from white paper using an adhesive sheet on top of the paper instead of underneath. I removed the top sheet and dipped the sticky side of the word in glitter.
Both banners were cut using a banner die from “A pocket full”. As the die has one “V” end I die cut only half way then flipped the die around and cut the other end with the “V” also. To finish the tags I matted with PB mix & match papers then twisted some embroidery floss to thread through the punched hole at the top.
Both Penny Black and Scrapboook Adhesives are hosting giveaways on their blogs this week so visit everyday for inspiration and a chance to win.
Supplies:
Stamps: Letter Background (PB)
Creative Dies: Exultations, A Pocket Full (PB)
Inks: Evergreen Bough, Pine Needles, Chipped Sapphire, Milled lavender, Dusty Concord, Worn Lipstick distress stains, Peacock Feather distress ink (Ranger)
Scrapbook Adhesives: Adhesive Sheet, Thin dimensional adhesive squares, 3D Foam Stars, 3D Foam Christmas Shapes, EZ runner adhesive
Cardstock: Fabriano 100% cotton hot pressed watercolour paper, #14 Rose Garden, #13 Periwinkle, #06 Spring Meadows paper (PB)
Also: Embroidery Floss


Once again, it is super! Thank you so much for inspiration.
What great tags Heather.
Nicely done Heather…..you are a master at whatever you choose to do!
Jan
wow I like very much thanks for the idea
I always enjoy looking at your designs, Heather, but this one really excites me as a glitter lover. The bookmarks are so fun to study because the impressionistic, dreamy water color-style element of the backgrounds causes the glittered designs to really POP, yet it grounds them at the same time. –Thank you for the tutorial. I’ve only used glue with a super-fine tip, but will have to experiment with the double-sided adhesives.
As always,Great cards!
You might just to put your glitter back in your craft stash — when you do break it out, you do very fine things with it! The backgrounds are beautiful and I like the embroidery floss treatment as well.
Oh how I love the glitter thanks for sharing.
Just Beautiful, Heather. I rarely use glitter here too. It just gets on EVERYTHING. I’m sure having the right adhesive helps. 😉
Gorgeous tags with awesome backgrounds! Just perfect for the sparkly embellishments. I love glitter! It does get everywhere though! xxx
Love the tags! The colors are beautiful and make the tags very special.