
A good thing
Posted: January 19, 2008 Filed under: Time Well Spent Leave a comment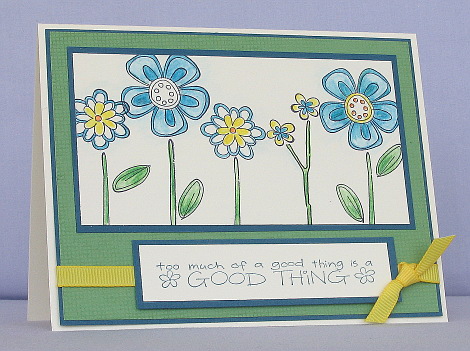
A little more blue and green with a bit of yellow this time. The colouring was done, once again, with watercolour pencils and a blender pen. I stamped the Wasabi card with the canvas background stamp for a bit of added texture.
Supplies:
Stamps: Time Well Spent
Inks: Basic Black, Wild Wasbi, Not quite Navy
Cardstock: Whisper White, Not quite Navy, Wild Wasabi
Also: Faber Castell watercolour pencils, blender pen, yellow grosgrain ribbon
Time for blue and green
Posted: January 18, 2008 Filed under: Time Well Spent Leave a comment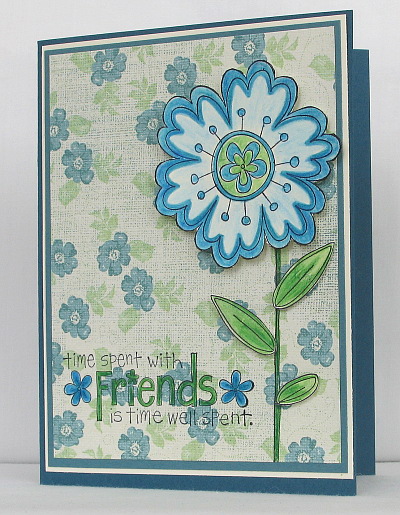
Here is my first card using one of the hostess sets from the new Spring/Summer Stampin Up catalogue. I matched my pencils to the designer paper from Porcelain Prints. The flower and leaves are raised using stampin dimensionals.
Supplies:
Stamps: Time Well Spent
Inks: Basic Black
Cardstock: Whisper White, Not quite Navy, Blue Bayou, Porcelain Prints d.p.
Also: Faber Castell watercolour pencils, blender pen, stampin dimensionals.
Made my day
Posted: January 17, 2008 Filed under: Pick a Petal Leave a comment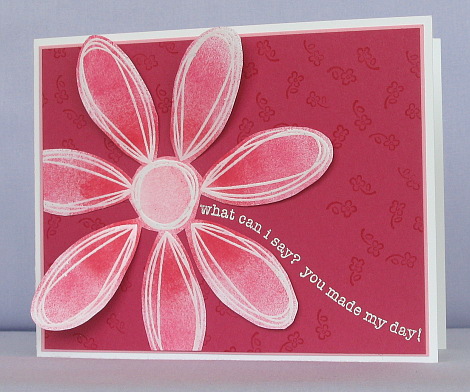
I am having fun with Pick a Petal, borrowed from a friend. For this flower I embossed the petals and centre in clear embossing powder before sponging real red around the centre part of the petals and rose red on the ends of the petals as well as the centre circle. The background is stamped with the flower from Background Basics and the stem sentiment is embossed in white e.p. I stuck the centre down and the petals that have been trimmed but the remaining petals are not glued down.
Supplies:
Stamps: Pick a Petal, Stem Sayings
Inks: Real red, Rose red, Versamark
Cardstock: Whisper White, Pretty in Pink, Rose Red
Also: White and clear embossing powder
Purple Petals
Posted: January 16, 2008 Filed under: Pick a Petal 1 Comment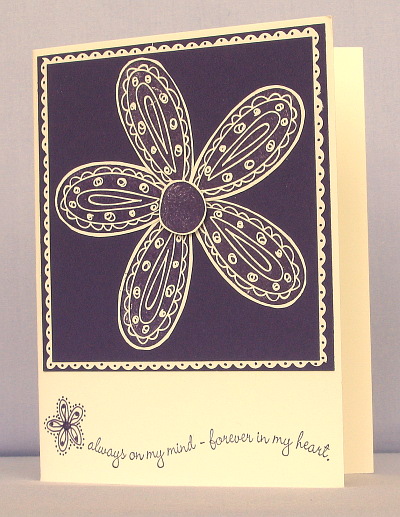
We have had a lot of sickness at our place over the last two weeks resulting in my daughter and I finally visiting the doctor last week to find out why we were not getting better. I now have medication and we both need to continue resting.
So, even though I had made a few new cards before I got sick they didn’t make it up here. This is one which I was quite happy with in just the vanilla and eggplant. I am not very happy with the photograph however as it was very hard to get the colour and focus accurate. I pulled out the scallop edged scissors to repeat the scallop design in the petals and used the eggplant marker to add dots in the scallops and add a little flower to the sentiment.
Supplies:
Stamps: Pick a Petal, Stem Sayings
Inks: Elegant Eggplant stamp pad and marker
Cardstock: Elegant Eggplant, Very Vanilla
Priceless Butterfly
Posted: December 31, 2007 Filed under: Designer Paper, Priceless 2 Comments 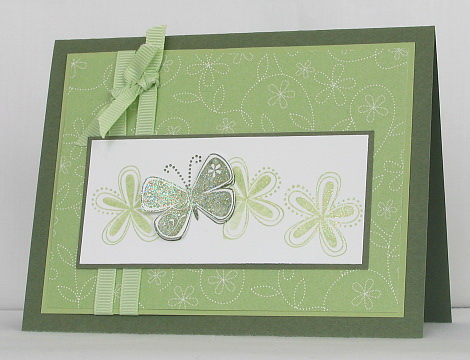
Sunday’s featured stamper at Splitcoast was Danielle. I chose this card to CASE and created a spring theme rather than a winter one. In order to make the butterfly and flowers sparkle I inked the stamps with versamark before the classic stamp pad colours and then embossed with Iridescent Ice embossing powder. The butterfly is cut out and stuck over one I stamped underneath for the 3D wings effect.
Supplies:
Stamps: Priceless
Inks: Certainly Celery, Versamark, Almost Artichoke
Cardstock: Certainly Celery, Whisper white, Celery Designer paper,Almost Artichoke
Also: Celery grosgrain ribbon, Iridescent Ice e.p.
Pretty & simple
Posted: December 31, 2007 Filed under: Paint Prints Leave a comment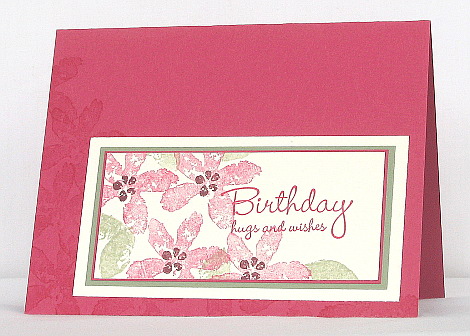
I finally found some to stamp again and pulled out the retired set Paint Prints. It is so easy to make pretty cards with this set. It isn’t very clear but I did some flowers in rose red on the rose red background from the bottom right hand corner to the top left hand corner.
Supplies:
Stamps: Paint Prints, Hugs & Wishes
Inks: Rose Red, Bravo Burgandy, Mellow Moss
Cardstock: Rose Red, Very Vanilla, Mellow Moss
Last Christmas card
Posted: December 21, 2007 Filed under: Sleigh Bells Ring Leave a comment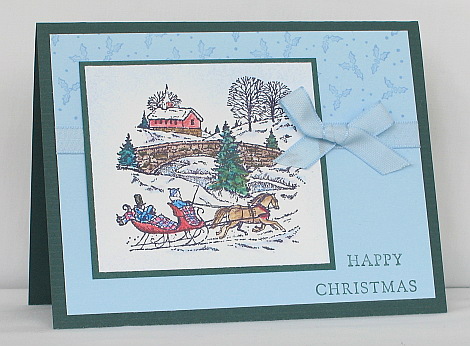
I believe this will be my last Christmas design for this year, although I will probably be making tags on Christmas Eve! I might have a couple more candles to show too. This card is made from textured cardstock I had in my stash which matched Handsome Hunter exactly.
Supplies:
Stamps: Sleigh Bells Ring, Fundamental Phrases, Background Basics
Inks: Basic Black, Bashful Blue, Handsome Hunter
Cardstock: Handsome Hunter, Bashful Blue, Whisper White
Also: Bashful Blue Taffeta Ribbon, Watercolour pencils, blender pens
Two more boxes
Posted: December 18, 2007 Filed under: Designer Paper, Festive Favourites, My Kid's cards, Polka dots & Paisley 4 Comments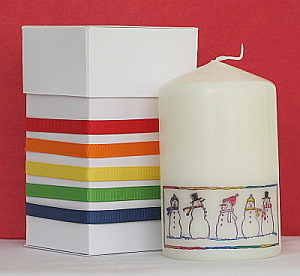
After I had made the box I in the last post my girls made some of their own. My younger daughter A11 used the snowman stamp from Festive Favourites and coloured with Stamping Markers, then used bold ribbons to decorate her white box.
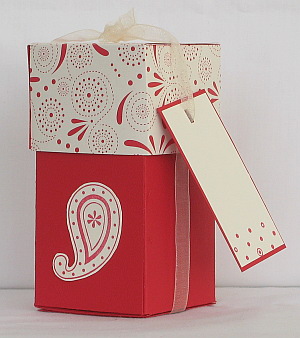
L13, my older daughter used some Cerise designer paper with real red cardstock to make a small box which she filled with red and white candy canes and peppermints. Her tag and box motif were done with stamps from Polka dots and Paisley.
Box & candle
Posted: December 16, 2007 Filed under: Designer Paper, Perfect Presentation, Rollers 5 CommentsWeeks ago I saw this box at No Time to Stamp and decided it would be my December Stampers’ Club project. I also wanted to stamp some candles so I came up with a candle in a gift box for everyone to make.
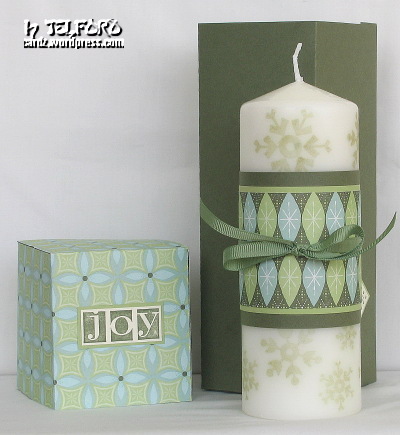
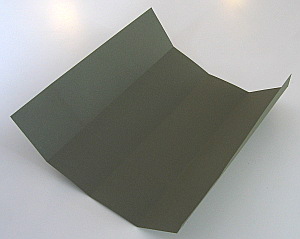
To make the box I used a 12×12 sheet of cardstock and a 12×12 piece of designer paper for the lid. I scored the cardstock 2 3/4″ from the bottom and then turned it and scored it at 2 3/4″ intervals across the opposite way making 4 panels with a narrow strip left over.
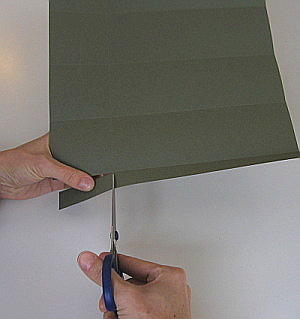
I cut the corner piece out where the narrow strip was and then cut up the four parallel score lines to the 2 3/4″ line.

After that it is quite straight forward to stick it together.

The lid follows exactly the same procedure except that you score 2 7/8″ from the bottom and across the piece at 2 7/8″ intervals leaving you a smaller flap to stick the lid together.

To decorate the candle stamp the image you want to use on tissue paper the same colour as your candle. Then cut out the image you have stamped.

Position the image on the candle and wrap a piece of waxed paper over it, holding either end of the waxed paper on firmly on the other side of the candle.

Holding the wax paper firmly heat the area of the stamped image with a heat tool. It doesn’t need to be heated for long, just long enough to see the wax over the image glisten as it melts into the tissue paper. Peel off the wax paper and repeat for another image on a different section of the candle.
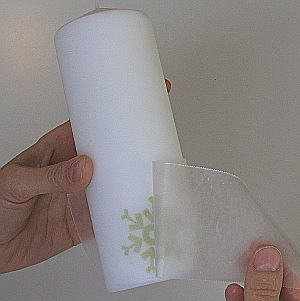
I finished the candle off with two strips of cardstock, a piece of co-ordinating designer paper and a ribbon.
Supplies:
Stamps: Perfect Presentation, Bold Snowflakes roller
Inks: Always Artichoke, Mellow Moss
Cardstock: Always Artichoke, Mellow Moss, Very Vanilla, Wintergreen Designer paper
Also: Candle (IKEA), square punches, Spring Moss grosgrain ribbon, Olive organza ribbon (retired)
Birthday bike card
Posted: December 13, 2007 Filed under: My Kid's cards, Uncategorized Leave a comment
I’m sorry about the lack of cards here but I hope to post the December Stampers’ Club projects soon. While I am getting that done I wanted to show you this very clever little card my daughter made for her brother’s birthday. It is all paper piecing except for the wire spokes on the wheels. I was very impressed with the attention to detail.












