
Lace and panels
Posted: May 19, 2008 Filed under: One of a Kind 1 Comment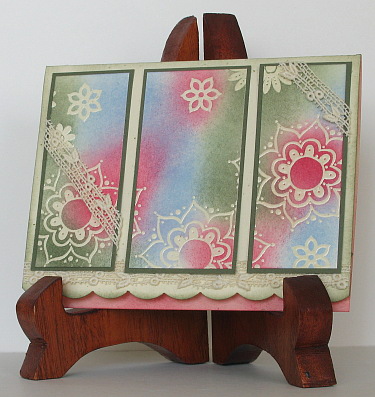
This is another card I made for Sharon’s Stamp Simply Challenge #35, where we had to use three panels. Like the last one I stamped my design as one panel and then cut it into three once all the colour had been added. I started by embossing on Vanilla cardstock with clear embossing powder and then sponged over the embossing. This time I split the panels a little further apart and matted each one separately. At this stage it was looking a little like tie dye so I decided to continue the shabby chic type of feel and add scallops and lace. When I was digging through my lace basket I realised there are some nice pieces in there which might also make their way onto cards.
I cut the scallops along the bottom using my corner rounder punch with the guide removed and sponged the edge. Inside the card I also sponged all around the edges leaving the centre blank to write in.
Supplies:
Stamps: One of a Kind
Inks: Rose Red, Always Artichoke, Bashful Blue
Cardstock: Very Vanilla, Always Artichoke
Also: Clear embossing powder, lace
Boughs and blessings
Posted: May 17, 2008 Filed under: Infinite Goodness 1 Comment
Often when I look at Sharon’s Stamp Simply Challenge I find she has suggested something I haven’t tried before, but this week her challenge features a technique I’ve tried several times. The challenge is to feature three panels on your card. The method I often use to do this is to stamp a design across a rectangle of card stock and then cut it into three panels. For this card I spread the panels slightly apart and adhered them to one matte.
The branches are stamped in chocolate chip, coloured with watercolour pencils and blended with a blender pen. I sponged the edges with bashful blue and added the word ‘blessings’. It was very relaxing to finally be stamping again!
Supplies:
Stamps: Infinite Goodness, Graceful words
Inks: Chocolate Chip, Bashful Blue
Cardstock: Very Vanilla, Chocolate chip, Green Galore
Also: Apple green grosgrain ribbon, watercolour pencils
Pink Flourish
Posted: May 3, 2008 Filed under: Baroque Motifs 2 Comments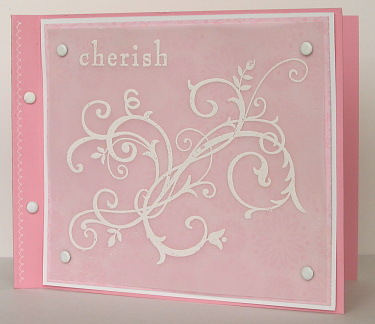
You can probably tell by now that I really like this new stamp! The design is stamped and heat embossed on vellum this time and laid over a piece of pink Berry Bliss designer paper. I wanted the designer paper to provide a soft background for the stamp, the effect is subtle but you can see the floral design a little better on the card.
I didn’t have any white brads to attach the vellum so I pressed some silver ones into the versamark and then dipped them into my white embossing powder before heating them. It worked just fine, but I would add that the brad gets very hot when you are heating it, so hold it with tweezers! The faux stitching is from the Cherished Memories rub-ons, I still haven’t used my sewing machine on any of my cards, but I will try it some time. Thanks for dropping in.
Supplies:
Stamps: Baroque Motifs
Inks: Versamark
Cardstock: Whisper White, Pretty in Pink, Berry Bliss designer paper
Also: White embossing powder, Cherished Memories Rub-ons, silver brads embossed with white e.p.
Baroque birthday
Posted: April 30, 2008 Filed under: Baroque Motifs 1 Comment
Sunday’s featured stamper on Splitcoast was Michelle. I browsed through her lovely gallery and was inspired by her card here. I did not copy her layout exactly but the similarities are there as you can see. I did try adding some ribbon, but it wasn’t quite right. This was a very simple card, which I will probably reproduce when I need something quick for myself or for a workshop.
Supplies:
Stamps: Baroque Motifs, Hugs & Wishes
Inks: Bashful Blue, Pumpkin Pie
Cardstock: Bashful Blue, Pumpkin Pie, Naturals White
Double Embossed
Posted: April 24, 2008 Filed under: Baroque Motifs, Cuttlebug, Designer Paper Leave a comment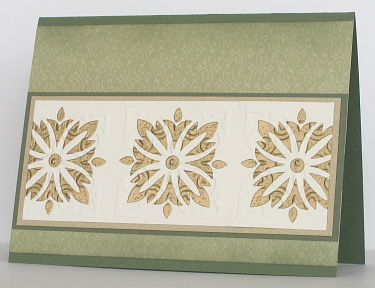
After I had tried the flourish from Baroque Motifs( the flourish is the whole reason I chose the set) I decided to see what I could do with the other stamps. The square motif reminded me of one of the cuttlebug folders so I decided to try and combine the two. I embossed the image in gold and then ran it through the cuttlebug three times, centering the the images each time. You can see the raised areas on the gold but not the cream. I sponged the upper and lower edges of the designer paper with Always Artichoke.
Supplies:
Stamps: Baroque Motifs
Inks: Versamark, Always Artichoke
Cardstock: Always Artichoke, Brushed Gold, Very Vanilla, Le Jardin designer paper
Also: Fancy Corners embossing folder, Gold e.p.,
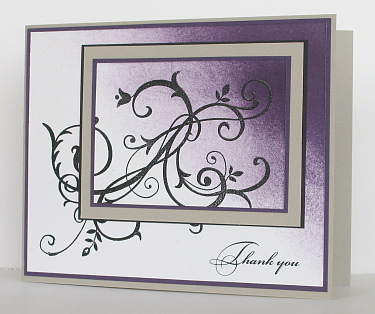
Black Flourish
Posted: April 22, 2008 Filed under: Baroque Motifs 1 Comment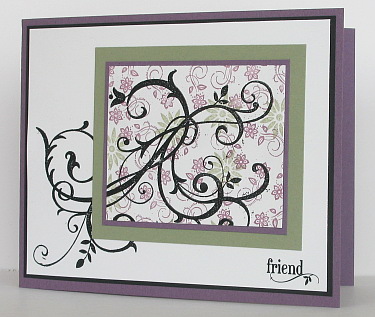
The camera is found! I had time over the weekend to try out my new set Baroque Motifs. Sharon’s Stamp Simply challenge this week called for black accents so I embossed in black. The first card I did had the flourish on a busy patterned panel which I wasn’t totally happy with. My second attempt features a simpler sponged effect which I prefer. For both cards I cut my small white rectangle first and laid it on top of the large white rectangle before stamping the flourish in versamark. That way I knew the tendrils of the flourish would line up after matting the small rectangle.
Supplies:
Stamps: Baroque Motifs, Boho Backgrounds
Inks: Versamark, Perfect Plum, Mellow Moss, Elegant Eggplant
Cardstock: Whisper White, Sahara Sand, Basic Black, Perfect Plum, Mellow Moss, Elegant Eggplant
Also: Black embossing powder, Cherished Memories Rub-ons
Colour blocking
Posted: April 11, 2008 Filed under: Lovely as a Tree, Spring Song Leave a comment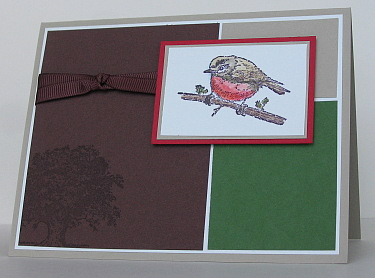
Even though Sharon’s new Stamp Simply Challenge is up today I am just getting last week’s onto the blog. The reason for the delay being the disappearance of our camera. It is still missing but I borrowed a friends’ so I have this one card to share. We have looked all over the house and don’t know quite where to look next.
I rarely use colour blocking on cards so this one is quite different from my usual style. I had the whole background done in blocks of the same colour originally but it needed the variety of colours. It is faint but there is a tree stamped in chocolate in the bottom left hand corner
Supplies:
Stamps: Spring Song, Lovely as a Tree
Inks: Chocolate Chip, Basic Black
Cardstock: Whisper White, Chocolate Chip, Garden Green, Sahara Sand
Also: Watercolour pencils, Chocolate grosgrain ribbon
Negative image
Posted: April 8, 2008 Filed under: Time Well Spent Leave a comment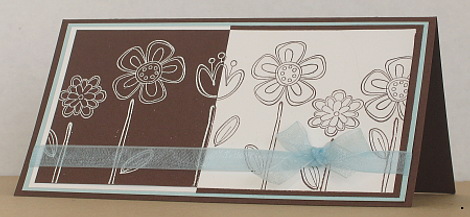
This is one of my first attempts at a positive/negative image card. It is just a matter of stamping in a dark colour on light cardstock and in the light colour on the dark cardstock. You need to stamp either a large image twice and cut it in half or stamp a design with a common element in the middle as I have done here.
Supplies:
Stamps: Time Well Spent
Inks: Chocolate Chip, Versamark
Cardstock: Whisper White, Chocolate Chip, Soft Sky
Also: Organza ribbon
Another simple spring card
Posted: April 6, 2008 Filed under: All Through the Year, Rollers Leave a comment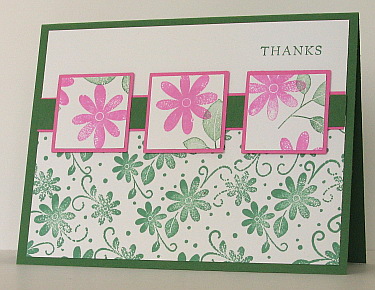
Here is another simple but bright and cheery spring card. The temperatures here today were definitely spring temperatures and I have seen grass around the place but not much at our place. We seem to keep our snow longer than most! I did notice yesterday that daffodils and tulips were coming up in A11’s garden in the 10cm strip where the snow had already melted.
Supplies:
Stamps: All Through the Year, Garden Annuals wheel, Fundamental Phrases
Cardstock: Garden Green, Pixie Pink, Whisper White
Inks: Garden Green, Pixie Pink
Also: Square punches
A simple spring card
Posted: April 3, 2008 Filed under: Sweet Shapes 1 Comment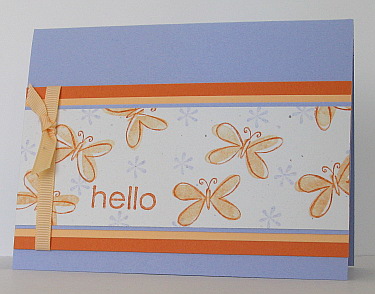
Someone just told me that we are still expecting two more winter storms! Despite this news it is beginning to look and feel a bit more like spring outside. When designing cards for a workshop last night I decided I really needed to feature spring things. So I have butterflies and flowers to share.
Sweet Shapes is a set which I bought at A11’s request and was not sure what I would do with it. When everyone used it for the Make and Take last night it was a hit and a few people ordered it for themselves It was certainly easy to get a pretty design with the two step butterflies.
Supplies:
Stamps: Sweet Shapes
Inks: Pumpkin Pie, Apricot Appeal, Almost Amethyst
Cardstock: Pumpkin Pie, Apricot Appeal, Almost Amethyst, Confetti White
Also: Apricot grosgrain ribbon


