
Blue Thank You
Posted: January 14, 2009 Filed under: Upsy Daisy Leave a comment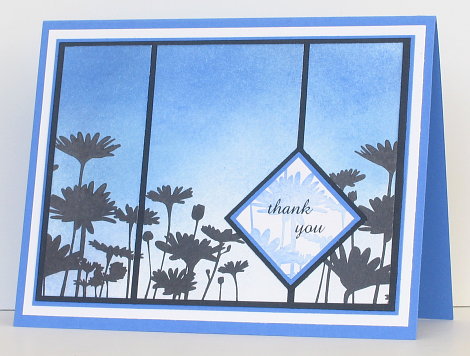
Who would have guessed the difference a new black stamp pad would make!? I have been reinking my well used black stamp pad, but as it was beginning to come apart I bought a new one. Wow,it was so much easier to get a good silhouette.
I sponged the sky first for this card, leaving a lighter patch for something. I didn’t really know what when I started the card, sometimes that is just how my cards develop. Neither Brocade Blue or Ballet Blue were quite what I wanted so the sponging is a combination of both plus Bashful Blue. I didn’t want to put anything too dominating in the space so I split the whole piece into three and stamped a blue flower in a square for the ‘thank you’ rub-on.
Thanks for droppng in.
Supplies:
Stamps: Upsy Daisy
Inks: Ballet Blue, Brocade Blue, Bashful Blue, Basic BLack
Cardstock: Whisper White, Ballet Blue, Basic Black
Also: Chateau Bella Rub-ons
Happiness is
Posted: January 13, 2009 Filed under: Happiness is a Journey, Upsy Daisy 1 Comment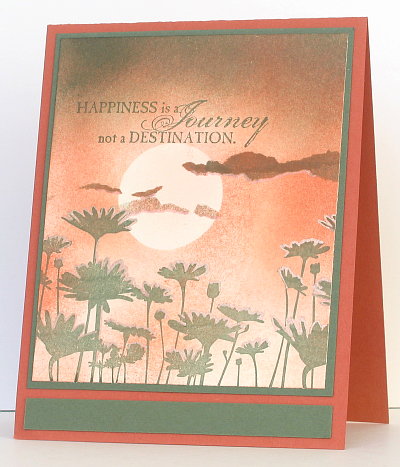
The Featured Stamper on Splitcoast last Sunday was Jaydekay. I haven’t had a chance to play for a while, but I managed to browse through Judy’s beautiful gallery on Sunday afternoon and find some inspiration.
I chose Judy’s card here
To make mine I punched the sun out of a post it note and used it to mask a circle while I sponged the sky with Apricot Appeal, Real Rust and Always Artichoke. I then stamped the daisies in artichoke and drew around their edges with a pinky-gold gel pen. To make the clouds I ripped thin strips out of a piece of paper and sponged through the spaces.
Supplies:
Stamps: Upsy Daisy, Happiness is a Journey
Inks: Apricot Appeal, Always Artichoke, Real Rust
Cardstock: Always Artichoke, Real Rust, Very Vanilla
Also: Sakura GellyRoll Metallic gel pen
Stampers Dream January Challenge
Posted: January 10, 2009 Filed under: Designer Paper, Garden Whimsy 4 Comments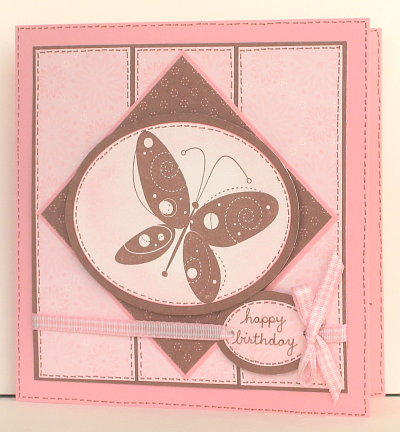
I haven’t tried a Stampers Dream challenge before but I was inspired by the sketch when I saw it on Laurie’s blog.
All the paper is Berry Bliss designer paper which I co-ordinated with a Pretty in Pink card and a Whisper White oval for the butterfly. I started with a little faux stitching around the butterfly, then a little more around the rectangles and so on. I have stamped a smaller butterfly inside the card and added a little stitching there as well. I keep meaning to get out my sewing machine and try some real stitching, but the marker works so well… The happy birthday is hand written and there is pink sponging around the butterfly.
Thanks for stopping by.
Supplies:
Stamps: Garden Whimsy
Inks: Close to Cocoa, Pretty in Pink
Cardstock: Whisper white, Pretty in Pink, Berry Bliss designer paper
Also: Pink gingham ribbon, Close to Cocoa Stampin marker, Creative Memories oval cutters
Still winter
Posted: January 9, 2009 Filed under: Lovely as a Tree, Snowflakes, Stamp Simply challenges, Stamped Landscapes 2 CommentsMy children are big Narnia fans, so when I saw Sharon’s challenge this week I thought of The Lion, the Witch and the Wardrobe where in Narnia it is “always winter, but never Christmas”. So although, we may use the same stamps we used at Christmas, the challenge is to make a card that says “Winter” It is very much “still winter” here and we had a snowstorm this week to prove it.
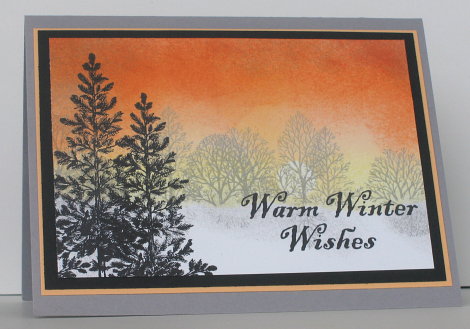
For my card I decided to continue playing with the snowy landscape idea, once again using Lovely as a Tree. I punched a small moon out of a post it note and tore a strip of paper to mask my snow at the bottom. I sponged in all the sky first using summer sun, apricot appeal and pumpkin pie. Then I stamped the background trees in grey with the mask still in place. I then swapped the mask over and covered the sponged sky and lightly stamped the trees upside down to try and make a shadow. It didn’t work that well so I sponged more shadow in grey. Finally I stamped two black trees and a greeting.
It’s nice to be stamping again. Thanks for stopping by.
Supplies:
Stamps: Lovely as a Tree, Snowflakes
Inks: Summer Sun, Apricot Appeal, Pumpkin Pie, Going Gray
Cardstock: Whisper White, Apricot Appeal, Going Grey, Basic Black
Three Notebooks
Posted: December 26, 2008 Filed under: Ageless Adornment, Designer Paper, Notebooks, Polka dots & Paisley 5 Comments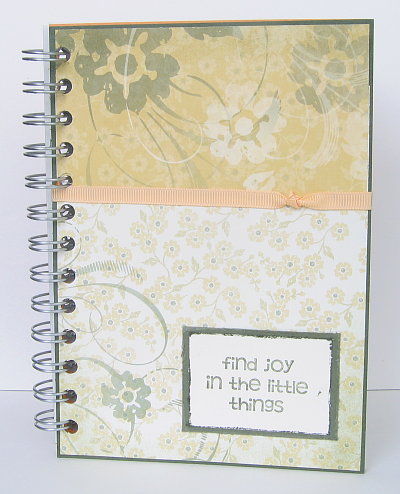
Supplies:
Stamps: Polka Dots & Paisley
Inks: Always Artichoke, Mellow Moss
Cardstock: Very Vanilla, Le Jardin Designer paper, Almost Artichoke
Also: Apricot grosgrain ribbon, Mead notebook from Staples
Every Boxing Day we go and hang out with some friends of ours at their Open House. We enjoy meeting up with their extended family again and just having a relaxing time with them. They have three girls ranging in age from ten to eighteen so I thought notebooks would be an appropriate gift. The youngest is getting the pink one, she is a pretty in pink girl!
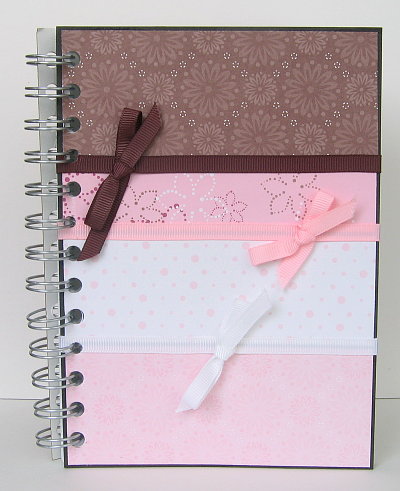
Supplies:
Cardstock: Berry Bliss Designer paper
Also: White, Chocolate and Light Pink grosgrain ribbon, Mead notebook from Staples
I carefully took off the covers as I had seen LeAnne do here then decorated each notebook with designer paper and ribbon. I left a narrow border on each notebook which dictated the colours of paper I used. After stamping the sentiments I distressed the edges and dragged them across the stamp pad. All the ribbon is stuck on with sticky strip. I repunched the holes with a single circle punch and then reassembled the notebooks.
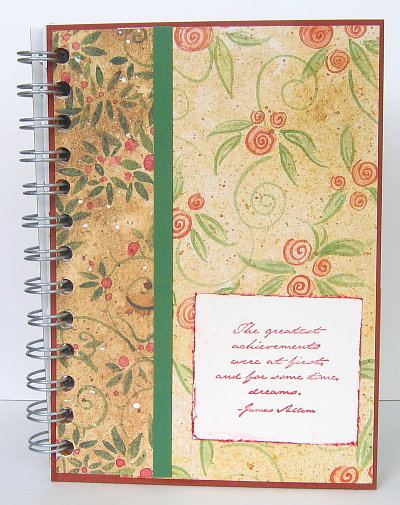
Supplies:
Stamps: Ageless Adornment
Inks: Ruby Red
Cardstock: Garden Green, d.p. from an old slab I got at Michaels years ago
Also: Mead notebook from Staples
Beyond Quick
Posted: December 20, 2008 Filed under: Best Yet, Designer Paper 1 Comment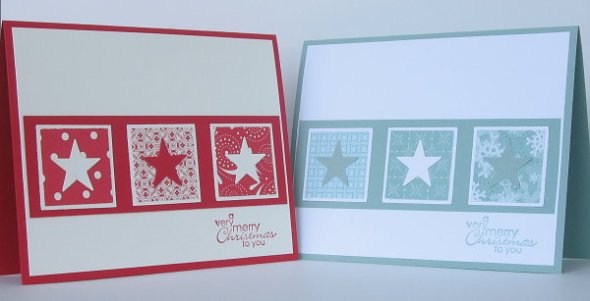
Sharon’s challenge this week is exactly what I was doing anyway, so it just spurred me on. I dropped in on the her guest designers too and picked up more ideas. Her challenge was to make a card so simple that you could make six in 30 minutes. I didn’t time myself but I made eleven last night, some like the ones above and some like the Wintergreen I posted the other day. I haven’t used Sage Shadow in ages, but I really like the crisp, snowy look the card has. But rather than make them all the same I pulled out my favourite Christmas combination Cerise designer paper, with vanilla and red!
The punches are the key to making this card quickly. The designer paper squares are punched with the 1¼” and the mattes with the 1 3/8″ punch. For the stars I used the SU small star punch. That’s it.
Supplies:
Stamps: Best Yet
Inks: Sage Shadow, Real Red
Cardstock: Whisper White, Sage Shadow, Wintergreen d.p., Very Vanilla, Real Red, Cerise d.p.
Also: square punches, star punch
Wintergreen
Posted: December 18, 2008 Filed under: Designer Paper, WInter Post Leave a comment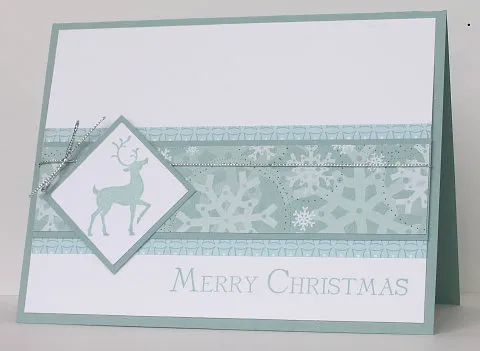
Just a quick easy card for you tonight. It will be quick to reproduce, which is what I need to do at this stage. It wasn’t that quick to make but that is because I couldn’t decide on the orientation, then I couldn’t decide on the stamp! All you need for this one is two strips of co-ordinating designer paper, a stamp small enough to punch out, a greeting and a piece of cord.
Supplies:
Stamps: Winter Post
Inks: Sage Shadow
Cardstock: Whisper White, Sage Shadow, Wintergreen d.p.
Also: silver cord
the wondrous gift is given
Posted: December 13, 2008 Filed under: Lovely as a Tree, Stamped Landscapes, Wondrous Gift 4 Comments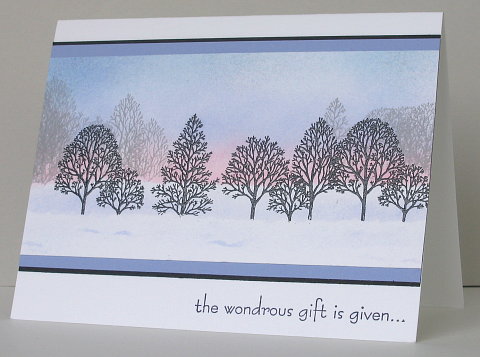
Last night I sat down and wrote in most of my Christmas cards, discovering in the process that I needed a few more. The inspiration for this one was a picture I saw on a friend’s blog yesterday. This kind of scene can be seen around here quite often at sunset or sunrise.
To make it I tore a piece of card to place across the bottom to mask my snowy area. I positioned it at the bottom before stamping the trees in versamark. I embossed them with black and then positioned the masking strip a little higher before sponging my sky, first in Pretty in Pink, then Almost Amethyst, Going Gray and Bashful Blue. I sponged a little Amethyst behind the trees and stamped some background trees in Going Grey. To give the foreground snow a bit of definition I tore tiny strips out of a piece of paper and sponged through the holes.
Supplies:
Stamps: Lovely as a Tree, Wondrous Gift
Inks: Almost Amethyst, Pretty in Pink, Going Gray, Bashful Blue, Versamark
Cardstock: Whisper White, Almost Amethyst, Basic Black
Also: black e.p.
Simple tags
Posted: December 10, 2008 Filed under: Holiday Sampler, WInter Post 8 CommentsIt’s Day 11 of Stamp Simply Celebrates! If you are new here, check out Party Central for a full rundown of our 12 day schedule. Feel free to jump in anytime at all!!!
Anyone can play ANY of the challenges by ANY of the hostesses during our 12 days of Stamp Simply Celebrates!!! You DO NOT need to have a Blog to play — uploading your project to SCS (Splitcoaststampers.com) is not only permissible, but HIGHLY ENCOURAGED. When doing so, use the KEYWORD SSC08. Thanks!
AJ Otto – The Willow Garden – Are you wrapping gifts yet? Probably! I’ll bet you need some pretty tags to dress those packages up — well, be sure to check in on AJ’s Featured Project today to see all her Gift Tags. And then play AJ’s Challenge so you, too, can have some nice gift tags on hand!!! Be sure to stop in at AJ’s today!
You can see more tag samples by checking out the Blogs of: Janine, LeAnne, Jerri , Sharon and me!
Jerri Jimenez – A Touch of Grace – Today Jerri will grace us with her Featured Project which is a beautiful 6 x 6 Scrapbook she made, which is certain to be a real treat for the eyes. Jerri also has BLOG CANDY to offer today (think scrapbooking made easy), so be sure to stop in to see Jerri!!!
Other scrapbook samples can be seen by checking out: Barb and Jennifer
Deb Saaranen – Dream in Color – Deb has an offering of BLOG CANDY for us today!
Jerri Jimenez – A Touch of Grace – Jerri also has BLOG CANDY to offer today so be sure to stop in to see Jerri!
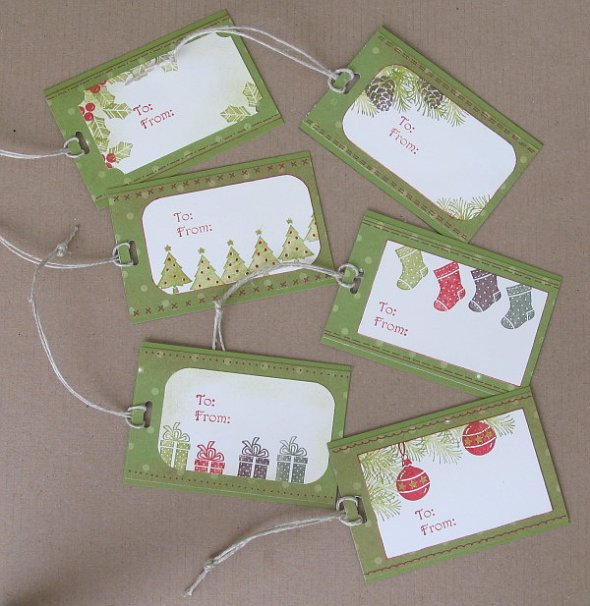 To make my easy tags I cut a strip of Old Olive and stuck on a piece of designer paper which was a little narrower so the olive showed at the top and bottom of each tag. I cut vanilla pieces all the same and then punched different corners on a few. All the stamping was done using the very useful little stamps from Holiday Sampler and the To/From out of Winter Post. I drew all my stitching lines on with a fineline pen. When I started these I didn’t even know if I would like them, I don’t usually reach for Old Olive, but I surprised myself and had a lot of fun creating a different design on each one.
Supplies:
Stamps: Holiday Sampler, Winter Post
Inks: Old Olive, Riding Hood Red, Chocolate Chip, Always Artichoke
Cardstock: Old Olive, Very Vanilla,Petals and Paisleys d.p.
Also: Hemp twine, slit punch, burgandy fineliner
Celebrate with candles
Posted: December 9, 2008 Filed under: Lovely as a Tree, Rollers 6 CommentsDay 10 of Stamp Simply Celebrates! I have a candle and matching box to share today, but first I’ll let you know about all the celebrating going on elsewhere:
Leslie Miller – Running With Scissors – Today we are treated to the beauty of Leslie’s work with her Featured Project where she is showing us how to Alter Food Packaging to turn it into a wonderfully warm, cozy, and sweet gift item that anyone would love to receive! And it’s something we can all easily do! I know you won’t want to miss this, so be sure to visit Leslie today.
You can see more great samples of Leslie’s Project by: Dee, Jennifer
Joan Fricker – Joan’s Garden – Joan offers us a beautiful Featured Project today — who doesn’t love beautifully presented Soap and Candle Gifts! Well, especially these soaps and candles! And you can make your own as a part of Joan’s Challenge, with inspiration from many. Be sure to check out this sweetly scented event!
And there are many more samples of Joan’s Challenge. Check out: LeAnne, Dee, AJ, Barb, Darlene, Janine, Sharon and me!
Anyone can play ANY of the challenges by ANY of the hostesses during our 12 days of Stamp Simply Celebrates!!! You DO NOT need to have a Blog to play — uploading your project to SCS (Splitcoaststampers.com) is not only permissible, but HIGHLY ENCOURAGED. When doing so, use the KEYWORD SSC08. Thanks!
Tammy Hershberger – Stamp Happy – Tammy is offering BLOG CANDY today!
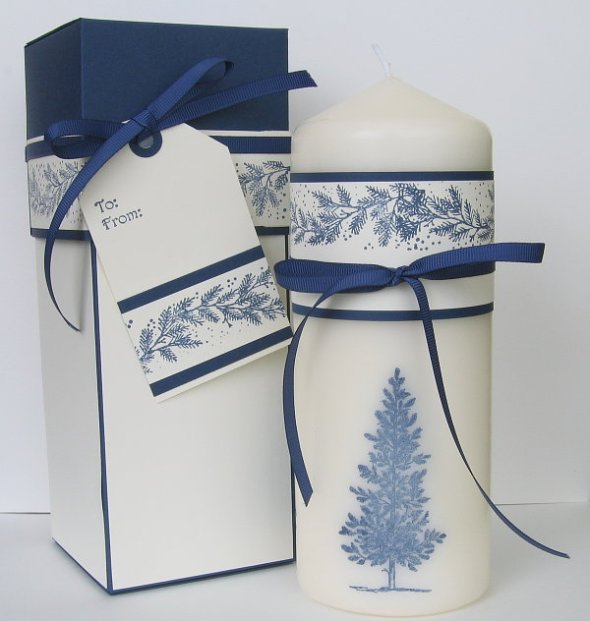
It is great to be playing along in the Stamp Simply Celebrations. I enjoyed decorating a candle and matching box for Joan’s challenge today. I stamped three navy trees on tissue paper then used wax paper and a heat gun to melt them onto the candle. I have a tutorial explaining how to make a box and candle HERE. The trim on the box and candle wrapper were made with the retired Pine Bough roller from Stampin’ Up. The box and lid were made from night of navy cardstock, with panels of vanilla stuck on the sides of the box.
Supplies:
Stamps: Pine Bough roller, Lovely as a Tree
Inks: Night of Navy
Cardstock: Night of Navy, Very Vanilla
Also: Navy grosgrain ribbon, pillar candle (IKEA)












