Thinking of you
Posted: February 9, 2008 Filed under: Designer Paper, My Kid's cards, Time Well Spent Leave a comment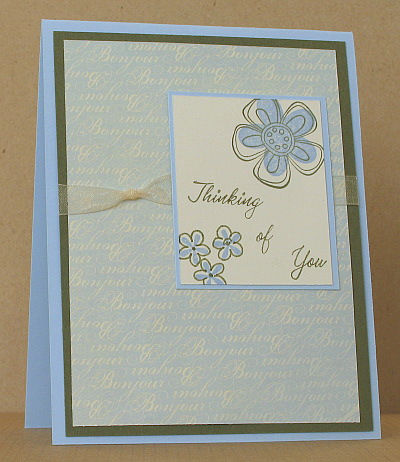
My daughter A11 made this one the night we worked together to fill my board. It is a simple design but once again the designer paper makes it very pretty.
Supplies:
Stamps: Time Well Spent, Warmest Regards
Inks: Almost Artichoke, Bashful Blue
Cardstock: Very Vanilla, Le Jardin Designer paper, Almost Artichoke, Bashful Blue
Also: Cream organdy ribbon
Leaves
Posted: February 5, 2008 Filed under: Designer Paper, Lovely as a Tree Leave a comment
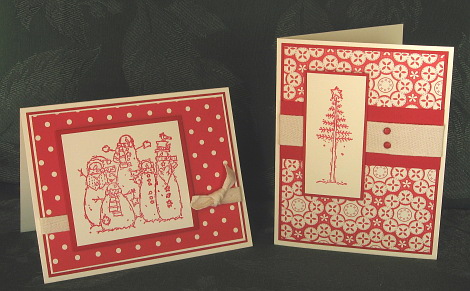
As A11 and I were creating the other night she noticed that most of my cards featured flowers or butterflies. It is harder to create cards for males but I think this one could be a man’s birthday card. It is one of the cards inspired by someone else’s sketch. Debbie Olsen posted this sketch on her beautiful blog the other day. The card was very quick to make as I used a strip of designer paper for the vertical panel.
Supplies:
Stamps: Lovely as a Tree, Fundamental Phrases
Inks: Wild Wasbi, Chocolate Chip
Cardstock: Very Vanilla, Chocolate Chip, Wild Wasabi, Porcelain Prints d.p.
Also: corner rounder punch, stampin dimensionals
Scalloped print
Posted: February 4, 2008 Filed under: Designer Paper Leave a comment
On Friday evening I set myself the challenge of making twelve cards before I went to bed. My display board is quite depleted and I need to refill it for my Open House next Friday night. I knew I wouldn’t get twelve different cards done in one night so I asked my younger daughter if she would like to take the challenge with me. My older daughter was away over night so A11 and I sat side by side at the craft table and created.
The first few cards were our own designs and took quite a while. Then we opened up a few of my favourite card blogs and picked sketches to follow. With the layout already thought out we moved a lot faster. We completed seven between us and I have since done two more so I am up to nine. Unfortunately that will not be enough to fill the board but I’m well on the way.
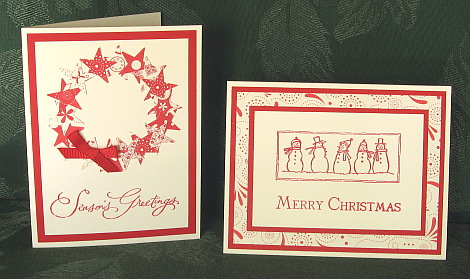
Above is one of the cards inspired by someone else’s sketch. This sketch is from the Card Positioning Systems blog which is a great resource for sketches. I used the scallop which was already part of the designer paper and added a matte and some sponging. On the area below the scallops I stamped the canvas background and then stamped Thinking of You all over the canvas. The sentiment is one of the new Rub-ons Stampin Up is now selling.
Supplies:
Stamps: Canvas, Warmest Regards
Inks: River Rock, Not Quite Navy
Cardstock: River Rock, Not Quite Navy, Porcelain Prints Designer paper, River Rock
Also: Cherished Memories rub-ons
Le Jardin with hearts
Posted: February 3, 2008 Filed under: Designer Paper, Priceless Leave a comment 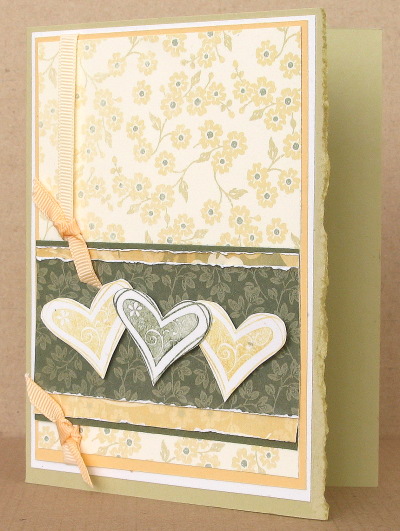
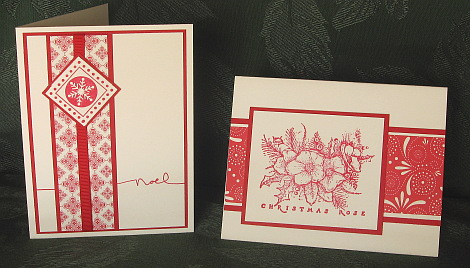
I played with the paper for a long time before I settled on this layout. The paper in this pack reminds me of pretty cotton quilting fabrics and I wanted that kind of effect in the card. It could be a Valentine card but as I don’t send Valentines I thought I would leave it blank and then stamp a sentiment when I decided who I would give it to. I gave the paper a frayed looking edge by scraping my fingernail along the edge and then pushing it up a little. The torn edge of the card was inked directly with the stamp pad.
Supplies:
Stamps: Priceless
Inks: Versamark, So Saffron, Always Artichoke
Cardstock: Whisper White, Le Jardin Designer paper, Always Artichoke, River Rock, So Saffron
Also: Glassy Glaze e.p., Stampin’ dimensionals, Apricot & Cream grosgrain ribbon
Priceless Butterfly
Posted: December 31, 2007 Filed under: Designer Paper, Priceless 2 Comments 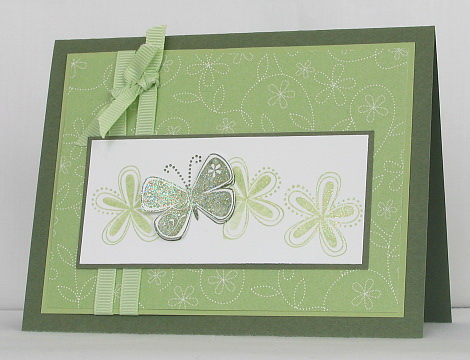
Sunday’s featured stamper at Splitcoast was Danielle. I chose this card to CASE and created a spring theme rather than a winter one. In order to make the butterfly and flowers sparkle I inked the stamps with versamark before the classic stamp pad colours and then embossed with Iridescent Ice embossing powder. The butterfly is cut out and stuck over one I stamped underneath for the 3D wings effect.
Supplies:
Stamps: Priceless
Inks: Certainly Celery, Versamark, Almost Artichoke
Cardstock: Certainly Celery, Whisper white, Celery Designer paper,Almost Artichoke
Also: Celery grosgrain ribbon, Iridescent Ice e.p.
Two more boxes
Posted: December 18, 2007 Filed under: Designer Paper, Festive Favourites, My Kid's cards, Polka dots & Paisley 4 Comments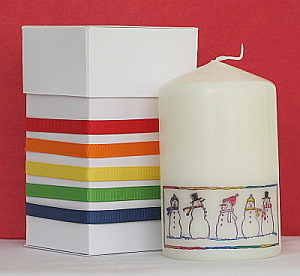
After I had made the box I in the last post my girls made some of their own. My younger daughter A11 used the snowman stamp from Festive Favourites and coloured with Stamping Markers, then used bold ribbons to decorate her white box.
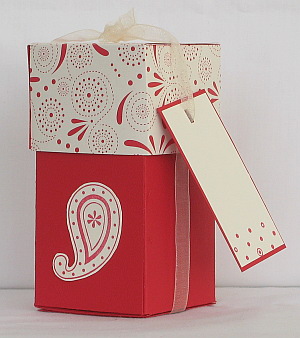
L13, my older daughter used some Cerise designer paper with real red cardstock to make a small box which she filled with red and white candy canes and peppermints. Her tag and box motif were done with stamps from Polka dots and Paisley.
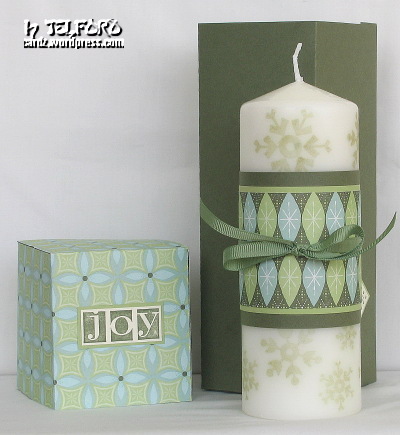
Box & candle
Posted: December 16, 2007 Filed under: Designer Paper, Perfect Presentation, Rollers 5 CommentsWeeks ago I saw this box at No Time to Stamp and decided it would be my December Stampers’ Club project. I also wanted to stamp some candles so I came up with a candle in a gift box for everyone to make.
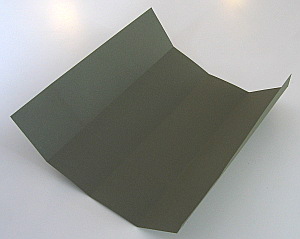
To make the box I used a 12×12 sheet of cardstock and a 12×12 piece of designer paper for the lid. I scored the cardstock 2 3/4″ from the bottom and then turned it and scored it at 2 3/4″ intervals across the opposite way making 4 panels with a narrow strip left over.
I cut the corner piece out where the narrow strip was and then cut up the four parallel score lines to the 2 3/4″ line.
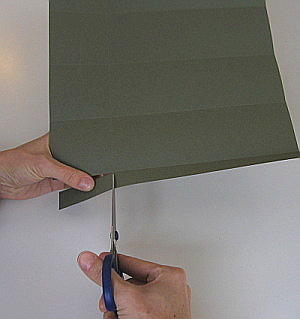

After that it is quite straight forward to stick it together.

The lid follows exactly the same procedure except that you score 2 7/8″ from the bottom and across the piece at 2 7/8″ intervals leaving you a smaller flap to stick the lid together.

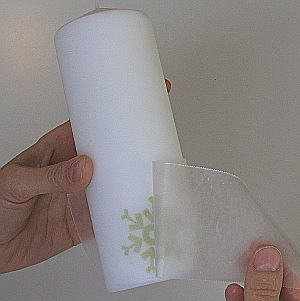
To decorate the candle stamp the image you want to use on tissue paper the same colour as your candle. Then cut out the image you have stamped.

Position the image on the candle and wrap a piece of waxed paper over it, holding either end of the waxed paper on firmly on the other side of the candle.

Holding the wax paper firmly heat the area of the stamped image with a heat tool. It doesn’t need to be heated for long, just long enough to see the wax over the image glisten as it melts into the tissue paper. Peel off the wax paper and repeat for another image on a different section of the candle.
I finished the candle off with two strips of cardstock, a piece of co-ordinating designer paper and a ribbon.
Supplies:
Stamps: Perfect Presentation, Bold Snowflakes roller
Inks: Always Artichoke, Mellow Moss
Cardstock: Always Artichoke, Mellow Moss, Very Vanilla, Wintergreen Designer paper
Also: Candle (IKEA), square punches, Spring Moss grosgrain ribbon, Olive organza ribbon (retired)