
New colours, new papers
Posted: September 9, 2008 Filed under: Designer Paper, Eastern Influences 1 Comment
I cracked open the new “In Colours” from Stampin Up on the weekend and a beautiful new set of designer paper that features three of the new colours. I had great fun working with Riding Hood Red, I think it will be my main colour for Christmas designs this year, Kiwi Kiss and Pirouette Pink. When the designer paper already has beautiful combinations and patterns all over it, it is not that hard to make a pretty card. I will posting some of my creations using the Bella Rose paper over the next few days.
For this card I divided the card up using a “wall with chair rail” type arrangement. Perhaps there is a name for this style among card makers, I don’t know. I’m using the rule of thirds, two thirds at the bottom, one at the top. The rose I used as my focus is not the one which perfectly co-ordinates with this paper, but I think it works pretty well. I stamped it in Riding Hood Red classic ink, which is not waterproof and then used a brush with water to draw some of the ink into the petals. I then painted the branches and leaves using Choc Chip and Old Olive ink. To create an antique look I wiped each side of the white paper across the Red stamp pad and then pulled some of that ink in with a brush and water. Using my fingernail as a distressing tool I gave the edge of the red matte an antique look also. Red hemp twine just happens to be a little darker that the Riding Hood Red, which is great.
Thanks for dropping in.
Supplies:
Stamps: Eastern Influence
Inks: Riding Hood Red, Old Olive, Chocolate Chip
Cardstock: Riding Hood Red, Kiwi Kiss, Pirouette Pink, Whisper White, Bella Rose designer paper
Also: Red Hemp twine
Fresh Grasses
Posted: September 5, 2008 Filed under: Designer Paper, Pocket Silhouettes Leave a comment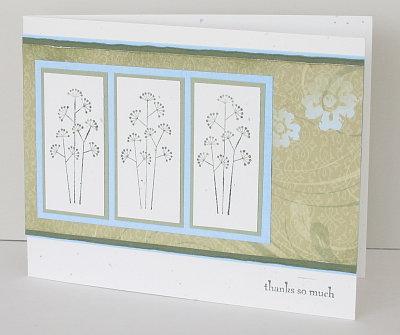
This is a very simple design, I don’t really have time for any thing but simple at present (although I do have a watercoloured card to post which took a little more time to make). As you can see the stamping for this card is limited to the three panels with a grass stalk in them and the little sentiment on the bottom. The designer paper dictated the colours for the mattes, I wasn’t originally thinking of bashful blue with the greens but I really like the way it pops. I ran my fingernail along the edges of the mattes to for a little more texture and added a bit of sponging to the designer paper. That’s all there was to it.
Supplies:
Stamps: Pocket Silhouettes
Inks: Mellow Moss, Always Artichoke
Cardstock: Confetti White, Le Jardin Designer paper, Almost Artichoke, Bashful Blue, Mellow Moss
Brocade gift set (cont.)
Posted: June 24, 2008 Filed under: Cuttlebug, Designer Paper 1 CommentI did not get back to the gifts for my friend’s birthday until Friday night and then gave it all to her on Saturday without getting good photos of everything. If I get a chance I will try and take some photos of the rest of the gifts. I do have photos of two more cards which were part of a box of greeting cards. I managed to find a nice woven box to put everything in. (You wouldn’t know that the photos from the last post and these ones show cards from the same set as I have very warm yellow light in the first ones and cold grey light in these.)
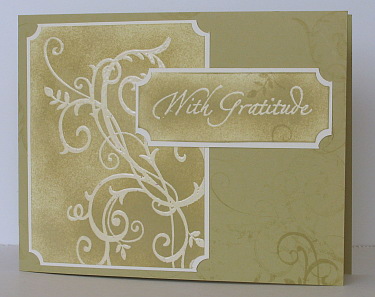
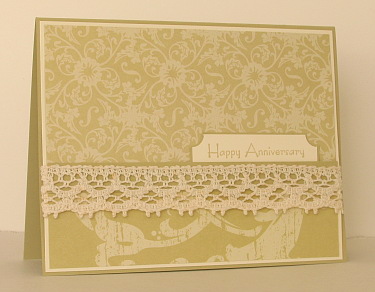
The card above features a clear embossed flourish on vanilla cardstock with river rock sponging over the top. To give the background some depth I stamped the flourish lightly and unevenly in river rock and did a little sponging as well.
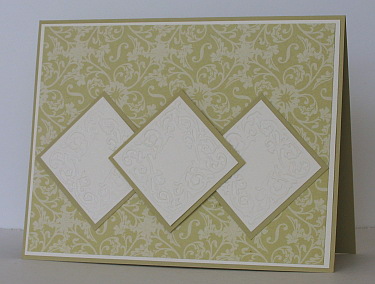
You can’t see them very well but the three squares on the card above were embossed with the cuttlebug using one of the formal squares folders. The design co-ordinated so well with the background designer paper that I didn’t add anything else.
Supplies:
Stamps:With Gratitude, Baroque motifs
Inks: River Rock, versmark
Cardstock: Very Vanilla, River Rock
Also: Brocade Backgrounds designer paper, formal squares embossing folder
Brocade gift set
Posted: June 15, 2008 Filed under: Designer Paper 1 Comment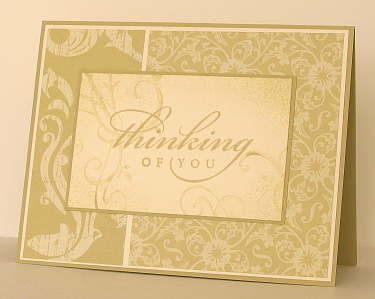
A dear friend of mine has a birthday next weekend, so I am working on some co-ordinating gifts. These two cards will be part of a box of cards with different greetings. I haven’t worked out exactly what the other gifts will be, other than one will definitely involve chocolate. I took my inspiration from some of the colours of her house and her love of old things. As you can see these two cards have minimal stamping, the design is in the co-ordinating papers. I will post some more during the week as I get them made.
Supplies:
Stamps: All Year Cheer, Baroque motifs, Hugs & Wishes
Inks: River Rock
Cardstock: Very Vanilla, River Rock
Also: Brocade Backgrounds, Lace
Two fold card
Posted: May 25, 2008 Filed under: Designer Paper Leave a comment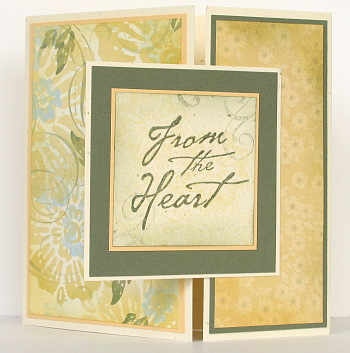
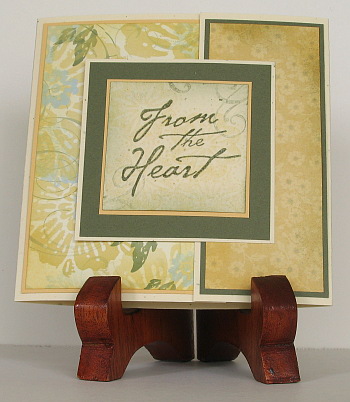
This is a card I made last weekend but didn’t get photographed until just the other day. Once again I am relying on the pretty patterns in the designer paper for most of the card. I haven’t made a two-fold card in a long time so it was fun to work out the logistics for this one. I was inspired by other peoples’ designs along these lines. In the picture above the card is sitting open to show you where the folds are and the different sizes of each panel.
I chose two papers from Le Jardin designer paper pack and matted one with Always Artichoke and the other with So Saffron. Then I sponged and stamped faintly corners of the flourish stamp from Baroque Motifs on a square to create a background for the sentiment “From the Heat”. I triple matted the sentiment square and then attached it to the smaller side panel so that when closed it would be in the centre.
Supplies:
Stamps: All Year Round, Baroque Motifs
Inks: Always Artichoke, So Saffron
Cardstock: Very Vanilla, Always Artichoke, So Saffron, Le Jardin Designer paper
Blue Purse
Posted: May 11, 2008 Filed under: Designer Paper, Purses 2 Comments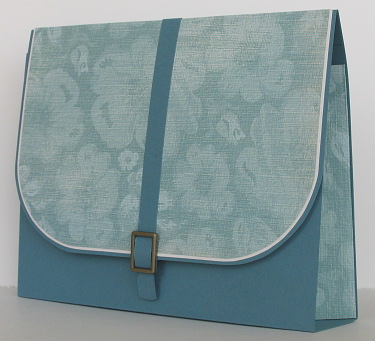
It has been very quiet here on Bits & Pieces this week. That usually means it has been anything but quiet at home. We have just returned home from the third concert of the weekend. Soccer and softball started during the week and there was an extra medical appointment thrown in early in the week. All this has meant no stamping whatsoever!
I made this purse a little while ago, it is the same design as my red one and my chocolate one but a little bigger. I will try a different design one of these days. I like the fabric effect the designer paper gives on the purse flap and sides and the buckle was a nice finishing touch
Supplies:
Cardstock: Blue Bayou, Naturals White, Porcelain Prints Designer paper
Also: Antique Brass hodgepodge hardware
Double Embossed
Posted: April 24, 2008 Filed under: Baroque Motifs, Cuttlebug, Designer Paper Leave a comment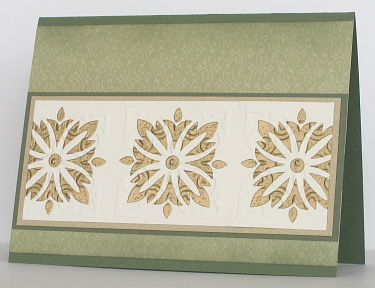
After I had tried the flourish from Baroque Motifs( the flourish is the whole reason I chose the set) I decided to see what I could do with the other stamps. The square motif reminded me of one of the cuttlebug folders so I decided to try and combine the two. I embossed the image in gold and then ran it through the cuttlebug three times, centering the the images each time. You can see the raised areas on the gold but not the cream. I sponged the upper and lower edges of the designer paper with Always Artichoke.
Supplies:
Stamps: Baroque Motifs
Inks: Versamark, Always Artichoke
Cardstock: Always Artichoke, Brushed Gold, Very Vanilla, Le Jardin designer paper
Also: Fancy Corners embossing folder, Gold e.p.,
Blue daisies
Posted: March 27, 2008 Filed under: Designer Paper, Infinite Goodness 1 Comment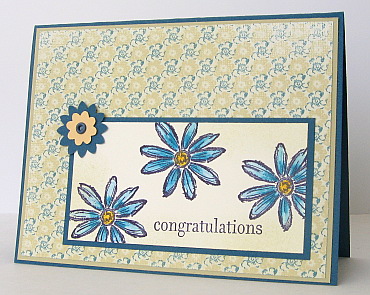
I made this one for Beate’s weekend sketch, and will use it at a workshop next week. Using patterned paper is such a simple way to create a backdrop for the focus of the card. I stamped the daisies on Vanilla cardstock and sponged the edges with River Rock to make to co-ordinate with the colours in the patterned paper. The two little flowers are punched out with the Boho blossoms punch.
Supplies:
Stamps: Infinite Goodness
Inks: River Rock, Basic Black,
Cardstock: River Rock, Not Quite Navy, Porcelain Prints Designer paper, Very Vanilla
Also: Boho Blossoms punch, Navy eyelet, watercolour pencils, blender pen
Only Berry Bliss
Posted: March 13, 2008 Filed under: Designer Paper, One of a Kind 1 Comment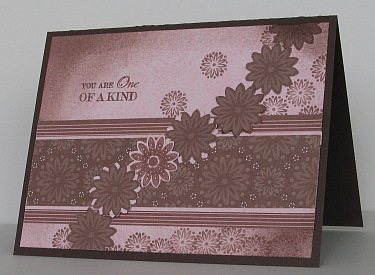
For the Ways To Use It Challenge at Splitcoast today the requirement was to use only patterned paper to make the card design. Cardstock was permitted only for the card base. My card is made from papers in the Berry Bliss designer paper pack and the matching flower stamps from the One of a Kind set. I punched out flowers from the designer paper with the co-ordinating punch.
Supplies:
Stamps: One of a Kind
Cardstock: Berry Bliss designer paper, Chocolate Chip
Ink: Close to Cocoa
Also: Boho Blossoms punch
Red polka dot purse
Posted: March 5, 2008 Filed under: Designer Paper, Purses, Tutorial 5 Comments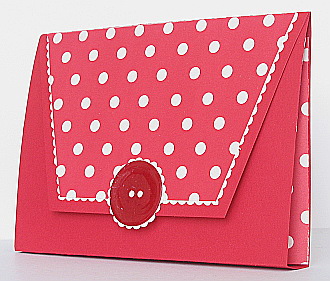
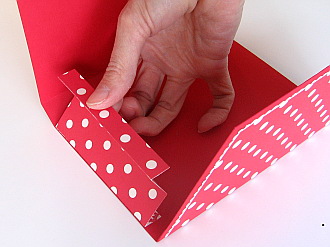
After I had completed my first purse, I set out to make another and create a tutorial as I did it. First I cut a piece of cardstock 10¼” x 6½”. I then scored it at ½”, 5″ and 5¾”as shown below.
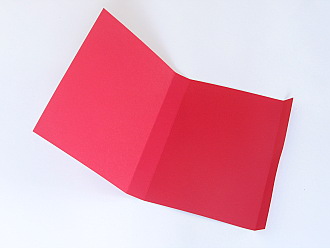
To make the purse flap I cut a piece 6½”x 3¾” and measured in 1″ from the corner on both ends of one long side and cut off triangles to make a trapezoid.

I did not measure to make the designer paper shape to decorate the purse flap (sorry), I just made it a little more than ¼” smaller all the way around the three shorter sides. Don’t stick it on yet.
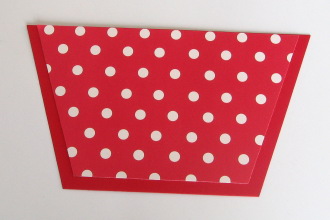
Attach designer paper shape to vanilla cardstock, aligning the longer edge with the edge of the cardstock.

Cut around the designer paper with decorative scissors making a “lace” edge.

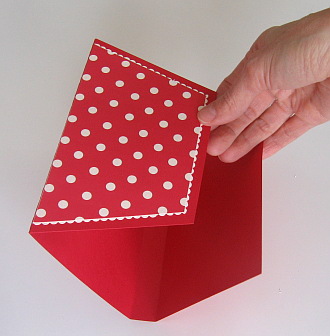
Attach the purse flap to the ½” flap on the purse.
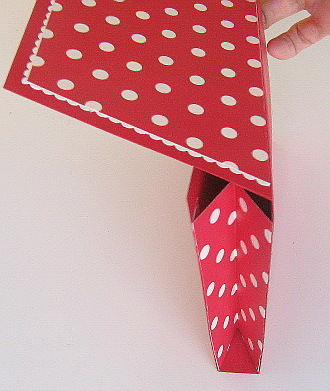
Next I made gusset pieces for the sides of the purse with designer paper. I cut two pieces 4″x 3″ and scored them along the length at ½” 1½” and 2½”. Then I folded them concertina style.
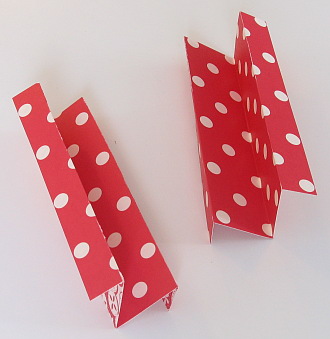
I then glued the narrower section of the concertina piece to the inside of my purse. I think it is easier to just look at the picture than have me try to explain it.
To fasten the purse flap I used a velcro circle and added a big red button with scallop trim to finish it off. The button just happened to end up looking exactly as I wanted even though I wasn’t sure how to make it initially. I punched out a circle of red cardstock and stamped the versamark pad directly onto it. I then embossed with glassy glaze enamel embossing powder, then stamped with versamark and embossed again. When I was heating the second layer I held the heat tool directly over head which pushed liquid enamel out to the sides giving the button a raised edge.


