Snowflakes-2 ways
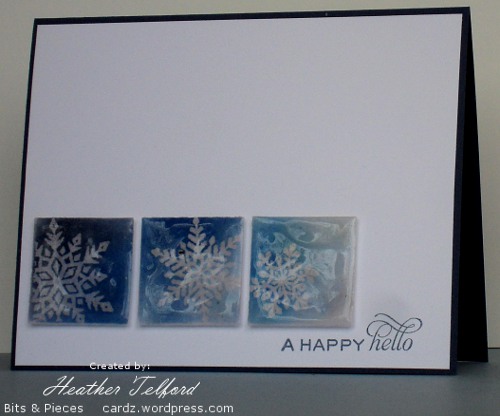
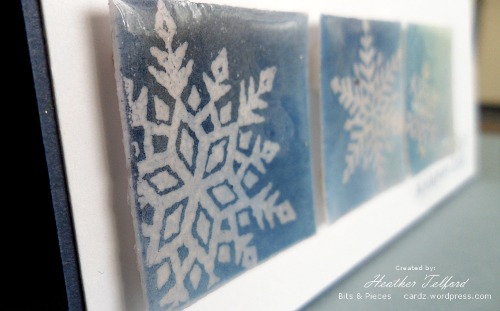
Posted: January 7, 2011 Filed under: CAS, Snowflakes 13 CommentsSnowflakes 2 ways sounds a little like a restaurant dish. I did not set out to make two snowflake cards it just happened. I spent a large chunk of time creating the tiles on the card above. They were hard to photograph but you can see the effect above and in the close up below.
The process in making the tiles was:
- stamp snowflakes in versamark on white card
- emboss snowflakes in clear
- sponge around snowflakes randomly with three blue inks
- punch squares out containing the three snowflakes
- press versamark pad onto punched squares
- emboss with glassy glaze
- repeat 5 & 6 until you are happy with the glassy surface.
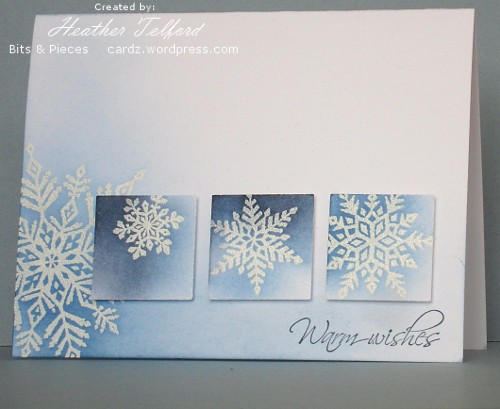
Once the tiles were completed I played around with the card base for a while before I was happy. My initial plan was to put them on a plain white card but there was too much white so I tried adding a snowflake and sponging to the card base and then lay the tiles on that but it didn’t look right either. (It became the base for the second card below). When I placed a white panel on a navy card base it looked balanced.
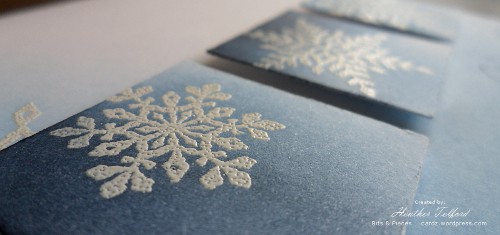
I didn’t want the sponged card base to go to waste so I made three more sponged squares without any glassy embossing and popped them up. My daughter, whose camera I am using, had to help me with her camera’s settings and had the bright idea of taking the side view closeups. I like them better than the front views!
Supplies:
Stamps: Snowflakes, Taglines(Flourishes), Hugs & Wishes
Inks: Versamark, Night of Navy, Brocade Blue, Bashful Blue
Cardstock: Flourishes Classic White, Night of Navy
Also: Clear & White e.p., Stampin’ dimensionals




Who needs red and green for Christmas? Blue is the best!!
I love your cards, gorgeous!! 🙂
Both are absolutely gorgeous cards!!
Another inspirational technique to try!
Beautiful cards Heather!
Chrissie
Beautiful card and a great technique.
Good inspiration for next Christmas.
Hilde from Switzerland
Wow !
Wie schön !!
Aber auch viel Arbeit….
Mir gefällt Nr.2 noch besser als Nr.1
Danke für die Inspiration !
lg Frieda
Hi Heather, I wanted to thank you for your very kind words on my blog and in the process found your wonderful work, that’s brilliant!
I love these 2 snowflake cards, great techniques but even better design.
Now I’m off to have a longer nosy around :0) xx
Your inspiration has triumphed again.
Thanks so much Heather… my copycat card is Here
Wow, what amazing cards and great instructions. Thanks for sharing.
I LOVE both of these cards and spent this morning trying to duplicate the top one. I wasn’t too successful with the embossing powder so I ended up leaving it off… any hints would be appreciated. Mine made my snowflakes look yellow.
oh my gosh..these are gorgeous! I’m really taken with the glassy glaze one. I want to give this a try- thank you for sharing your cards and your creative process 🙂 Our snow here had melted away, but we just got a fresh covering, and your cards capture that beauty of new snow!
Your cards are absolutely beautiful! Thank you for sharing them! I like the side views, too!
Can you tell me what is glassy glaze?
Glassy glaze is a clear embossing powder with large crystals so it sets like enamel. WOW embossing makes one called Clear Gloss Ultra High Embossing Powder